
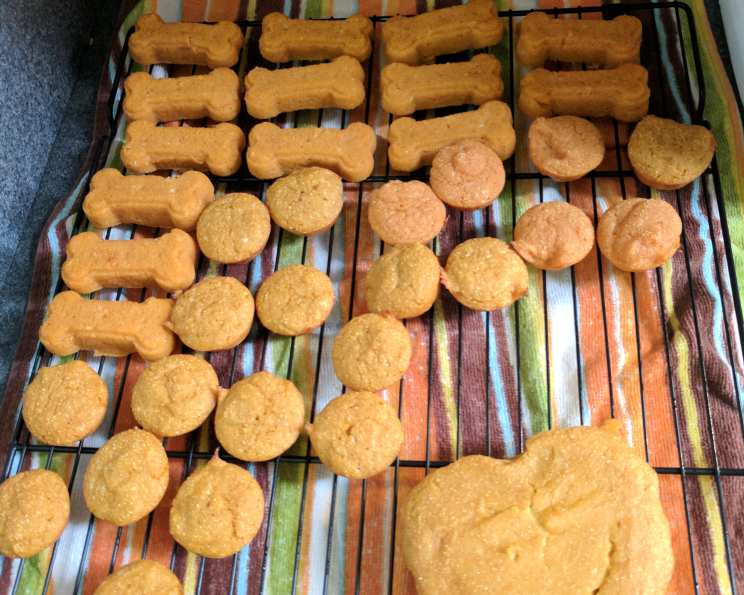
Baby Food Soft Dog Treats: A Recipe for Happy, Healthy Pups
My golden retriever, Gus, was the pickiest eater I’d ever met, canine or human. As he aged, his teeth weren’t what they used to be, and even his favorite kibble became a chore. I remember one particularly frustrating afternoon, trying to coax him to eat anything. That’s when I stumbled upon this simple recipe, born out of desperation and a willingness to try anything. The joy on his face when he finally tasted these soft, meaty treats was pure magic, and I’ve been making them ever since. Now, I’m excited to share this recipe with you!
Recipe Overview
- Prep Time: 10 minutes
- Cook Time: 15 minutes
- Total Time: 25 minutes
- Servings: Varies depending on size of treats
- Yield: Approximately 2-3 dozen treats
- Dietary Type: High Protein
Ingredients
- 2 ½ ounces jars of baby food (meat) (chicken, beef, or turkey)
- ½ cup powdered milk
- ½ cup cream of wheat
Equipment Needed
- Mixing Bowl
- Cookie Sheet
- Parchment Paper (optional)
- Measuring Cups
- Measuring Spoons
- Cookie Scoop or Spoon
Instructions
-
Begin by preheating your oven to 350°F (175°C). While the oven is heating, prepare your cookie sheet. Lightly grease the cookie sheet or line it with parchment paper to prevent sticking. Parchment paper makes for easier cleanup!
-
In a mixing bowl, combine the baby food (meat), powdered milk, and cream of wheat. Mix all ingredients thoroughly until a uniform dough forms. The mixture should be moist enough to hold together but not overly sticky. If the dough seems too wet, add a tablespoon of cream of wheat at a time until the desired consistency is reached.
-
Once the ingredients are well combined, it’s time to form the treats. You can roll the dough into small balls by hand, or use a small cookie scoop to ensure consistent sizing. Aim for small, bite-sized portions, especially if you’re using these as training treats or if your dog has dental issues.
-
Place the dough balls onto the prepared cookie sheet, leaving a little space between each one. Gently flatten each ball slightly with your fingers or the back of a spoon. This will help them bake evenly.
-
Bake in the preheated oven for 15 minutes, or until the treats are lightly browned around the edges. Keep a close eye on them, as baking times may vary slightly depending on your oven. You want them to be firm enough to hold their shape but still soft and chewy.
-
Remove the cookie sheet from the oven and allow the treats to cool completely on a wire rack. Cooling them completely will prevent them from becoming soggy.
-
Once cooled, the baby food soft dog treats are ready to serve! Store them in an airtight container in the refrigerator or freezer to maintain freshness.
Expert Tips & Tricks
- Ingredient Quality: Choose high-quality, natural baby food without added salt, sugar, or preservatives. Look for options with a single source of meat to avoid potential allergens.
- Texture Control: Adjust the amount of cream of wheat to achieve the perfect soft, chewy texture. Add more for firmer treats and less for softer treats.
- Flavor Boost: While the meat baby food provides the primary flavor, you can experiment with adding small amounts of dog-safe herbs like parsley or rosemary for added nutritional benefits and flavor complexity. Be careful about introducing new ingredients and ensure they are safe for your dog.
- Preventing Sticking: If you don’t have parchment paper, a light coating of cooking spray can prevent sticking, but be sure to use a dog-friendly spray. Alternatively, silicone baking mats are a great reusable option.
- Freezing for Later: These treats freeze beautifully! If you have extra, pop them in a freezer-safe bag for up to 2-3 months. Thaw in the refrigerator before serving.
Serving & Storage Suggestions
Serve these soft dog treats as a reward during training sessions, as a special snack between meals, or as a way to administer medication (check with your vet first!). Due to their soft texture, they are especially suitable for senior dogs, puppies, or dogs with dental issues. Store the treats in an airtight container in the refrigerator for up to one week, or in the freezer for up to two months. Allow frozen treats to thaw completely before feeding to your dog. Avoid leaving treats at room temperature for extended periods as they may spoil.
Nutritional Information
Please note that this is an estimated nutritional breakdown. Actual values may vary depending on the specific brands and ingredients used.
| Nutrient | Amount per Treat (estimated) |
|---|---|
| Calories | 10-15 kcal |
| Protein | 1-2 g |
| Fat | <1 g |
| Carbohydrates | 1-2 g |
| Fiber | <0.5 g |
Variations & Substitutions
- Grain-Free Option: Substitute the cream of wheat with an equal amount of coconut flour or almond flour for a grain-free alternative.
- Vegetarian Option: While this recipe primarily uses meat-based baby food, you can experiment with vegetable-based baby food like sweet potato or butternut squash for a vegetarian twist. Combine with a source of protein like mashed lentils or chickpea flour.
- Flavor Variations: Try different flavors of meat baby food, such as chicken, beef, lamb, or turkey. You can also add a pinch of dog-safe spices like turmeric (anti-inflammatory) or cinnamon (antioxidant) for a unique flavor profile.
- Dairy-Free Option: Ensure the powdered milk is a non-dairy alternative like powdered soy milk or coconut milk powder.
FAQs (Frequently Asked Questions)
Q: Are these treats safe for all dogs?
A: While generally safe, it’s always best to check with your veterinarian before introducing new foods into your dog’s diet, especially if they have allergies or sensitivities.
Q: Can I use human-grade ingredients instead of baby food?
A: Yes, you can substitute human-grade cooked and pureed meat. Ensure there are no added seasonings, salt, or unhealthy oils.
Q: How long will these treats last?
A: Stored properly in the refrigerator, these treats will last up to a week. In the freezer, they can last for up to two months.
Q: Can I add other ingredients to the recipe?
A: Yes, but be cautious. Small amounts of dog-safe fruits, vegetables, or herbs can be added. Research ingredients carefully to ensure they are not toxic to dogs.
Q: How often can I give these treats to my dog?
A: Treats should only make up a small portion of your dog’s daily diet. Adjust portion sizes based on your dog’s size, age, and activity level. Consult with your veterinarian if you are unsure.
Final Thoughts
I wholeheartedly encourage you to try this recipe for your furry friend. It’s simple, affordable, and packed with goodness. Seeing your dog enjoy these homemade treats is a reward in itself. Feel free to experiment with different variations and flavors to find your dog’s personal favorite. And most importantly, don’t forget to share your experiences and creations with fellow dog lovers! Happy baking!