
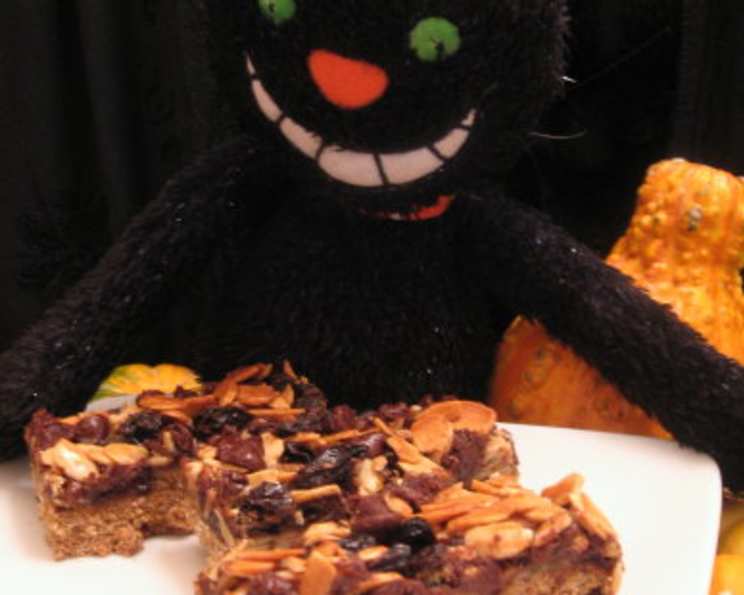
Backpacker Bars: Fuel Your Adventures with Flavor
I still remember my first solo backpacking trip – a daunting but exhilarating trek through the Appalachian Trail. I meticulously planned every detail, from the lightweight tent to the water purification system. But the real challenge came with the food. Granola bars were too boring, and trail mix didn’t quite cut it. Then my Aunt Carol, a seasoned hiker herself, shared her secret weapon: these incredible Backpacker Bars. They were packed with energy, delicious, and held up perfectly in my pack. Every bite was a taste of home and a boost of motivation on those long, challenging days. These bars are more than just a snack; they’re a reminder that even on the toughest adventures, a little bit of comfort can go a long way.
Recipe Overview
- Prep Time: 20 minutes
- Cook Time: 30-35 minutes
- Total Time: 50-55 minutes
- Yields: 12 bars
- Dietary Type: Omnivore
Ingredients
- 1 cup butter
- 1 1/2 cups brown sugar, divided
- 1 cup quick-cooking oats
- 1 cup whole wheat flour
- 1 cup all-purpose flour
- 1/2 cup wheat germ
- 1 tablespoon grated orange zest
- 4 large eggs, lightly beaten
- 2 cups sliced almonds
- 1 cup mini chocolate chips or 1 cup regular size chocolate chips
- 1 cup chopped raisins
- 1 cup flaked coconut
Equipment Needed
- 13 x 9 inch baking pan
- Mixing bowls
- Measuring cups and spoons
- Electric mixer (optional, but recommended)
- Rubber spatula or wooden spoon
Instructions
-
Preheat your oven to 350°F (175°C). It’s essential to have a properly preheated oven for even baking.
-
Grease a 13 x 9 inch baking pan. You can use butter, shortening, or cooking spray to prevent the bars from sticking. For easier removal, you can also line the pan with parchment paper, leaving an overhang on the sides. This creates a “sling” to lift the bars out after baking.
-
In a large mixing bowl, cream together the butter and 1 cup of the brown sugar. Use an electric mixer on medium speed for a light and fluffy texture, or do it by hand with a sturdy spoon. Make sure the butter is softened, but not melted, for best results. The mixture should be smooth and well-combined.
-
In a separate bowl, stir together the quick-cooking oats, whole wheat flour, all-purpose flour, wheat germ, and grated orange zest. Whisking ensures even distribution of the ingredients.
-
Gradually add the dry ingredients to the creamed butter mixture, mixing until just combined. Be careful not to overmix, as this can result in a tough crust. The dough will be crumbly.
-
Press this mixture firmly and evenly into the bottom of the prepared baking pan. Use the back of a spoon or your fingers to create a compact, uniform layer. This forms the base of your Backpacker Bars.
-
In another large mixing bowl, combine the eggs, sliced almonds, chocolate chips, raisins, flaked coconut, and the remaining 1/2 cup of brown sugar. Mix gently but thoroughly to ensure all ingredients are evenly coated. Overmixing can toughen the eggs, so aim for just incorporated.
-
Pour the egg and nut mixture evenly over the pressed crust in the baking pan. Use a spatula to spread it into a uniform layer, ensuring it reaches all corners of the pan.
-
Bake in the preheated oven for 30-35 minutes, or until the top is golden brown and the edges are slightly pulling away from the sides of the pan. A toothpick inserted into the center should come out with moist crumbs attached, not wet batter.
-
Cool completely in the pan before cutting into bars. This is crucial for preventing the bars from crumbling. For best results, let them cool for at least an hour, or even longer.
-
Once cooled, cut into bars of your desired size. A sharp knife works best. If you lined the pan with parchment paper, simply lift the bars out using the overhang and cut on a cutting board.
Expert Tips & Tricks
- Toast the nuts: For a deeper, more intense nutty flavor, lightly toast the sliced almonds in a dry skillet over medium heat before adding them to the egg mixture. Watch them carefully, as they can burn easily.
- Customize the mix-ins: Feel free to swap out the chocolate chips, raisins, and coconut for other dried fruits, nuts, or seeds that you enjoy. Dried cranberries, chopped dates, walnuts, or sunflower seeds all work well.
- Spice it up: Add a pinch of cinnamon, nutmeg, or ginger to the dry ingredients for a warm, aromatic flavor.
- Make it ahead: The crust can be made ahead of time and stored in the refrigerator for up to 2 days. Just press it into the pan and cover it tightly with plastic wrap.
- High altitude baking: Reduce the brown sugar in the topping by 1/4 cup and increase the all-purpose flour by 2 tablespoons. This helps to prevent the bars from spreading too thin and becoming too sticky.
Serving & Storage Suggestions
Serve these Backpacker Bars as a quick and easy breakfast, a satisfying snack on the trail, or a delicious treat any time of day. They pair perfectly with a cup of coffee, tea, or a glass of milk.
To store, keep the cooled bars in an airtight container at room temperature for up to 5 days. For longer storage, wrap them individually in plastic wrap and freeze them for up to 2 months. To thaw, simply leave them at room temperature for a few hours. Freezing doesn’t affect the taste or texture.
Nutritional Information
| Nutrient | Amount per Serving | % Daily Value* |
|---|---|---|
| Calories | 602 kcal | 30% |
| Total Fat | 32 g | 41% |
| Saturated Fat | 15 g | 75% |
| Cholesterol | 111 mg | 37% |
| Sodium | 163 mg | 7% |
| Total Carbohydrate | 74 g | 27% |
| Dietary Fiber | 6 g | 21% |
| Sugars | 45 g | N/A |
| Protein | 11 g | 22% |
*Percent Daily Values are based on a 2000 calorie diet. Your daily values may be higher or lower depending on your calorie needs.
Variations & Substitutions
- Gluten-Free: Substitute the whole wheat and all-purpose flours with a gluten-free all-purpose flour blend. Make sure to use a blend that contains xanthan gum for binding.
- Vegan: Replace the butter with a vegan butter alternative. Substitute the eggs with a flax egg (1 tablespoon ground flaxseed mixed with 3 tablespoons water per egg) or an equivalent egg replacement product.
- Nut-Free: Omit the almonds and substitute them with sunflower seeds or pumpkin seeds. Always double-check all ingredients to ensure they are processed in a nut-free facility if allergies are a concern.
- Lower Sugar: Reduce the amount of brown sugar in both the crust and the filling. You can also substitute some of the sugar with a sugar alternative like erythritol or stevia.
FAQs (Frequently Asked Questions)
Q: Can I use rolled oats instead of quick-cooking oats?
A: While you can use rolled oats, the texture of the bars will be slightly different. Quick-cooking oats are finer and create a more cohesive crust.
Q: My bars are too crumbly. What did I do wrong?
A: Possible causes include not pressing the crust firmly enough into the pan or not allowing the bars to cool completely before cutting. Overbaking can also lead to crumbly bars.
Q: Can I use honey or maple syrup instead of brown sugar?
A: Yes, you can substitute honey or maple syrup, but the flavor and texture of the bars will be different. You may need to adjust the amount of liquid to achieve the desired consistency.
Q: How do I prevent the chocolate chips from melting too much during baking?
A: Use high-quality chocolate chips and avoid overbaking the bars. You can also try adding the chocolate chips towards the end of the mixing process to minimize their exposure to heat.
Q: Can I add dried fruit other than raisins?
A: Absolutely! Dried cranberries, chopped dates, dried apricots, or even freeze-dried berries can be used as alternatives or additions to the raisins.
Final Thoughts
These Backpacker Bars are a testament to the fact that delicious and convenient can go hand-in-hand, especially when you’re on the move. Whether you’re scaling a mountain, exploring a new city, or simply need a quick and satisfying snack, these bars are sure to hit the spot. I encourage you to try this recipe and make it your own by experimenting with different flavor combinations and ingredients. Don’t be afraid to get creative and share your variations with others! And most importantly, enjoy the journey, one delicious bite at a time.