
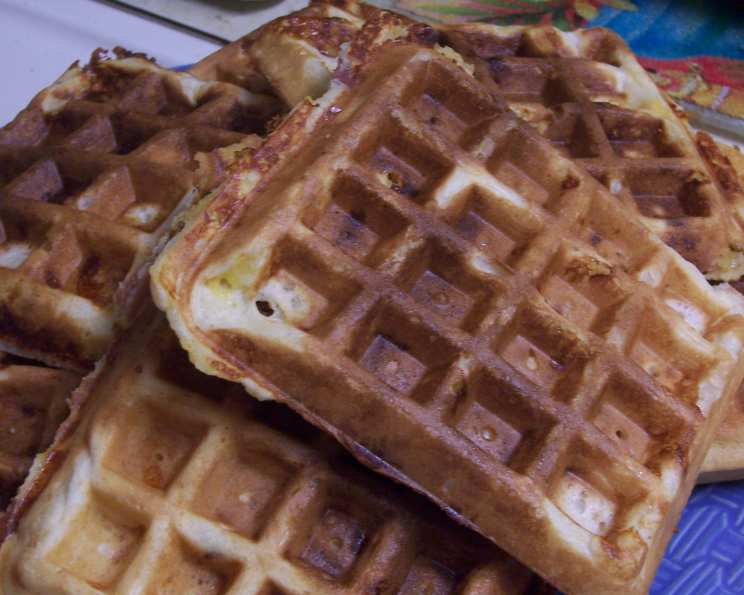
Bacon & Cheese Waffles: The Ultimate Savory Breakfast
There’s something about the smell of waffles that takes me back to childhood weekends. Not the perfectly uniform, freezer-aisle kind, but the golden-brown, slightly misshapen ones my grandmother used to make. The real magic happened when she started experimenting – adding blueberries, chocolate chips, and, once, gloriously, bacon and cheese. That particular Sunday morning stands out vividly, a symphony of crispy bacon, melted cheddar, and fluffy, slightly tangy waffle batter that sparked a lifelong love affair with savory waffles. This recipe is my homage to that memory, a testament to the fact that waffles aren’t just for syrup anymore.
Recipe Overview
- Prep Time: 5 minutes
- Cook Time: 15 minutes
- Total Time: 20 minutes
- Servings: 4
- Yield: 4 waffles
- Dietary Type: Not specified (Contains Gluten, Dairy, Eggs)
Ingredients
- 1 egg
- 1 cup milk
- 1 cup sour cream
- 1 tablespoon butter, melted
- 2 cups pancake mix
- 6-8 slices bacon, cooked and crumbled (about 1/2 cup)
- 1 cup shredded cheddar cheese (4 oz.)
Equipment Needed
- Waffle iron
- Mixing bowl
- Whisk
- Measuring cups and spoons
Instructions
- Prepare the Wet Ingredients: In a mixing bowl, beat the egg lightly with a whisk. This helps to incorporate air and create a lighter waffle.
- Combine Liquids: Add the milk, sour cream, and melted butter to the beaten egg. Whisk until the mixture is smooth and well combined. The sour cream adds a wonderful tang and helps create a tender crumb.
- Incorporate Dry Ingredients: Gradually stir in the pancake mix. Mix until just combined. Be careful not to overmix the batter, as this can lead to tough waffles. A few lumps are okay!
- Fold in the Good Stuff: Gently fold in the cooked and crumbled bacon and shredded cheddar cheese. Distribute the bacon and cheese evenly throughout the batter.
- Preheat the Waffle Iron: While the batter rests for a few minutes, preheat your waffle iron according to the manufacturer’s instructions. Most waffle irons have an indicator light that will signal when it’s ready.
- Cook the Waffles: Once the waffle iron is hot, spoon or pour the batter onto the hot iron, using the amount recommended by your waffle iron’s instructions. Close the lid and cook until the waffle is golden brown and crispy. This usually takes about 3-5 minutes, but cooking times may vary depending on your waffle iron.
- Remove and Repeat: Carefully remove the waffle from the iron using a fork. Repeat with the remaining batter, adding more batter to the iron as needed.
- Serve Immediately: Serve the waffles immediately while they are hot and crispy.
Expert Tips & Tricks
- Crispy Bacon is Key: Make sure your bacon is cooked to a crisp before crumbling it into the batter. Soggy bacon will result in soggy waffles.
- Don’t Overmix: Overmixing pancake batter develops the gluten, leading to tough, chewy waffles instead of light and airy ones. Mix until just combined.
- Rest the Batter: Letting the batter rest for about 5 minutes before cooking allows the gluten to relax and the baking powder to activate, resulting in a more tender waffle.
- Prevent Sticking: To prevent waffles from sticking, ensure your waffle iron is properly preheated and lightly greased, even if it’s non-stick. A quick spray of cooking oil can make a big difference.
- Cheese Placement: For extra cheesy goodness, sprinkle a little bit of the shredded cheddar cheese directly onto the waffle iron before pouring in the batter. This creates a crispy cheese crust on the outside of the waffle.
- Keep Warm: If you’re making a large batch of waffles, keep the cooked waffles warm in a preheated 200°F (93°C) oven until ready to serve. Place them on a wire rack in a single layer to prevent them from becoming soggy.
Serving & Storage Suggestions
These Bacon & Cheese Waffles are best served immediately while they’re hot and crispy. They’re fantastic on their own, or you can elevate them with a dollop of sour cream, a sprinkle of fresh chives, or a drizzle of hot sauce for a spicy kick.
Storage: Leftover waffles can be stored in an airtight container in the refrigerator for up to 3 days.
Reheating: To reheat, toast them in a toaster oven or conventional oven at 350°F (175°C) until warmed through and crispy. You can also microwave them, but they will lose some of their crispness. For best results, avoid microwaving.
Freezing: Waffles can also be frozen for up to 2 months. Allow the waffles to cool completely before wrapping them individually in plastic wrap and then placing them in a freezer bag. To reheat from frozen, toast them in a toaster or oven until heated through.
Nutritional Information
(Estimated per serving; values will vary based on specific ingredients and portion sizes)
| Nutrient | Amount per Serving | % Daily Value |
|---|---|---|
| Calories | 720 kcal | 36% |
| Total Fat | 46g | 71% |
| Saturated Fat | 23g | 115% |
| Cholesterol | 161mg | 54% |
| Sodium | 1347mg | 56% |
| Total Carbohydrate | 52g | 17% |
| Dietary Fiber | 2g | 7% |
| Sugars | 0g | 0% |
| Protein | 23g | 46% |
Variations & Substitutions
- Spice it Up: Add a pinch of cayenne pepper or a dash of hot sauce to the batter for a spicy kick.
- Cheese Variations: Experiment with different types of cheese, such as pepper jack, Gruyere, or Swiss.
- Herb Infusion: Mix in some chopped fresh herbs like rosemary, thyme, or chives for added flavor and aroma.
- Gluten-Free: Use a gluten-free pancake mix to make these waffles gluten-free. Ensure all other ingredients are also gluten-free.
- Vegetarian: These waffles are easily made vegetarian by simply omitting the bacon. Consider adding sauteed mushrooms or spinach instead.
- Dairy-Free: Substitute the milk and sour cream with dairy-free alternatives like almond milk and dairy-free sour cream. Ensure the pancake mix doesn’t contain dairy.
- Sweet and Savory: Drizzle a little maple syrup over the waffles for a delightful sweet and savory combination.
FAQs (Frequently Asked Questions)
Q: Can I make the batter ahead of time?
A: Yes, you can prepare the batter up to 24 hours in advance and store it in the refrigerator. However, keep in mind that the batter may thicken slightly as it sits. You may need to add a tablespoon or two of milk to thin it out before cooking.
Q: My waffles are sticking to the waffle iron. What am I doing wrong?
A: Make sure your waffle iron is properly preheated and lightly greased. Even if it’s non-stick, a little cooking spray can help. Also, avoid opening the waffle iron too early; wait until the waffle is fully cooked and releases easily.
Q: Can I use regular all-purpose flour instead of pancake mix?
A: While you can substitute all-purpose flour, you’ll need to add leavening agents like baking powder and baking soda to achieve the same fluffy texture as pancake mix. You might also need to adjust the liquid ratio. Using pancake mix simplifies the process and ensures consistent results.
Q: How do I keep the waffles crispy after cooking?
A: Place the cooked waffles on a wire rack in a preheated 200°F (93°C) oven to keep them warm and crispy until serving. Avoid stacking them, as this will trap steam and make them soggy.
Q: Can I add other ingredients to the batter?
A: Absolutely! Feel free to experiment with different additions like chopped vegetables, cooked sausage, or different types of cheese. Just make sure not to overcrowd the batter, as this can affect the cooking time and texture of the waffles.
Final Thoughts
These Bacon & Cheese Waffles are more than just a breakfast dish; they’re an experience. They’re a delightful blend of savory flavors and comforting textures that will brighten any morning. So, gather your ingredients, preheat your waffle iron, and get ready to create a culinary masterpiece. I encourage you to experiment with different variations and share your feedback – I’d love to hear what you come up with! Serve these waffles with a side of fresh fruit or a cup of strong coffee for the perfect start to your day. Happy waffle-making!