
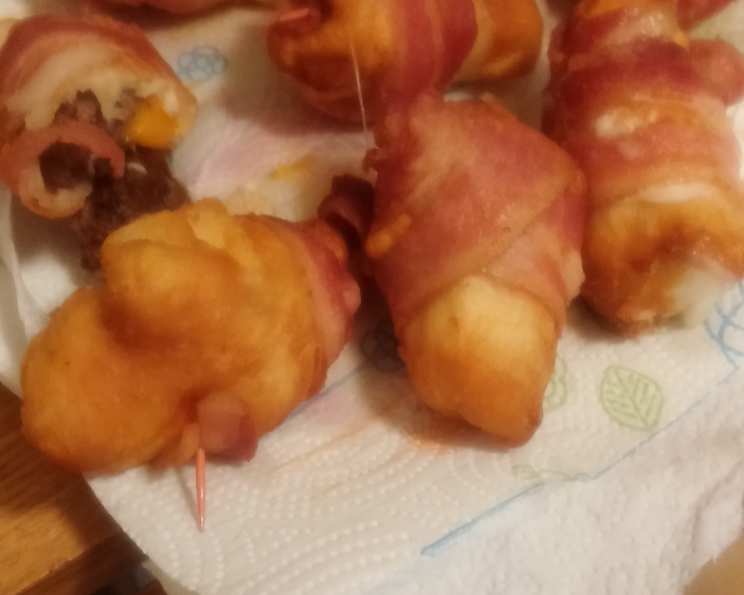
Bacon Cheeseburger Bombs: An Explosion of Flavor in Every Bite
I can still picture my Dad, apron on backwards, meticulously arranging a plate of these Bacon Cheeseburger Bombs for a Super Bowl party years ago. The aroma of sizzling bacon and buttery biscuit dough filled the house, a promise of the savory, cheesy goodness to come. Everyone devoured them; they were the first thing to disappear every time. These aren’t just appetizers; they’re tiny bites of pure comfort food nostalgia. I’ve tweaked Dad’s original method a little over the years, but they’re always a guaranteed crowd-pleaser.
Recipe Overview
- Prep Time: 20 minutes
- Cook Time: 15-20 minutes
- Total Time: 35-40 minutes
- Servings: 8
- Yield: 16 bombs
- Dietary Type: Not Gluten-Free
Ingredients
- 1 (16.3 ounce) can Pillsbury Grands Original Biscuits or 1 (16.3 ounce) can Pillsbury Grands Buttermilk Biscuits
- 1 pound lean ground beef, cooked and drained (or 16 meatballs)
- 8 ounces cheddar cheese, cut into 16 cubes
- 16 slices bacon
- Long toothpicks or skewers
- Canola oil (for frying, if choosing that cooking method)
Equipment Needed
- Large skillet or pot
- Foil-lined baking sheets (2)
- Heavy saucepan or deep fryer (for frying, if choosing that cooking method)
- Paper towels
- Cutting board
- Knife
Instructions
-
Begin by preheating your oven to 400°F (200°C) if you plan to bake the bombs. If you prefer the fried version, have a heavy saucepan or deep fryer ready.
-
Separate the biscuit dough into 8 individual biscuits. On a lightly floured surface or using your hands, cut each biscuit in half horizontally. Gently press each half into a circle approximately 3 inches in diameter. The dough should be thin enough to wrap around the filling without being too bulky.
-
In the center of each biscuit round, place about 2 tablespoons of cooked ground beef (or one meatball) and one cheddar cheese cube. Make sure the filling is centered so you can seal the dough properly.
-
Carefully wrap the dough around the beef and cheese, ensuring it completely encloses the filling. Pinch the seams firmly to seal. This is crucial to prevent the cheese from leaking out during cooking. A good seal will also help maintain the round shape of the “bomb.”
-
For the Fried Version: Partially cook the bacon. In a large skillet, fry the bacon strips until they are pliable but not crispy. This will ensure they wrap around the bombs nicely. Cut each strip of bacon in half. Wrap each stuffed “bomb” with one slice of partially cooked bacon. Gently secure the loose end of the bacon with a toothpick, inserting it through the bacon and halfway into the dough. Heat the canola oil in a 3-quart heavy saucepan or deep fryer to 350°F (175°C). Fry the stuffed “bombs” for 4 to 5 minutes, or until the dough is golden brown on all sides. Be sure to turn them occasionally to ensure even cooking. Place the fried bombs on paper towels to drain excess oil and cool slightly before serving.
-
For the Baked Version: Line two baking sheets with foil. Lay the bacon strips on the prepared baking sheets. Bake for about 8 minutes to partially cook the bacon. It should still be pliable but slightly cooked. Remove from the oven. Cut each strip of bacon in half. Wrap each stuffed “bomb” with one slice of partially cooked bacon. Place the bacon-wrapped dough 2 inches apart on the foil-lined baking sheets, with the dough seam side down. This will help prevent them from opening up during baking. Bake for 13 to 15 minutes, or until the dough is golden brown and the bacon is crisp.
-
Let the baked bombs cool slightly on the baking sheets before serving.
-
Remove toothpicks before serving.
Expert Tips & Tricks
- To prevent the dough from sticking, lightly flour your work surface.
- Ensure the ground beef is well-drained after cooking to avoid soggy bombs.
- Don’t overcrowd the pan when frying; cook in batches to maintain the oil temperature.
- If you’re short on time, use pre-cooked bacon slices. Just ensure they are pliable enough to wrap around the bombs.
- For a spicier kick, add a pinch of red pepper flakes to the ground beef mixture.
- If you find the dough is too sticky to work with, chill it in the refrigerator for 10-15 minutes before shaping. This will firm it up and make it easier to handle.
- For a more even bake, rotate the baking sheets halfway through the baking time.
- Make sure your oven is properly preheated. An inaccurate oven temperature can affect the final result.
Serving & Storage Suggestions
Serve the Bacon Cheeseburger Bombs warm, ideally straight from the fryer or oven. They are delicious on their own or with dipping sauces like ketchup, mustard, barbecue sauce, or a spicy mayo.
Storage: Leftover bombs can be stored in an airtight container in the refrigerator for up to 3 days.
Reheating: Reheat in a preheated oven at 350°F (175°C) for about 5-10 minutes, or until heated through. You can also microwave them, but the dough might become slightly softer. For the fried version, re-frying for a short time will help to crisp up the bacon again.
Freezing: While best enjoyed fresh, you can freeze the bombs after baking. Let them cool completely, then wrap them individually in plastic wrap and place them in a freezer-safe bag. They can be frozen for up to 2 months. To reheat, thaw overnight in the refrigerator and then bake as directed above.
Nutritional Information
| Nutrient | Amount per Serving | % Daily Value |
|---|---|---|
| Calories | 246 kcal | N/A |
| Fat | 16g | 24% |
| Saturated Fat | 7g | 32% |
| Cholesterol | 40mg | 13% |
| Sodium | 342mg | 14% |
| Carbohydrates | 13g | 4% |
| Fiber | 0g | 1% |
| Sugar | 1g | 2% |
| Protein | 12g | 24% |
Note: Nutritional information is an estimate and may vary based on specific ingredients and cooking methods.
Variations & Substitutions
- Cheese Variations: Experiment with different types of cheese, such as Monterey Jack, pepper jack, or a blend of cheeses.
- Meat Variations: Substitute the ground beef with cooked Italian sausage, shredded chicken, or even vegetarian crumbles for a meat-free option.
- Spice it Up: Add a pinch of cayenne pepper or a dash of hot sauce to the ground beef mixture for a spicier kick.
- Crust Alternative: Instead of biscuits, use crescent roll dough for a flakier crust.
- Gluten-Free: While using regular biscuit dough, substituting with a gluten free pizza dough, cut into smaller circles, would work well as a substitute.
FAQs (Frequently Asked Questions)
Q: Can I make these ahead of time?
A: Yes, you can assemble the bombs ahead of time and store them in the refrigerator for a few hours before baking or frying. However, it’s best to cook them fresh for optimal texture.
Q: What’s the best way to prevent the cheese from leaking out?
A: Ensure the dough is tightly sealed around the filling by pinching the seams firmly. Using a good quality cheese that doesn’t melt too quickly can also help.
Q: Can I use pre-cooked bacon?
A: Yes, but make sure the bacon is still pliable enough to wrap around the bombs. You may need to microwave it briefly to soften it.
Q: What if I don’t have a deep fryer?
A: You can easily fry these in a heavy saucepan with enough oil to submerge the bombs. Just be sure to monitor the oil temperature closely.
Q: How do I know when the bombs are cooked through?
A: The dough should be golden brown and cooked through, and the cheese should be melted and bubbly. A toothpick inserted into the center of the dough should come out clean.
Final Thoughts
These Bacon Cheeseburger Bombs are more than just a recipe; they’re a bite-sized adventure in flavor. Don’t be afraid to experiment with different fillings and spices to create your own signature version. Whether you fry them up for a game-day party or bake them for a cozy family dinner, I hope they bring as much joy to your table as they have to mine. Give them a try, and let me know what you think! And if you’re feeling adventurous, pair them with a crisp, cold beer or a tangy coleslaw for the perfect meal. Happy cooking!