
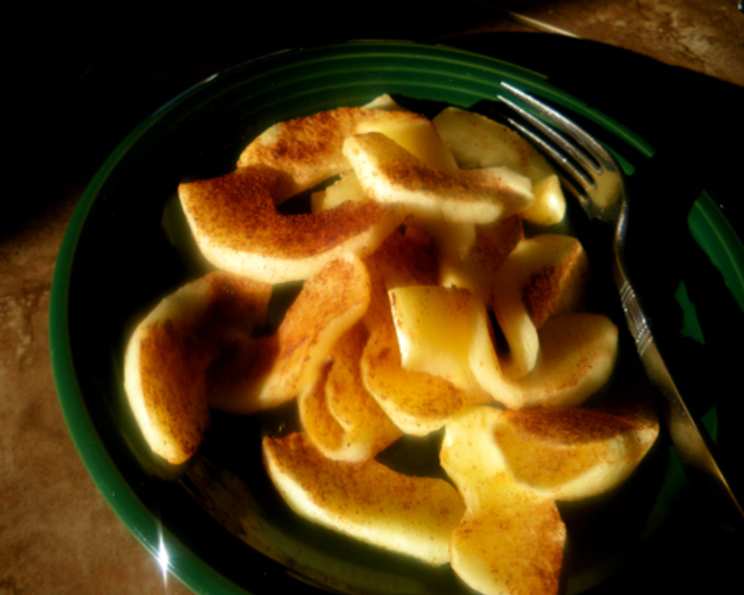
Baked Apple Slices: A Simple Comfort
The aroma of warm cinnamon and baked apples instantly transports me back to my grandmother’s kitchen. She always had a batch cooling on the counter, ready to be devoured after school. The slightly tart sweetness, the tender texture, and that comforting spice—it was pure love baked into every slice. These baked apple slices are more than just a recipe; they’re a reminder of simple joys and the warmth of family.
Recipe Overview
- Prep Time: 15 minutes
- Cook Time: 15-20 minutes
- Total Time: 30-35 minutes
- Servings: 6
- Yield: Approximately 48 slices
- Dietary Type: Vegetarian, Gluten-Free adaptable, Dairy-Free (as is)
Ingredients
- 4 apples (such as Gala, Honeycrisp, or Fuji)
- 1/3 cup all-purpose flour (or gluten-free blend)
- 1/3 cup granulated sugar
- 1 1/2 teaspoons cinnamon
Equipment Needed
- Large bowl
- Paring knife
- Cutting board
- Baking sheet
- Parchment paper (optional, but recommended)
Instructions
-
Begin by preparing the apples. Peel, halve, and core each apple. A melon baller or small spoon works well for removing the core cleanly.
-
Cut each apple half into 6 wedges. You should aim for relatively uniform slices so they cook evenly.
-
In a large bowl, combine the dry ingredients: flour, sugar, and cinnamon. Whisk together well to ensure the cinnamon is evenly distributed and no lumps of flour remain.
-
Add the apple slices to the bowl with the dry ingredients. Toss gently but thoroughly to coat each slice evenly with the flour, sugar, and cinnamon mixture. Make sure every slice is nicely coated for optimal flavor and texture.
-
Spread the coated apple slices in a single layer on a non-stick baking sheet or a baking sheet lined with parchment paper. Parchment paper makes cleanup much easier and prevents sticking. Avoid overcrowding the pan, as this will steam the apples instead of allowing them to bake and brown. If needed, use two baking sheets.
-
Bake in a preheated oven at 450°F (230°C) for 15 to 20 minutes, or until the apples are browned and tender. The baking time will depend on the variety of apple and your oven’s calibration. Start checking for doneness around 15 minutes. The apples should be easily pierced with a fork, and the edges should be slightly caramelized.
-
Once baked, cool for a few minutes on the baking sheet before removing the apple slices. This allows them to firm up slightly.
-
Serve warm.
Expert Tips & Tricks
- Apple Variety Matters: Choose apples that hold their shape well during baking, such as Gala, Honeycrisp, Fuji, or Braeburn. Softer apples like McIntosh may become too mushy.
- Even Slicing: Uniformly sliced apples cook more evenly. Aim for consistent thickness.
- Don’t Overcrowd the Pan: Overcrowding the pan leads to steaming rather than baking, resulting in softer, less caramelized apples. Use two baking sheets if necessary.
- Enhance the Flavor: A pinch of nutmeg or ground ginger added to the flour mixture can enhance the warmth and depth of flavor. A teaspoon of lemon juice tossed with the apples can brighten the flavor and prevent excessive browning before baking.
- Check for Doneness: The apples are done when they are tender and easily pierced with a fork. Look for slight browning and caramelization on the edges.
- Prevent Sticking: Lining the baking sheet with parchment paper ensures easy removal and prevents sticking. Alternatively, lightly grease the baking sheet with butter or cooking spray.
- Crispier Apples: For slightly crispier edges, try broiling the apples for the last minute or two of baking, keeping a close eye to prevent burning.
Serving & Storage Suggestions
Serve these baked apple slices warm as a snack, dessert, or even as a side dish with savory foods like pork or roast chicken, as Bonnie Stern originally suggested. They are also wonderful served with a dollop of yogurt cheese, a scoop of fruit sorbet, or a drizzle of maple syrup.
Leftover baked apple slices can be stored in an airtight container in the refrigerator for up to 3 days. To reheat, warm them gently in the oven at 350°F (175°C) for a few minutes, or microwave them in short intervals until heated through. They can also be enjoyed cold. For longer storage, consider freezing the slices in a single layer on a baking sheet, then transferring them to a freezer bag or container once frozen solid. They can be stored in the freezer for up to 2 months. Reheat from frozen in the oven.
Nutritional Information
| Nutrient | Amount per Serving | % Daily Value |
|---|---|---|
| Calories | 132.9 kcal | N/A |
| Calories from Fat | 2g | 2% |
| Total Fat | 0.3 g | 0% |
| Saturated Fat | 0.1 g | 0% |
| Cholesterol | 0 mg | 0% |
| Sodium | 1.5 mg | 0% |
| Total Carbohydrate | 33.7 g | 11% |
| Dietary Fiber | 3.5 g | 13% |
| Sugars | 23.7 g | N/A |
| Protein | 1.1 g | 2% |
Note: Nutritional information is an estimate and may vary based on specific ingredients and portion sizes.
Variations & Substitutions
- Gluten-Free: Substitute the all-purpose flour with a gluten-free blend. Ensure the blend contains xanthan gum or another binder for best results.
- Sugar Alternatives: Replace granulated sugar with coconut sugar, maple sugar, or a sugar substitute like erythritol. Adjust the amount to taste.
- Spiced Apple Medley: Experiment with different spices like nutmeg, ginger, cardamom, or allspice.
- Citrus Zest: Add a teaspoon of lemon, orange, or lime zest to the flour mixture for a bright, aromatic flavor.
- Nutty Crunch: Sprinkle chopped nuts like walnuts, pecans, or almonds over the apples before baking.
- Caramel Drizzle: Drizzle a homemade or store-bought caramel sauce over the baked apple slices for an extra touch of indulgence.
- Fruit Combinations: Add other fruits like berries, peaches, or pears to the mix for a delightful medley.
- Apple Butter: Mix a spoonful of apple butter into the flour mixture for added flavor and moisture.
FAQs (Frequently Asked Questions)
Q: Can I use a different type of apple?
A: Yes, you can! Firmer apples like Gala, Honeycrisp, Fuji, and Braeburn hold their shape well during baking. Softer apples like McIntosh may become too mushy.
Q: Can I make this recipe ahead of time?
A: You can peel and slice the apples ahead of time, but toss them with a little lemon juice to prevent browning. Store them in the refrigerator until ready to use. The dry ingredients can also be pre-mixed.
Q: Do I need to peel the apples?
A: Peeling the apples is optional. If you prefer, you can leave the skin on for added texture and nutrients. Just be sure to wash the apples thoroughly.
Q: Can I freeze the baked apple slices?
A: Yes, you can freeze them for up to 2 months. Freeze them in a single layer on a baking sheet before transferring them to a freezer bag or container. Reheat from frozen in the oven.
Q: My apples are browning too quickly. What should I do?
A: If the apples are browning too quickly, reduce the oven temperature slightly or tent the baking sheet with foil.
Final Thoughts
These Baked Apple Slices are proof that simple ingredients, when combined with a little care, can create something truly extraordinary. It’s a recipe that welcomes improvisation, encourages experimentation, and delivers comfort in every bite. I encourage you to try this recipe and experience the warm, comforting flavors for yourself. Feel free to adjust the spices to your liking, add your favorite nuts, or pair them with a scoop of vanilla ice cream for an extra special treat. And most importantly, share your creations and feedback – I’d love to hear about your baking adventures!