
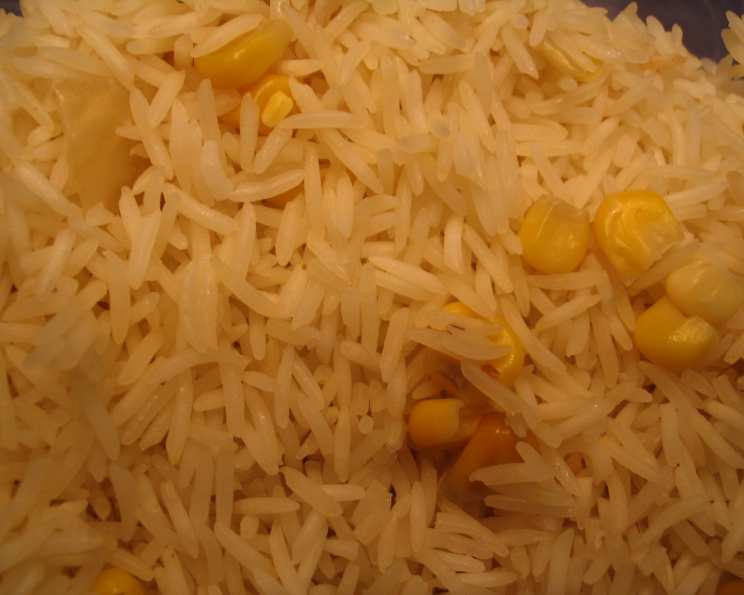
Baked Basmati Bliss: An Oven-Baked Rice Revelation
My earliest memory of rice isn’t some perfectly fluffy cloud served at a formal dinner, but rather the slightly crisp, almost nutty grains clinging to the bottom of my grandmother’s cast iron skillet. She called it “the treasure,” and we’d fight over those crunchy bits, a testament to her patient stovetop cooking. It was that contrasting texture – the tender grains mingling with the slightly caramelized – that sparked my lifelong fascination with rice. This baked basmati recipe, with its similarly delightful play of textures, is a tribute to those cherished childhood memories.
Recipe Overview
- Prep Time: 10 minutes
- Cook Time: 55 minutes
- Total Time: 1 hour 5 minutes
- Servings: 4-6
- Yield: 1 baking dish
- Dietary Type: Vegetarian (easily adaptable to Vegan)
Ingredients
- 2 tablespoons olive oil
- 1 1/2 cups basmati rice
- 1 cup water
- 2 tablespoons butter (or vegan butter substitute)
- 2 packets Oxo instant chicken bouillon (or 4-6 tablespoons instant chicken stock)
- 1/2 cup chopped onion (frozen or fresh)
- 1 cup frozen corn
Equipment Needed
- 9×13 inch baking pan
- Aluminum foil
- Measuring cups and spoons
Instructions
-
Preheat your oven to 350°F (175°C). While the oven is heating, prepare your baking dish.
-
Generously grease a 9×13 inch baking pan with the olive oil. Ensure the entire surface is lightly coated to prevent sticking.
-
Pour the 1 1/2 cups of basmati rice into the prepared baking pan, spreading it out evenly across the bottom.
-
Evenly distribute the Oxo instant chicken bouillon (or instant chicken stock) over the dry rice. Make sure it’s not all clumped in one spot, as this will affect the flavor distribution.
-
Carefully pour 1 cup of water over the rice and bouillon mixture. Try to distribute the water evenly to ensure consistent cooking.
-
Add the 1/2 cup of chopped onion and 1 cup of frozen corn to the baking pan. Gently stir all the ingredients together, ensuring they are well combined with the rice and water.
-
Cut the 2 tablespoons of butter into small chunks and place them sporadically around the dish. This will add richness and flavor to the rice as it bakes. If using a vegan butter substitute, follow the same process.
-
Tightly cover the baking pan with aluminum foil. This step is crucial, as it traps the steam and allows the rice to cook evenly. Make sure the foil is securely sealed around the edges of the pan.
-
Bake in the preheated oven for approximately 55 minutes. During the baking process, it’s important to stir the rice every once in a while (about every 15-20 minutes). This helps prevent the rice at the bottom from burning and ensures that the rice on top gets evenly crispy.
-
After 55 minutes, check the rice for doneness. It should be tender but slightly “al dente,” meaning it has a slight bite. If the rice is still too firm or there is excessive liquid remaining, return it to the oven for an additional 5-10 minutes, checking frequently.
Expert Tips & Tricks
- Rice Quality Matters: Using high-quality basmati rice makes a noticeable difference in both flavor and texture. Look for long, slender grains.
- Bouillon Powder Fine-Tuning: Adjust the amount of bouillon or chicken stock to suit your taste. Start with the recommended amount and adjust next time based on your preference.
- Achieving the Perfect “Al Dente”: The key to getting the rice “al dente” is to not overcook it. Keep a close eye on it during the final 15 minutes of baking. Remember, the rice will continue to cook slightly even after you remove it from the oven.
- Flavor Boost: For an extra layer of flavor, try sautéing the onions in a little olive oil or butter before adding them to the rice.
- Crispy Top: For a crispier top, remove the foil during the last 5-10 minutes of baking. Watch it closely to prevent burning.
- Even Cooking: Even oven temperature is key. If your oven runs hot, consider lowering the temperature by 25 degrees and extending the cooking time.
Serving & Storage Suggestions
This baked basmati rice is incredibly versatile and pairs well with a variety of dishes. It makes an excellent accompaniment to curries, stir-fries, roasted vegetables, grilled meats, or simply enjoyed on its own.
- Serving: Fluff the rice with a fork before serving to separate the grains. Garnish with fresh herbs like cilantro or parsley for a pop of color and freshness.
- Storage: Leftover baked basmati rice can be stored in an airtight container in the refrigerator for up to 3 days.
- Reheating: To reheat, add a tablespoon or two of water or broth to the rice and microwave on medium power until heated through. You can also reheat it in a skillet over low heat, stirring occasionally.
- Freezing: While not ideal, baked basmati rice can be frozen for up to 1 month. Thaw completely in the refrigerator before reheating. Note that the texture may change slightly after freezing.
Nutritional Information
| Nutrient | Amount per Serving | % Daily Value |
|---|---|---|
| Calories | 452.7 kcal | N/A |
| Calories from Fat | N/A | 31% |
| Total Fat | 15.5 g | 23% |
| Saturated Fat | 5.2 g | 25% |
| Cholesterol | 15.3 mg | 5% |
| Sodium | 543.9 mg | 22% |
| Total Carbohydrate | 73 g | 24% |
| Dietary Fiber | 4.8 g | 19% |
| Sugars | 1.8 g | N/A |
| Protein | 8.6 g | 17% |
Note: Nutritional information is an estimate and may vary based on specific ingredients and portion sizes.
Variations & Substitutions
- Vegan Option: Substitute the butter with a vegan butter alternative or olive oil to make this recipe completely vegan. Ensure your chicken-style bouillon is plant-based too!
- Spice it Up: Add a pinch of red pepper flakes or a dash of your favorite hot sauce for a spicy kick.
- Vegetable Medley: Experiment with different vegetables. Diced carrots, peas, bell peppers, or mushrooms would all be delicious additions.
- Herbed Rice: Stir in fresh herbs like thyme, rosemary, or oregano before baking for an aromatic twist.
- Garlic Infusion: Add minced garlic along with the onions for a savory flavor boost.
- Coconut Rice: Substitute half of the water with coconut milk for a richer, more exotic flavor.
FAQs (Frequently Asked Questions)
Q: Why is my rice still crunchy after baking for the recommended time?
A: This usually indicates that there wasn’t enough liquid. Add a little more water (about 1/4 cup), cover the pan with foil, and continue baking until the rice is tender.
Q: Can I use brown rice instead of basmati rice?
A: Yes, but you’ll need to adjust the cooking time and liquid accordingly. Brown rice requires more liquid and a longer cooking time than basmati rice.
Q: Can I prepare this dish ahead of time?
A: You can assemble the rice dish ahead of time and store it in the refrigerator until you’re ready to bake it. Add a few extra minutes to the baking time to ensure the rice is fully cooked.
Q: My rice is mushy. What did I do wrong?
A: You likely used too much water or overcooked the rice. Next time, reduce the amount of water slightly and check the rice for doneness more frequently.
Q: Can I use a different type of stock?
A: Yes, you can use vegetable stock, beef stock, or even just water. Keep in mind that the flavor of the stock will affect the overall taste of the dish.
Final Thoughts
This baked basmati rice is a simple yet satisfying dish that’s perfect for any occasion. Its versatility and ease of preparation make it a go-to recipe for busy weeknights or relaxed weekend gatherings. Don’t be afraid to experiment with different flavors and ingredients to create your own signature version. I encourage you to try this recipe and share your feedback – I’m always eager to hear how you make it your own. And for the ultimate comfort meal, serve it alongside a flavorful Tikka Masala for a truly unforgettable experience!