
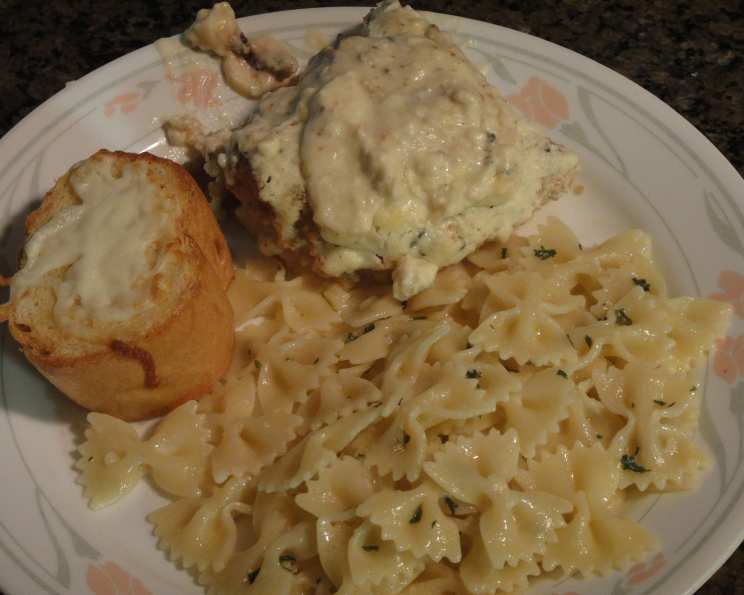
Baked Blue Cheese Chicken: A Flavor Explosion
I’ll never forget the first time I tasted this Baked Blue Cheese Chicken. I was a young line cook, intimidated by the sophisticated palates of the fine dining establishment I worked in. The head chef, a gruff but secretly kind soul, prepared this dish for the staff meal one evening. The pungent aroma of blue cheese filled the kitchen, and the creamy, tangy flavor combined with the perfectly cooked chicken was a revelation. It was comforting yet elegant, and it showed me that even the simplest ingredients, when combined with care, could create something extraordinary. This dish quickly became a staple, not just in my professional life, but also for casual dinners at home with friends and family.
Recipe Overview
- Prep Time: 20 minutes
- Cook Time: 45-60 minutes
- Total Time: 1 hour 5-20 minutes
- Servings: 4-6
- Dietary Type: Gluten-Adaptable
Ingredients
- ½ lb blue cheese, crumbled
- 1 pint sour cream
- 4 cloves fresh garlic, minced
- 4-6 large boneless, skinless chicken breasts
- 1 cup fine breadcrumbs
- 1 egg, beaten
- ½ cup flour
- 2 tablespoons butter
- 2 tablespoons vegetable oil
- Salt, to taste
Equipment Needed
- Non-stick skillet
- Lightly greased baking dish
- Mixing bowl
- Fork or whisk
Instructions
- Begin by preheating your oven to 350 degrees Fahrenheit (175 degrees Celsius). Preparing the oven in advance ensures even cooking.
- In a mixing bowl, combine the crumbled blue cheese, sour cream, and minced garlic. Mix well until thoroughly combined. Set this mixture aside. This will be the creamy, flavorful topping for your chicken.
- Lightly salt the chicken breasts. A little seasoning at this stage enhances the overall flavor.
- Prepare three separate shallow dishes. In the first, place the flour. In the second, the beaten egg. And in the third, the fine breadcrumbs.
- Dredge each chicken breast in the flour, ensuring it’s fully coated. Shake off any excess.
- Next, dip the floured chicken breast into the beaten egg, making sure it is evenly coated.
- Finally, roll the egg-coated chicken in the breadcrumbs, pressing gently to help the crumbs adhere. This breading process creates a lovely crispy texture.
- Place the butter and vegetable oil in a non-stick skillet. Heat over medium-high heat until the butter is melted and the oil is shimmering. The combination of butter and oil adds richness and prevents the butter from burning.
- Carefully place the breaded chicken breasts in the hot skillet. Brown them on both sides, about 3-4 minutes per side. This step adds flavor and color to the chicken. Remember not to overcrowd the pan; work in batches if necessary.
- Transfer the browned chicken breasts to a lightly greased baking dish, arranging them in a single layer.
- Pour the blue cheese mixture evenly over the chicken breasts, ensuring each piece is well-covered.
- Cover the baking dish with foil. This helps retain moisture and prevents the blue cheese topping from browning too quickly.
- Bake in the preheated oven for 45-60 minutes, or until the chicken is tender and cooked through. The internal temperature of the chicken should reach 165 degrees Fahrenheit (74 degrees Celsius). Use a meat thermometer to ensure accurate doneness.
- Remove the foil during the last 10-15 minutes of baking for a golden color.
- Once cooked, let the chicken rest for a few minutes before serving. This allows the juices to redistribute, resulting in more tender and flavorful meat.
Expert Tips & Tricks
- Blue Cheese Variety: Experiment with different types of blue cheese to find your favorite flavor profile. Gorgonzola is milder than Roquefort, for example.
- Crispier Chicken: For an extra crispy crust, consider using panko breadcrumbs instead of fine breadcrumbs. You can also toast the breadcrumbs in a dry skillet before using them for coating.
- Garlic Infusion: Sauté the minced garlic in the butter and oil for a minute or two before browning the chicken. This infuses the oil with garlic flavor, adding an extra layer of complexity.
- Make-Ahead Prep: You can prepare the chicken up to the point of baking and store it in the refrigerator for up to 24 hours. This is great for saving time on busy weeknights. Just be sure to add a few minutes to the baking time if starting with cold chicken.
- Preventing Soggy Breadcrumbs: Ensure the chicken isn’t overly wet after being dipped in the egg. This will prevent the breadcrumbs from becoming soggy during baking.
Serving & Storage Suggestions
Serve the Baked Blue Cheese Chicken hot, straight from the oven. It pairs perfectly with a variety of sides, such as baked potatoes, rice pilaf, roasted vegetables (asparagus, broccoli, or Brussels sprouts are excellent choices), or a simple green salad. A sprinkle of fresh herbs, like parsley or chives, adds a touch of freshness and visual appeal.
To store leftovers, allow the chicken to cool completely before placing it in an airtight container. It can be stored in the refrigerator for up to 3-4 days. To reheat, bake in a preheated oven at 350 degrees Fahrenheit (175 degrees Celsius) until heated through. You can also reheat it in the microwave, but the crust may not be as crispy. For longer storage, the cooked chicken can be frozen for up to 2-3 months. Thaw it in the refrigerator overnight before reheating.
Nutritional Information
| Nutrient | Amount per Serving | % Daily Value |
|---|---|---|
| Calories | 853.6 kcal | N/A |
| Calories from Fat | 516 g | 61% |
| Total Fat | 57.4 g | 88% |
| Saturated Fat | 29.8 g | 148% |
| Cholesterol | 239.7 mg | 79% |
| Sodium | 1288.1 mg | 53% |
| Total Carbohydrate | 37 g | 12% |
| Dietary Fiber | 1.7 g | 6% |
| Sugars | 6.1 g | 24% |
| Protein | 46.6 g | 93% |
Note: Nutritional information is an estimate and may vary based on specific ingredients and portion sizes.
Variations & Substitutions
- Gluten-Free Version: Use gluten-free flour and gluten-free breadcrumbs to create a gluten-free version of this dish.
- Different Cheese: If you’re not a fan of blue cheese, try using crumbled feta, goat cheese, or a sharp cheddar cheese instead.
- Herb Infusion: Add some chopped fresh herbs, such as thyme, rosemary, or oregano, to the breadcrumb mixture for an extra layer of flavor.
- Spicy Kick: Add a pinch of red pepper flakes to the breadcrumb mixture or a dash of hot sauce to the blue cheese sauce for a spicy kick.
- Lemon Zest: Grate some lemon zest into the blue cheese mixture for a bright, citrusy flavor.
- Lighten it up: Substitute Greek yogurt for some of the sour cream to reduce the fat content.
FAQs (Frequently Asked Questions)
Q: Can I use chicken thighs instead of chicken breasts?
A: Yes, you can! Chicken thighs will add even more flavor and stay incredibly moist. Just be sure to adjust the cooking time accordingly, as thighs may require a slightly longer baking time.
Q: How do I prevent the breadcrumbs from falling off?
A: Ensure the chicken is adequately coated with flour and egg before adding the breadcrumbs. Press the breadcrumbs firmly onto the chicken to help them adhere.
Q: Can I make this dish ahead of time?
A: Absolutely! You can prepare the chicken breasts through the breading stage and refrigerate them for up to 24 hours before baking. This makes it a great option for meal prepping.
Q: What is the best way to tell if the chicken is cooked through?
A: The most reliable way is to use a meat thermometer. Insert it into the thickest part of the chicken breast; it should reach an internal temperature of 165 degrees Fahrenheit (74 degrees Celsius).
Q: Can I freeze leftover Baked Blue Cheese Chicken?
A: Yes, you can freeze leftovers for up to 2-3 months. Be sure to wrap it tightly to prevent freezer burn. When reheating, the crust may not be as crispy as it was originally.
Final Thoughts
This Baked Blue Cheese Chicken is more than just a recipe; it’s a comforting and flavorful experience waiting to happen. I encourage you to try it, experiment with different variations, and make it your own. Don’t be afraid to adjust the seasonings or cheese to suit your personal preferences. Share your creations and feedback with others, and most importantly, enjoy the process of creating something delicious and memorable. I recommend pairing it with a crisp white wine or a light beer for the perfect culinary experience. Happy cooking!