
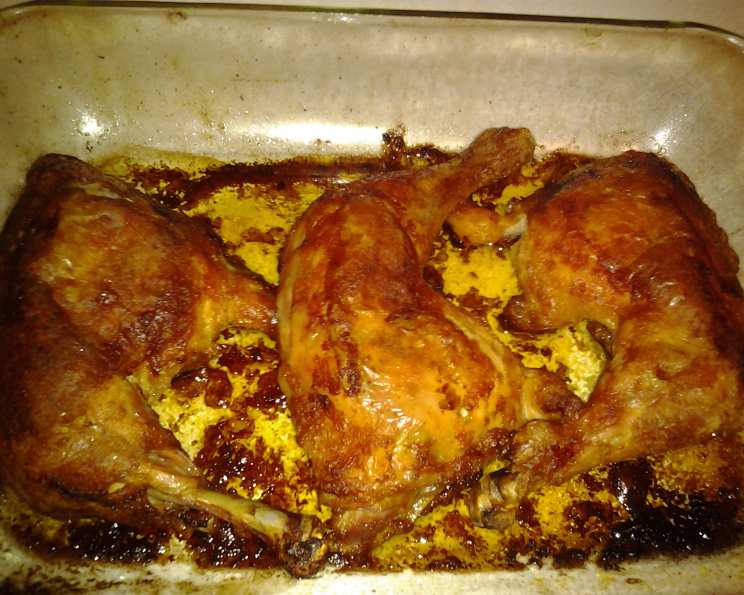
Grilled “Baked” Chicken: A Summer Classic
The first time I tried “baked” chicken from the grill, I was skeptical. “Baked” chicken was a Sunday supper staple at my grandmother’s house, a symphony of aromas filling her cozy kitchen. But the thought of replicating that same comfort food magic on a grill? It seemed like culinary heresy. However, one sweltering summer day, desperate to avoid heating up my own kitchen, I gave it a shot. The result? Crispy skin, juicy meat, and that undeniable smoky kiss only a grill can provide. It instantly became a new family favorite, proving that sometimes, the best traditions are the ones that evolve.
Recipe Overview
- Prep Time: 15 minutes
- Cook Time: 60-80 minutes
- Total Time: 1 hour 15 minutes – 1 hour 35 minutes
- Servings: 4-6
- Dietary Type: Varies (see notes)
Ingredients
- 2/3 cup biscuit baking mix (such as Bisquick)
- 1 1/2 teaspoons paprika
- 1 1/4 teaspoons seasoning salt
- 1/2 teaspoon pepper
- 1 broiler-fryer chicken, cut up (3 to 3-1/2 pounds)
Ingredient Notes:
- For a gluten-free option, use a gluten-free baking mix.
- Adjust the amount of seasoning salt and pepper to your personal preference.
Equipment Needed
- Large resealable plastic bag
- Greased metal or foil 13×9 inch baking pan
- Grill
Instructions
-
In a large resealable plastic bag, combine the biscuit baking mix, paprika, seasoning salt, and pepper. Seal the bag tightly and shake well to ensure the spices are evenly distributed. This creates your “breading” for the chicken, and the bag method makes for easy cleanup.
-
Add the cut-up chicken to the bag, a few pieces at a time. Reseal the bag and shake vigorously until each piece of chicken is thoroughly coated with the spice mixture. Ensure every nook and cranny is covered for maximum flavor and a beautiful, crispy crust.
-
Lightly grease a 13×9 inch metal or foil baking pan. This prevents the chicken from sticking and makes cleanup a breeze. I prefer foil pans when grilling, as they are disposable and withstand high heat well.
-
Arrange the coated chicken pieces in the prepared baking pan. Ensure the pieces are not overcrowded, as this can hinder even cooking and crisping. Leave a little space between each piece.
-
Preheat your grill to low heat. It’s crucial to maintain a low temperature throughout the cooking process to ensure the chicken cooks through without burning the outside. If your grill has a temperature gauge, aim for around 250-300°F (120-150°C).
-
Place the pan with the chicken directly on the grill grates. Cover the grill and let the chicken cook for 30-40 minutes on each side. The cooking time will depend on the thickness of the chicken pieces and the consistency of the grill’s heat.
-
After the initial 30-40 minutes on the first side, carefully flip the chicken pieces in the pan. Cover the grill again and continue cooking for another 30-40 minutes, or until the chicken is cooked through and the juices run clear when pierced with a fork. Use a meat thermometer to ensure the thickest part of the thigh reaches an internal temperature of 165°F (74°C).
-
Check for doneness: To ensure the chicken is fully cooked, insert a meat thermometer into the thickest part of the thigh, avoiding the bone. The internal temperature should read 165°F (74°C). Alternatively, pierce the chicken with a fork; the juices should run clear, not pink.
-
Carefully remove the pan from the grill using heat-resistant gloves or mitts. Let the chicken rest for about 5-10 minutes before serving. This allows the juices to redistribute, resulting in more tender and flavorful meat.
Expert Tips & Tricks
- Spice it up: For a spicier kick, add a pinch of cayenne pepper or red pepper flakes to the baking mix mixture.
- Marinade boost: Marinate the chicken in buttermilk or a yogurt-based marinade for a few hours before coating it in the baking mix. This will tenderize the meat and add extra flavor.
- Browning: If the chicken isn’t browning enough, you can briefly increase the grill temperature during the last 10 minutes of cooking. Watch closely to prevent burning.
- Indirect Heat is Key: If your grill has hot spots, use indirect heat by placing the pan away from the direct flame.
- Grill basket alternative: For easier flipping, you can use a grill basket instead of a baking pan. Just make sure to grease the basket well to prevent sticking.
- Prevent Flare-Ups: Trim excess fat from the chicken to minimize flare-ups during grilling.
Serving & Storage Suggestions
Serve the grilled “baked” chicken hot off the grill with your favorite sides. Classic pairings include mashed potatoes, corn on the cob, coleslaw, or a simple green salad. For a more casual meal, serve the chicken with potato salad and baked beans.
Storage: Leftover grilled chicken can be stored in an airtight container in the refrigerator for up to 3-4 days.
Reheating: Reheat leftover chicken in the oven at 350°F (175°C) until warmed through, or in the microwave in short intervals to prevent drying out. You can also reheat the chicken on the grill, but be careful not to overcook it.
Nutritional Information
Note: Estimated nutritional information will vary based on the specific ingredients used and portion sizes.
| Nutrient | Amount per Serving | % Daily Value |
|---|---|---|
| Calories | 350 kcal (Estimate) | 18% (Estimate) |
| Total Fat | 20g (Estimate) | 31% (Estimate) |
| Saturated Fat | 5g (Estimate) | 25% (Estimate) |
| Cholesterol | 120mg (Estimate) | 40% (Estimate) |
| Sodium | 500mg (Estimate) | 22% (Estimate) |
| Total Carbohydrate | 15g (Estimate) | 5% (Estimate) |
| Dietary Fiber | 1g (Estimate) | 4% (Estimate) |
| Sugars | 2g (Estimate) | N/A |
| Protein | 30g (Estimate) | 60% (Estimate) |
Variations & Substitutions
- Lemon Herb Chicken: Add 1 tablespoon of dried herbs (such as thyme, rosemary, and oregano) and the zest of one lemon to the baking mix mixture.
- Spicy BBQ Chicken: Substitute the paprika with chili powder and add 1/4 cup of your favorite BBQ sauce to the chicken after it’s cooked.
- Parmesan Herb Chicken: Add 1/4 cup of grated Parmesan cheese and 1 tablespoon of dried Italian herbs to the baking mix mixture.
- Dairy-Free Option: Replace the biscuit baking mix with a gluten-free and dairy-free alternative. Ensure all other ingredients are also dairy-free.
- Boneless, Skinless Chicken: While this recipe is written for bone-in chicken, you can adapt it for boneless, skinless chicken breasts or thighs. Reduce the cooking time accordingly, as boneless chicken will cook faster. Be sure to monitor the internal temperature closely to prevent overcooking.
FAQs (Frequently Asked Questions)
Q: Can I use a gas grill instead of a charcoal grill?
A: Yes, this recipe works well on both gas and charcoal grills. Just make sure to maintain a low and consistent heat.
Q: Do I need to use a baking pan? Can I put the chicken directly on the grill grates?
A: Using a baking pan helps to prevent the chicken from sticking to the grates and makes it easier to manage. You can try grilling directly on the grates, but be sure to grease them well and monitor the chicken closely to prevent burning.
Q: Can I use a different cut of chicken?
A: Yes, you can use other cuts of chicken, such as bone-in chicken breasts or thighs. Adjust the cooking time accordingly.
Q: How do I know when the chicken is done?
A: The best way to check for doneness is to use a meat thermometer. Insert the thermometer into the thickest part of the thigh, avoiding the bone. The internal temperature should read 165°F (74°C).
Q: Can I prepare this chicken ahead of time?
A: You can coat the chicken with the baking mix mixture ahead of time and store it in the refrigerator for up to 24 hours before grilling.
Final Thoughts
This grilled “baked” chicken is a testament to the fact that delicious, comforting food can be achieved anywhere, anytime. It’s a perfect way to enjoy a classic favorite while keeping your kitchen cool during those hot summer months. So, fire up your grill, gather your ingredients, and prepare to experience the magic of “baked” chicken, grilled to perfection. Don’t hesitate to experiment with different spice combinations or marinades to create your own signature version. And remember to share your creations with friends and family – food is always better when enjoyed together!