
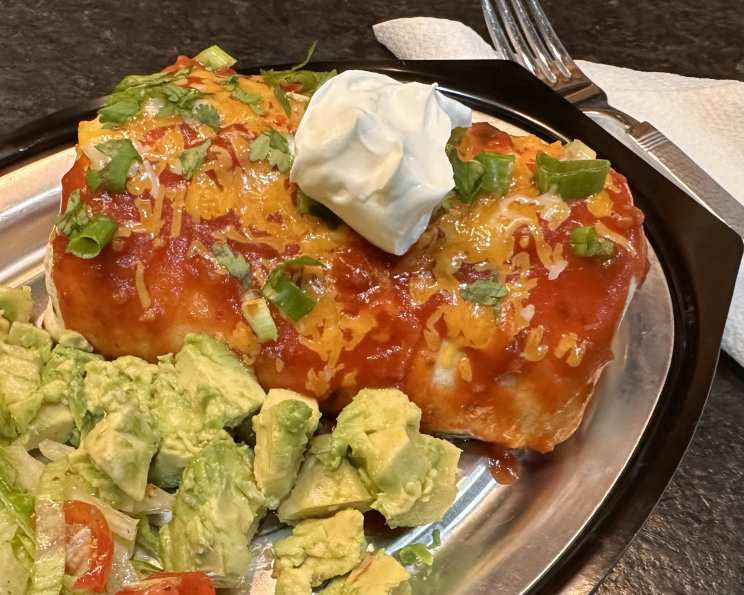
Baked Chimichangas: A Southwestern Fiesta at Home
The aroma of sizzling ground beef, spices, and melted cheese always takes me back to my college days. Late-night study sessions were often fueled by impromptu chimichanga feasts at a tiny, family-owned Mexican restaurant near campus. The warm, crispy tortillas filled with savory goodness were the perfect comfort food, and I can still picture us huddled around a table, laughing and sharing stories between bites. Now, recreating that experience at home brings back those cherished memories with every delicious mouthful.
Recipe Overview
- Prep Time: 20 minutes
- Cook Time: 15-20 minutes
- Total Time: 35-40 minutes
- Servings: 8
- Dietary Type: Can be made Gluten-Free (using GF tortillas)
Ingredients
- 1 lb ground chuck
- 1 cup chopped onion
- 1 (4 ounce) can chopped green chilies
- 1 (8 ounce) can tomato sauce
- 1/2 cup water
- 1 (1 1/4 ounce) package taco seasoning
- 1 (15 ounce) can refried beans
- 8 burrito-size flour tortillas
- 1 (8 ounce) package shredded Mexican blend cheese
- 1 (16 ounce) jar salsa, divided
- 1 tablespoon vegetable oil (or vegetable spray)
Equipment Needed
- Large skillet
- Rimmed baking pan
- Parchment paper or foil
Instructions
-
Begin by preparing the filling. In a large skillet over medium-high heat, brown the ground beef and onions until the beef is no longer pink. Be sure to break up the ground beef with a spoon as it cooks. Once browned, drain off any excess grease. This step is crucial to prevent soggy chimichangas later on.
-
Now, it’s time to infuse the beef with flavor. Stir in the green chilies, tomato sauce, water, and taco seasoning packet into the skillet. If you’re using homemade taco seasoning instead of a packet, you might need a little less water – start with about 1/3 cup and adjust as needed. Bring the mixture to a boil, then reduce the heat to low and simmer for approximately 8 minutes, or until the sauce has thickened slightly. This allows the flavors to meld together beautifully. Finally, stir in the refried beans until well combined.
-
Preheat your oven to 450 degrees Fahrenheit. While the oven heats up, prepare your baking sheet by lining it with parchment paper or aluminum foil. If using foil, lightly spray it with non-stick cooking spray to prevent the chimichangas from sticking.
-
Assemble the chimichangas. Spoon about 1/3 cup of the meat mixture onto the center of each tortilla. Top with approximately 3 tablespoons of shredded cheese – don’t be shy, a generous amount of cheese is key! Add 1 tablespoon of your favorite salsa (verde or roja, depending on your preference) on top of the cheese.
-
Now for the fun part: folding! Fold up the four sides of each tortilla towards the center, creating a sealed package. Place each assembled chimichanga seam-side down onto the prepared baking sheet.
-
For that irresistible golden-brown crust, lightly brush the tops of the chimichangas evenly with vegetable oil. Alternatively, you can spray them with canola cooking spray. This step ensures a crispy texture that complements the soft filling.
-
Bake in the preheated oven for 15 to 20 minutes, or until the chimichangas are golden brown and the cheese is melted and bubbly. Keep a close eye on them to prevent burning.
-
Remove from the oven and let cool for a few minutes before serving.
Expert Tips & Tricks
- Spice it up: Add a pinch of cayenne pepper or a dash of hot sauce to the meat mixture for an extra kick.
- Make ahead: Assemble the chimichangas ahead of time, wrap them individually in plastic wrap, and store them in the refrigerator for up to 24 hours. Add a few minutes to the baking time if baking directly from the fridge.
- Get creative with fillings: Experiment with different fillings such as shredded chicken, carnitas, or vegetarian options like black beans and corn.
- Prevent soggy chimichangas: Ensure the meat filling is not too watery before assembling the chimichangas. Drain off any excess liquid after browning the ground beef.
- Crispier texture: For an even crispier texture, try pan-frying the assembled chimichangas in a skillet with a little oil after baking them in the oven.
Serving & Storage Suggestions
Serve these baked chimichangas immediately while they are warm and crispy. They are delicious on their own or with a variety of toppings such as sour cream, guacamole, chopped tomatoes, shredded lettuce, and extra salsa.
Leftover chimichangas can be stored in an airtight container in the refrigerator for up to 3 days. To reheat, bake them in a preheated oven at 350 degrees Fahrenheit for 10-15 minutes, or until heated through and crispy. You can also reheat them in a microwave, but they will not be as crispy.
For longer storage, you can freeze the assembled chimichangas before baking. Wrap them individually in plastic wrap and then place them in a freezer bag. They can be stored in the freezer for up to 2 months. To bake from frozen, preheat the oven to 375 degrees Fahrenheit and bake for 25-30 minutes, or until heated through and golden brown.
Nutritional Information
| Nutrient | Amount per Serving | % Daily Value |
|---|---|---|
| Calories | 748.3 kcal | N/A |
| Calories from Fat | 313 g | 42% |
| Total Fat | 34.8 g | 53% |
| Saturated Fat | 14.7 g | 73% |
| Cholesterol | 91.9 mg | 30% |
| Sodium | 2515.9 mg | 104% |
| Total Carbohydrate | 74.9 g | 24% |
| Dietary Fiber | 10.1 g | 40% |
| Sugars | 11 g | N/A |
| Protein | 35.2 g | 70% |
Note: Nutritional information is an estimate and may vary based on specific ingredients and preparation methods.
Variations & Substitutions
- Gluten-Free: Use gluten-free tortillas to make this recipe suitable for those with gluten sensitivities.
- Vegetarian: Substitute the ground beef with plant-based ground meat, lentils, or a mixture of black beans, corn, and diced vegetables.
- Spicier: Add a diced jalapeño pepper or a few dashes of your favorite hot sauce to the meat mixture for an extra kick.
- Lower-Fat: Use lean ground beef or ground turkey to reduce the fat content. You can also use fat-free refried beans and reduced-fat cheese.
- Cheese Options: Experiment with different types of cheese such as Monterey Jack, cheddar, or pepper jack.
- Salsa Variations: Try using different flavors of salsa, such as mango salsa, pineapple salsa, or roasted tomato salsa.
FAQs (Frequently Asked Questions)
Q: Can I use pre-cooked ground beef to save time?
A: Yes, you can definitely use pre-cooked ground beef. Just make sure to heat it thoroughly before adding the other ingredients.
Q: Can I make these chimichangas in an air fryer?
A: Yes, you can air fry them! Preheat your air fryer to 400°F (200°C). Place the assembled chimichangas in the air fryer basket, being careful not to overcrowd them. Cook for 8-10 minutes, flipping halfway through, until golden brown and crispy.
Q: Can I freeze the chimichangas after they are baked?
A: Yes, you can freeze baked chimichangas. Allow them to cool completely, then wrap them individually in plastic wrap and place them in a freezer bag. Reheat in the oven until warmed through.
Q: What can I serve with these chimichangas?
A: These are great with Mexican rice, refried beans, a simple salad, or a side of guacamole and tortilla chips.
Q: Can I use a different type of meat filling?
A: Absolutely! Shredded chicken, carnitas, or even seasoned tofu would work well in this recipe.
Final Thoughts
I hope this recipe inspires you to create your own batch of delicious baked chimichangas and relive some of my college memories. Don’t be afraid to experiment with different fillings and toppings to customize the recipe to your liking. Whether you’re hosting a fiesta or simply craving a comforting meal, these chimichangas are sure to be a hit. And if you make it, I would love to hear how they turned out for you! Feel free to share your feedback and photos in the comments below. Pair with a refreshing margarita or ice-cold Mexican beer for the perfect Southwestern experience. Enjoy!