
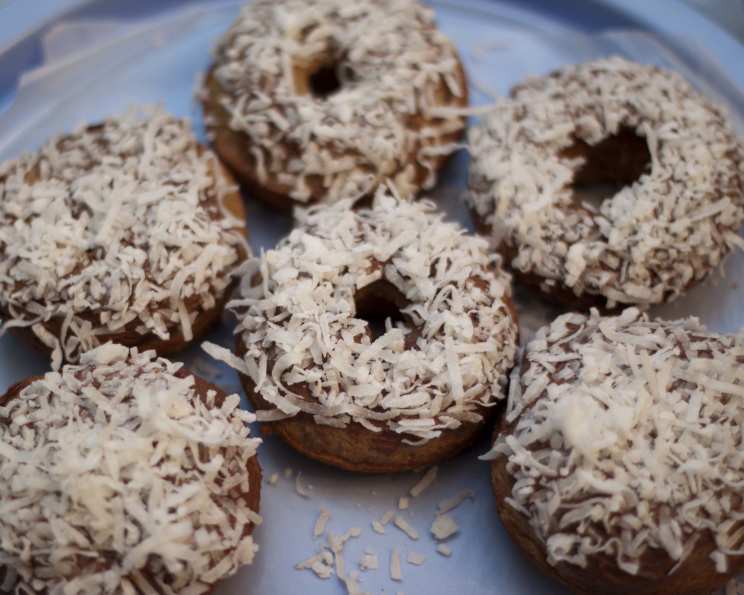
Baked Doughnuts: A Healthier Indulgence
My grandmother, Elsie, had a secret weapon for cheering up a rainy day: doughnuts. Not the fried, sugary kind you buy at the corner store, but delicate, cake-like baked doughnuts, redolent with nutmeg and cinnamon. The aroma alone could chase away the gloom, and one bite of their tender crumb, often glazed with a simple confectioner’s sugar icing, was pure, unadulterated comfort. While she’s no longer with us, her memory (and the comforting scent of baked goods!) live on, especially every time I recreate these simple doughnuts.
Recipe Overview
- Prep Time: 15 minutes
- Cook Time: 10-12 minutes
- Total Time: 25-27 minutes
- Servings: 6
- Yield: 6 doughnuts
- Dietary Type: Vegetarian
Ingredients
- 1 cup pastry flour (4 ounces) or 7/8 cup all-purpose flour
- 1/2 cup sugar (3 1/2 ounces)
- 1 teaspoon baking powder
- 1/8 teaspoon nutmeg
- 1/4 teaspoon salt
- 1 teaspoon cinnamon
- 3 tablespoons dry buttermilk powder (1 ounce)
- 3 tablespoons vegetable oil (1 1/4 ounce)
- 2 large eggs
- 2 tablespoons water
Equipment Needed
- Medium bowl
- Whisk
- Doughnut pan
- Cooling rack
Instructions
-
Preheat your oven to 375°F (190°C). Ensure your oven rack is positioned in the center.
-
In a medium-sized bowl, thoroughly whisk together all the dry ingredients: pastry flour (or all-purpose flour), sugar, baking powder, nutmeg, salt, cinnamon, and dry buttermilk powder. Make sure there are no clumps of baking powder or buttermilk powder. This ensures even distribution and proper leavening.
-
In a separate bowl, beat together the wet ingredients: eggs, vegetable oil, and water (or buttermilk or yogurt if substituting for the buttermilk powder). Beat until the mixture is light and foamy. This incorporates air, which contributes to a lighter texture in the final doughnut.
-
Pour the wet ingredients all at once into the bowl with the dry ingredients.
-
Stir the wet and dry ingredients together just until combined. Be careful not to overmix! Overmixing develops the gluten in the flour, resulting in a tougher doughnut. A few streaks of flour are okay; they will disappear during baking.
-
Prepare your doughnut pan. Thoroughly butter or grease the doughnut pan. Non-stick pan spray also works very well. Getting every nook and cranny greased is crucial for easy release of the doughnuts after baking.
-
Fill each doughnut form half full with the batter. An easy way to do this is by using a piping bag or a large zip-top bag with a corner snipped off. Avoid overfilling, as the doughnuts will rise during baking and could spill over.
-
Bake the doughnuts in the preheated oven for 10-12 minutes.
-
Check for doneness. The doughnuts are done when they spring back lightly when touched and are quite brown on top. A toothpick inserted into the center of a doughnut should come out clean.
-
Remove the doughnuts from the oven and allow them to cool in the pan for a few minutes before carefully inverting them onto a cooling rack.
-
Allow the doughnuts to cool completely on the rack before glazing with icing, coating with cinnamon sugar, or dusting with a non-melting sugar (such as powdered sugar with cornstarch).
Expert Tips & Tricks
- Flour Power: While all-purpose flour works, pastry flour gives a more tender crumb. If using all-purpose, reduce the amount slightly (as specified in the ingredient list) to prevent a dry texture.
- Buttermilk Boost: Dry buttermilk powder adds a subtle tang and helps create a tender crumb. If you don’t have it, substitute 2 tablespoons of buttermilk or plain yogurt for the water. The acidity in these substitutes will help tenderize the dough.
- Don’t Overmix: Overmixing is the enemy of a light and airy baked doughnut. Mix just until the dry ingredients are moistened.
- Even Baking: Ensure even baking by placing the doughnut pan in the center of the oven. If your oven tends to bake unevenly, rotate the pan halfway through baking.
- Easy Release: If your doughnuts are sticking, gently loosen the edges with a thin spatula before inverting the pan.
- Custom Glaze: Get creative with your glaze! Experiment with different extracts (vanilla, almond, lemon), add a splash of coffee or juice, or incorporate spices like cardamom or ginger.
- Cinnamon Sugar Coating: For a warm and comforting coating, mix cinnamon and sugar together and brush the warm doughnuts with melted butter before coating.
- Make-Ahead Batter: The batter can be made ahead of time and stored in the refrigerator for up to 24 hours. Bring to room temperature before filling the doughnut pan and baking.
- Prevent Sinking: If your doughnuts are sinking in the middle, it could be due to overmixing or too much leavening agent. Ensure accurate measurements and avoid overmixing.
Serving & Storage Suggestions
Serve these baked doughnuts warm or at room temperature, ideally within a day or two of baking. To maintain freshness, store them in an airtight container at room temperature. They will keep for about 2-3 days. You can also freeze them for longer storage (up to 2 months). Wrap them individually in plastic wrap before placing them in a freezer bag. To reheat, thaw at room temperature or briefly warm in a low oven or microwave. These doughnuts pair perfectly with a cup of coffee, tea, or a glass of cold milk.
Nutritional Information
(Estimated per doughnut, excluding glaze or toppings):
| Nutrient | Amount per Serving | % Daily Value |
|---|---|---|
| Calories | 246 kcal | 12% |
| Total Fat | 8.9g | 11% |
| Saturated Fat | 1.6g | 8% |
| Cholesterol | 72.7mg | 24% |
| Sodium | 198.2mg | 9% |
| Total Carbohydrate | 36.7g | 13% |
| Dietary Fiber | 0.6g | 2% |
| Sugars | 18.5g | 37% |
| Protein | 5.1g | 10% |
Variations & Substitutions
- Gluten-Free: Substitute a gluten-free all-purpose flour blend for the pastry flour. Be sure to use a blend that contains xanthan gum, as it helps to bind the ingredients together.
- Vegan: Replace the eggs with flax eggs (1 tablespoon ground flaxseed meal mixed with 3 tablespoons of water per egg) and use a plant-based milk alternative in place of the water (if not using buttermilk powder) or in place of the buttermilk/yogurt if using it as a substitution.
- Chocolate Chip: Gently fold 1/2 cup of mini chocolate chips into the batter before filling the doughnut pan.
- Lemon Poppy Seed: Add 1 tablespoon of lemon zest and 2 tablespoons of poppy seeds to the dry ingredients.
- Spice It Up: Experiment with other spices like cardamom, ginger, or cloves for a different flavor profile.
- Maple Glaze: Instead of a traditional glaze, whisk together powdered sugar with maple syrup and a touch of milk for a delicious maple-flavored glaze.
FAQs (Frequently Asked Questions)
Q: Can I use a muffin tin instead of a doughnut pan?
A: While a muffin tin will work, the doughnuts will not have the classic doughnut shape. Adjust baking time accordingly, as muffins may take slightly longer to bake.
Q: My doughnuts are dry. What did I do wrong?
A: Dry doughnuts are often the result of overbaking or using too much flour. Make sure to measure your flour accurately and avoid overbaking.
Q: Can I freeze these doughnuts?
A: Yes, baked doughnuts freeze well. Wrap them individually in plastic wrap and then place them in a freezer bag. They can be frozen for up to 2 months.
Q: Do I have to use buttermilk powder?
A: No, you can substitute 2 tablespoons of buttermilk or plain yogurt for the water. The acidity in these substitutes will help tenderize the dough.
Q: My doughnuts are sticking to the pan. How can I prevent this?
A: Make sure to thoroughly grease your doughnut pan with butter, shortening, or non-stick cooking spray. Even with a non-stick pan, greasing is recommended.
Final Thoughts
These baked doughnuts are a delightful and slightly healthier alternative to their fried counterparts, perfect for breakfast, brunch, or a sweet treat any time of day. Feel free to experiment with different flavors and toppings to create your own signature doughnuts. Don’t be afraid to get creative and share your creations with friends and family. Baking is about sharing love, one delicious bite at a time. I hope this recipe brings you as much joy and warmth as it brings me every time I bake them, carrying on a tradition of simple pleasures passed down through generations.