
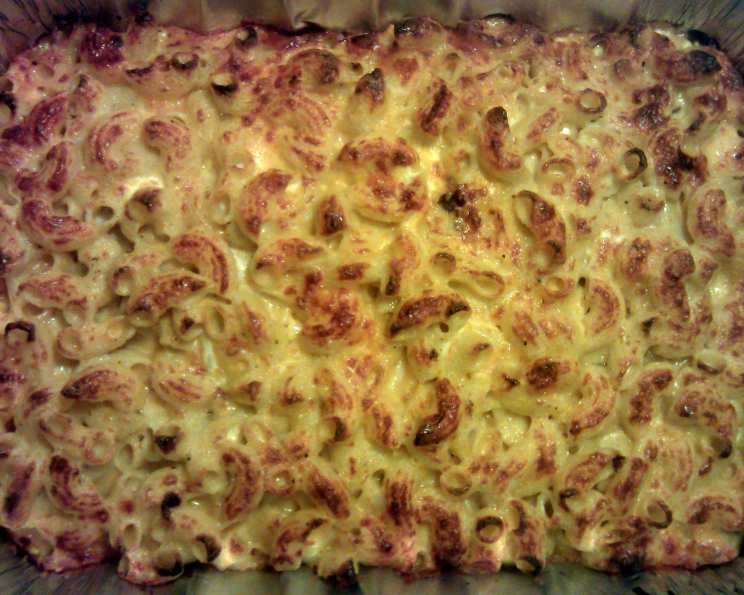
The Thanksgiving Mac & Cheese Revelation
I can still picture it: a whirlwind of flour, cheese, and nervous energy. It was Thanksgiving 2011, just days after our daughter was born. We were hosting for the first time, a monumental occasion made even more daunting by my mom being miles away, traveling. Her legendary baked mac & cheese was a holiday staple, and I was tasked with recreating it from scattered memories and frantic phone calls. Armed with her vague recollections and my own kitchen instincts, I cobbled together a recipe, layering cheeses and hoping for the best. The result? A cheesy, bubbly masterpiece that has graced our Thanksgiving table ever since. It wasn’t just mac & cheese; it was a symbol of family, resilience, and the delicious surprises that can arise from kitchen chaos.
Recipe Overview
- Prep Time: 20 minutes
- Cook Time: 35 minutes
- Total Time: 55 minutes
- Servings: 12-15
- Dietary Type: Comfort Food
Ingredients
- 16 ounces macaroni noodles
- 16 ounces Velveeta cheese, cut into cubes
- 1 1/2 cups milk
- 3 tablespoons margarine
- 1 tablespoon flour
- Salt and pepper to taste
- 16 ounces shredded Monterey Jack and Cheddar cheese blend
- 16 ounces shredded Colby-Monterey Jack cheese
- 1 egg
- Paprika
Equipment Needed
- Large pot
- Saucepan
- Colander
- 9×13 inch baking pan
- Aluminum foil
Instructions
- Preheat your oven to 375°F (190°C).
- Cook the macaroni noodles according to package directions until al dente. This is crucial, as the pasta will continue to cook in the oven. Overcooked noodles will result in a mushy mac & cheese.
- While the macaroni is cooking, prepare the cheese sauce. In a saucepan over medium heat, combine the cubed Velveeta cheese, milk, margarine, and flour.
- Season with salt and pepper. Remember, cheese is naturally salty, so start with a small amount and adjust to your taste.
- Continuously stir the cheese mixture until the Velveeta is completely melted and the sauce is smooth and creamy. This may take a few minutes, so be patient and keep stirring to prevent scorching.
- Once the macaroni is cooked, drain it well using a colander, removing as much excess water as possible.
- Add the drained macaroni to the saucepan with the cheese sauce. Stir to thoroughly coat the noodles in the creamy sauce. Ensure every noodle is coated in cheese.
- Grease a 9×13 inch baking pan with margarine or cooking spray. This will prevent the mac & cheese from sticking to the pan and make serving easier.
- Now, begin layering the macaroni mixture and the shredded cheeses in the prepared baking pan. Start with a layer of the macaroni mixture, then sprinkle a generous amount of the shredded Monterey Jack and Cheddar cheese blend and the shredded Colby-Monterey Jack cheese over the top. Repeat these layers until all of the macaroni mixture is used, reserving enough shredded cheese to completely cover the top layer.
- Beat the egg in a small bowl until lightly frothy. Pour the beaten egg evenly over the top layer of mac & cheese. This helps bind the topping and gives it a golden-brown color.
- Sprinkle the top generously with paprika for color and a subtle smoky flavor.
- Cover the baking pan tightly with aluminum foil. This will help to retain moisture and prevent the top from browning too quickly.
- Bake in the preheated oven at 375°F (190°C) for 30 minutes.
- Remove the aluminum foil and increase the oven temperature to 425°F (220°C). Bake for an additional 5 minutes, or until the top is golden brown and bubbly. Keep a close eye on it to prevent burning.
- Remove from the oven and let it rest for a few minutes before serving. This allows the cheese to set slightly and makes it easier to slice.
Expert Tips & Tricks
- For an extra creamy mac & cheese, try adding a small amount of cream cheese or sour cream to the cheese sauce. A few ounces will do the trick!
- If you want a crispier top, you can add breadcrumbs to the top layer of cheese. Toss the breadcrumbs with melted butter and sprinkle them evenly over the top before baking.
- To make this recipe ahead of time, assemble the mac & cheese in the baking pan, cover tightly with foil, and refrigerate for up to 24 hours. When ready to bake, add an extra 10-15 minutes to the baking time to ensure it’s heated through.
- If your mac & cheese becomes too dry during baking, add a splash of milk to the dish and stir gently before continuing to bake.
- Don’t be afraid to experiment with different cheeses! Gruyere, fontina, and smoked gouda are all delicious additions to this recipe.
Serving & Storage Suggestions
Serve the baked mac & cheese hot, straight from the oven. It’s a perfect side dish for holidays, potlucks, or family dinners. It pairs wonderfully with roasted chicken, grilled meats, or even a simple salad. For a more elegant presentation, garnish with fresh parsley or chives.
Leftovers can be stored in an airtight container in the refrigerator for up to 3-4 days. To reheat, you can microwave individual portions, but for best results, reheat in the oven at 350°F (175°C) until warmed through. Add a splash of milk or cream to keep it moist.
Freezing is also an option. Allow the mac & cheese to cool completely, then wrap it tightly in plastic wrap and aluminum foil. Freeze for up to 2-3 months. Thaw overnight in the refrigerator before reheating.
Nutritional Information
| Nutrient | Amount per Serving | % Daily Value |
|---|---|---|
| Calories | 589.8 kcal | N/A |
| Calories from Fat | 324 kcal | N/A |
| Total Fat | 36.1 g | 55% |
| Saturated Fat | 21.3 g | 106% |
| Cholesterol | 117 mg | 39% |
| Sodium | 1022 mg | 42% |
| Total Carbohydrate | 34.5 g | 11% |
| Dietary Fiber | 1.2 g | 4% |
| Sugars | 4.4 g | 17% |
| Protein | 31.2 g | 62% |
Note: Nutritional information is an estimate and may vary based on specific ingredients and portion sizes.
Variations & Substitutions
- Spicy Mac & Cheese: Add a pinch of cayenne pepper or a dash of hot sauce to the cheese sauce for a kick. You can also use pepper jack cheese for an extra layer of heat.
- Vegetarian Mac & Cheese: Add roasted vegetables like broccoli, cauliflower, or bell peppers to the mac & cheese for a more nutritious and flavorful dish.
- Gluten-Free Mac & Cheese: Use gluten-free macaroni noodles and a gluten-free flour blend for the cheese sauce.
- Deluxe Mac & Cheese: Incorporate cooked bacon, ham, or sausage for a heartier and more indulgent meal.
- Smoked Mac & Cheese: Add a touch of smoked paprika to the cheese sauce, or use smoked gouda cheese for a smoky flavor.
FAQs (Frequently Asked Questions)
Q: Can I use pre-shredded cheese, or is it better to shred my own?
A: Pre-shredded cheese is convenient, but freshly shredded cheese melts more smoothly. Pre-shredded cheese often contains cellulose, which can prevent it from melting as well.
Q: What if I don’t have Velveeta cheese?
A: Velveeta adds a specific creaminess, but you can substitute it with another smooth melting cheese like American cheese or a combination of cheddar and cream cheese.
Q: How do I prevent the top from burning?
A: If the top is browning too quickly, cover the dish loosely with aluminum foil for the last few minutes of baking.
Q: Can I add breadcrumbs to the topping?
A: Absolutely! Toss breadcrumbs with melted butter and sprinkle them over the top for a crispy crust.
Q: What’s the best way to reheat leftover mac & cheese without it drying out?
A: Add a splash of milk or cream when reheating to restore moisture. Reheating in the oven covered with foil also helps prevent it from drying out.
Final Thoughts
This baked mac & cheese is more than just a recipe; it’s a comforting hug in a dish, a reminder of family traditions and kitchen adventures. Don’t be afraid to make it your own, experiment with different cheeses and flavors, and most importantly, share it with the people you love. Whether you’re serving it at a holiday feast or a casual weeknight dinner, this mac & cheese is sure to be a crowd-pleaser. So gather your ingredients, preheat your oven, and get ready to create a cheesy masterpiece that will be remembered for years to come. I’d love to hear about your experiences making this recipe, so feel free to share your feedback and any delicious twists you add!