
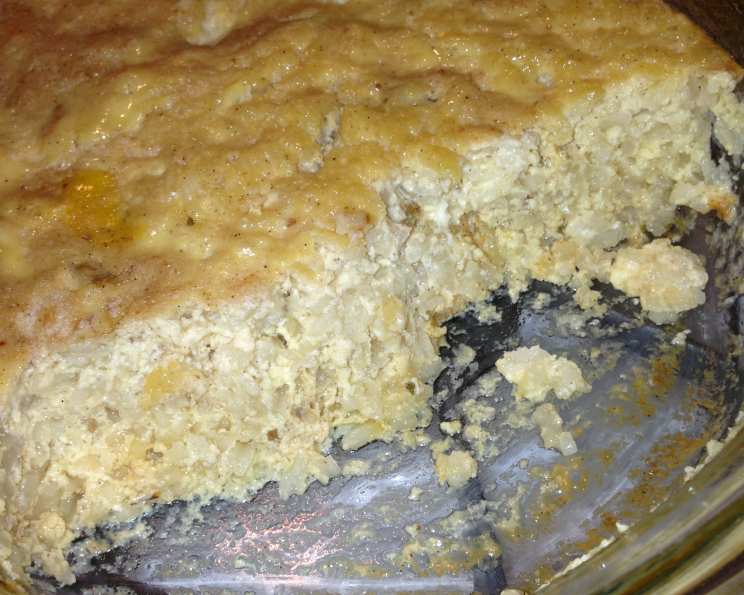
Baked Rice Pudding: A Taste of Home
My grandmother’s kitchen always smelled of cinnamon and something sweet simmering on the stove. More often than not, that comforting aroma belonged to her famous rice pudding. It wasn’t fancy, but it was pure love in a bowl, a taste of warmth that chased away every childhood worry. It’s a recipe I cherish and still make regularly.
Recipe Overview
- Prep Time: 10 minutes
- Cook Time: 45-50 minutes
- Total Time: 55-60 minutes
- Servings: 6
- Yield: 1 (10x6x2 inch) pan
- Dietary Type: Not suitable for dairy-free or gluten-free diets
Ingredients
- 2 cups whole milk
- 1/2 cup long grain rice (Uncle Ben’s)
- 1/2 cup raisins, plump (soaked in hot water for 5 minutes)
- 1/4 cup butter or margarine
- 3 eggs, beaten
- 1/2 cup granulated sugar
- 2 cups whole milk
- 1 teaspoon vanilla
- 1/2 teaspoon salt
- Ground nutmeg
- Ground cinnamon
- Light cream or heavy milk (for serving, optional)
Equipment Needed
- Heavy medium-sized saucepan
- Mixing bowl
- 10x6x2 inch baking pan or baking dish
- Whisk
- Measuring cups and spoons
Instructions
-
Preheat your oven to 325°F (160°C).
-
In a heavy medium-sized saucepan, combine 2 cups of milk, uncooked rice, and raisins (pre-soaked in hot water for 5 minutes) over medium heat. Bring the mixture to a boil, then immediately reduce the heat to low.
-
Cover the saucepan and let the rice simmer over very low heat for approximately 15 minutes, or until the rice is tender and has absorbed most of the milk. Stir occasionally to prevent sticking.
-
Remove the saucepan from the heat. Stir in the butter or margarine until it is completely melted and incorporated into the rice mixture. Set aside to cool slightly.
-
In a separate mixing bowl, whisk together the beaten eggs, 2 cups of milk, sugar, vanilla, and salt until well combined.
-
Gradually pour the slightly cooled rice mixture into the egg mixture, stirring constantly to temper the eggs and prevent them from curdling. Ensure everything is thoroughly mixed.
-
Pour the combined mixture into a greased 10x6x2 inch baking pan or baking dish.
-
Bake in the preheated oven for 30 minutes.
-
Remove the baking pan from the oven and stir the rice pudding mixture well. This helps distribute the heat and ensures even cooking.
-
Sprinkle the surface of the rice pudding generously with ground nutmeg and cinnamon.
-
Return the baking pan to the oven and bake for an additional 15-20 minutes, or until a knife inserted into the center comes out clean. The pudding should be set but still slightly jiggly.
-
Remove from the oven and let cool slightly before serving.
-
Serve warm or chilled. If desired, drizzle with light cream or heavy milk before serving.
Expert Tips & Tricks
- Soaking the Raisins: Plumping the raisins in hot water for 5 minutes ensures they are juicy and soft, preventing them from drawing moisture from the rice pudding during baking.
- Tempering the Eggs: Gradually adding the hot rice mixture to the egg mixture is crucial. This prevents the eggs from scrambling and gives the rice pudding a smooth, creamy texture.
- Stirring During Baking: Stirring the rice pudding halfway through baking ensures even cooking and prevents a skin from forming on the surface.
- Spice it up: A pinch of cardamom or allspice along with the nutmeg and cinnamon adds a more complex warm flavor.
- Achieving Perfect Consistency: The rice pudding is done when a knife inserted into the center comes out clean, but it should still be slightly jiggly. It will continue to set as it cools. Overbaking will result in a dry, crumbly pudding.
- Preventing Sticking: Using a heavy-bottomed saucepan helps prevent the rice from sticking and burning during the initial cooking stage. Stirring frequently also helps.
- Flavor Infusion: Consider infusing the milk with a vanilla bean during the initial cooking stage for a more intense vanilla flavor. Remove the bean before adding the rice to the pan.
Serving & Storage Suggestions
Baked rice pudding is delicious served both warm and chilled. A dollop of whipped cream, a sprinkle of extra cinnamon, or a drizzle of honey can elevate the serving experience.
To store leftovers, allow the rice pudding to cool completely before covering it tightly with plastic wrap or transferring it to an airtight container. Refrigerated rice pudding will keep for up to 3-4 days.
To reheat, microwave individual portions in 30-second intervals, stirring in between, until heated through. Alternatively, you can reheat larger quantities in a preheated oven at 300°F (150°C) until warmed through. Adding a splash of milk or cream while reheating can help restore moisture. Freezing is not recommended as it can alter the texture.
Nutritional Information
| Nutrient | Amount per Serving | % Daily Value |
|---|---|---|
| Calories | 361.7 kcal | N/A |
| Calories from Fat | 139 g | 39% |
| Total Fat | 15.5 g | 23% |
| Saturated Fat | 8.7 g | 43% |
| Cholesterol | 129.6 mg | 43% |
| Sodium | 369.1 mg | 15% |
| Total Carbohydrate | 46.6 g | 15% |
| Dietary Fiber | 0.7 g | 2% |
| Sugars | 32.2 g | N/A |
| Protein | 9.8 g | 19% |
Note: Nutritional information is an estimate and may vary based on specific ingredients and preparation methods.
Variations & Substitutions
- Dairy-Free Version: While the original recipe relies on dairy, a good start to making a dairy free version would be to substitute the whole milk with almond milk or oat milk. Note that the resulting flavor and texture may vary slightly.
- Different Rice: Experiment with other types of rice, such as Arborio or brown rice. Keep in mind that cooking times may need to be adjusted based on the type of rice used.
- Fruit Variations: Try adding different types of dried fruit, such as chopped dried apricots, cranberries, or cherries. You can also incorporate fresh fruit, such as berries or sliced bananas, after baking.
- Spice Variations: Adjust the spices to your liking. Add a pinch of ground ginger, cardamom, or allspice for a different flavor profile.
- Sweetener Options: Instead of granulated sugar, try using honey, maple syrup, or coconut sugar for a different flavor and sweetness level.
FAQs (Frequently Asked Questions)
Q: Can I use instant rice instead of long-grain rice?
A: While you can use instant rice, the texture will be different, and the cooking time will need to be adjusted. Long-grain rice provides a better, creamier texture.
Q: Can I make this recipe ahead of time?
A: Yes, rice pudding can be made a day in advance. Store it in the refrigerator and reheat it gently before serving.
Q: Why is my rice pudding too watery?
A: This usually means that it hasn’t been baked long enough. Return it to the oven for a few more minutes until a knife inserted into the center comes out clean.
Q: Can I add other flavorings besides vanilla?
A: Absolutely! A touch of almond extract, lemon zest, or orange zest can add a lovely twist to the flavor.
Q: How do I prevent the rice from sticking to the bottom of the pan?
A: Using a heavy-bottomed saucepan and stirring frequently during the initial cooking process can help prevent sticking.
Final Thoughts
There’s something undeniably comforting about a warm bowl of baked rice pudding. It’s a simple dessert, but its simplicity is what makes it so special. This recipe, passed down from my grandmother, is a reminder of home, love, and the sweet moments in life. I encourage you to try it, share it with loved ones, and create your own memories around this timeless classic. Pair it with a cup of strong coffee or a glass of chilled milk for the ultimate comforting treat. And don’t forget to leave a sprinkle of cinnamon on top – it’s the perfect finishing touch.