
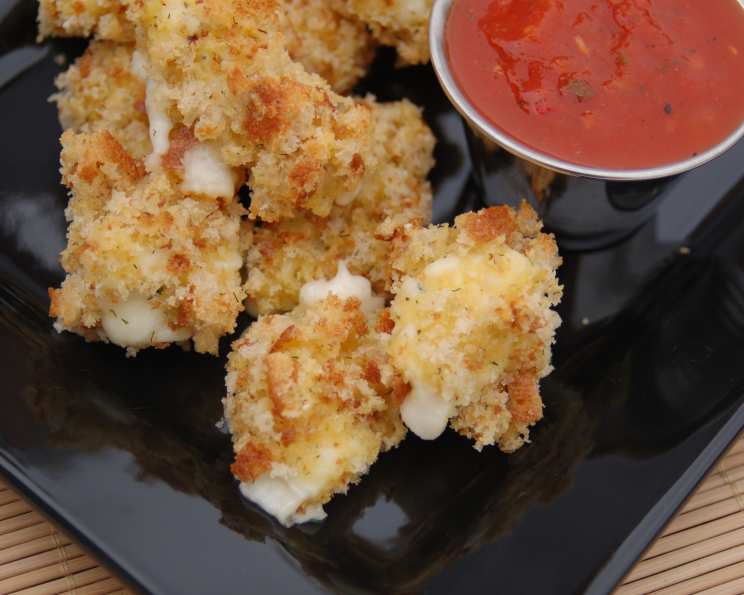
Baked Wisconsin Cheese Curds: A Midwestern Delight
There’s something magical about cheese curds. Growing up in Wisconsin, they were practically a food group. I still remember road trips with my family, stopping at roadside cheese factories, the squeak of a fresh curd between my teeth, the salty, milky flavor exploding on my tongue. While fried curds are a classic, I wanted to find a way to enjoy that cheesy goodness with a slightly lighter touch, still achieving that perfect golden-brown crust. This baked version captures all the joy of the original, but with a technique that’s just a little bit healthier and incredibly satisfying.
Recipe Overview
- Prep Time: 30 minutes
- Cook Time: 20 minutes
- Total Time: 50 minutes (plus freezing time)
- Servings: 4-6
- Yield: Variable, depending on cheese curd size
- Dietary Type: Not Gluten-Free
Ingredients
- 10 ounces cheese curds
- 1 cup flour
- 4 eggs, beaten
- 2 tablespoons milk
- 2 cups seasoned bread crumbs, Italian seasoned panko style
- 2 teaspoons salt
- 1 teaspoon ground pepper
- Olive oil flavored cooking spray
Equipment Needed
- Three shallow dishes or trays
- Wax paper
- Cookie sheet
- Freezer storage bag
- Parchment paper
Instructions
-
Prepare your breading station. In three separate shallow dishes or trays, set up the following:
- Tray 1: Flour, seasoned with 1 teaspoon of salt and ½ teaspoon of ground pepper.
- Tray 2: Eggs and milk, well beaten together and seasoned with the remaining 1 teaspoon of salt and ½ teaspoon of ground pepper.
- Tray 3: Seasoned bread crumbs, preferably Italian seasoned panko style.
-
Begin the double-breading process. This can get a little messy, but it’s crucial for a crispy coating. Use one hand for dry ingredients and the other for wet to minimize clumping.
- Take a cheese curd and dredge it completely in the flour, ensuring it’s fully coated.
- Next, dip the floured curd into the egg wash, allowing any excess to drip off.
- Immediately transfer the curd to the bread crumbs, pressing gently to coat thoroughly.
- Return the curd to the egg wash for a second dip, ensuring complete coverage.
- Finally, coat the curd once more in the bread crumbs, pressing to adhere. The goal is to completely encapsulate the cheese curd in a thick layer of breading.
-
Place the breaded cheese curds on a cookie sheet lined with wax paper, ensuring they are not touching.
-
Freeze the breaded cheese curds until they are firm. This step is essential to prevent the cheese from melting completely during baking. I recommend freezing them for at least four hours, but preferably overnight. Once frozen solid, the curds can be transferred to a freezer storage bag for longer storage.
-
When you’re ready to bake, preheat your oven to 400 degrees Fahrenheit (200 degrees Celsius).
-
Line a cookie sheet with parchment paper. This will prevent sticking and make cleanup easier.
-
Lightly spray each frozen, breaded cheese curd with olive oil flavored cooking spray. This helps to achieve a golden-brown and crispy crust. Arrange the sprayed curds on the prepared cookie sheet, leaving a little space between each one.
-
Bake for 15-20 minutes, or until the cheese curds are golden brown and the breading is crispy. Keep a close eye on them during the last few minutes of baking, as some curds may start to leak slightly. This is normal, but you want to avoid them melting completely.
-
Remove from the oven and let cool slightly before serving.
Expert Tips & Tricks
- Double Breading is Key: Don’t skip the second breading. It creates a thicker, more protective layer that helps keep the cheese inside.
- Freeze Solid: Ensure the cheese curds are thoroughly frozen before baking. This is the most important step to prevent complete meltdown.
- Don’t Overbake: Keep a close watch during baking. A little leakage is okay, but you want to pull them out before the cheese completely liquefies.
- Panko Power: Using panko bread crumbs adds extra crunch and a lighter texture compared to regular bread crumbs.
- Air Fryer Option: If you have an air fryer, you can adapt this recipe. Reduce the baking time by a few minutes and check frequently.
- Spice It Up: Add a pinch of cayenne pepper or garlic powder to the flour mixture for an extra kick.
Serving & Storage Suggestions
Serve the baked Wisconsin cheese curds immediately while they are warm and crispy. They are delicious on their own or served with a dipping sauce such as marinara sauce, ranch dressing, or even a spicy aioli.
Leftovers can be stored in an airtight container in the refrigerator for up to 3 days. To reheat, bake in a preheated oven at 350 degrees Fahrenheit (175 degrees Celsius) for 5-10 minutes, or until heated through and crispy. Microwaving is not recommended, as it will make the breading soggy.
You can also freeze the baked cheese curds for longer storage. Allow them to cool completely before transferring them to a freezer-safe container. To reheat, bake from frozen at 350 degrees Fahrenheit (175 degrees Celsius) for 10-15 minutes, or until heated through.
Nutritional Information
| Nutrient | Amount per Serving | % Daily Value |
|---|---|---|
| Calories | 421 kcal | 21% |
| Total Fat | 19g | 29% |
| Saturated Fat | 8g | 40% |
| Cholesterol | 188mg | 63% |
| Sodium | 2294mg | 96% |
| Total Carbohydrate | 66g | 22% |
| Dietary Fiber | 4g | 16% |
| Sugars | 4g | 8% |
| Protein | 18g | 36% |
Note: Nutritional information is an estimate and may vary based on specific ingredients and portion sizes.
Variations & Substitutions
- Gluten-Free: Use gluten-free flour and gluten-free bread crumbs for a gluten-free version.
- Different Cheese: While Wisconsin cheese curds are the classic choice, you can experiment with other cheeses that hold their shape well when baked, such as mozzarella or Monterey Jack, cut into curd-sized pieces.
- Seasoning Variations: Get creative with the seasoning in the bread crumbs. Try adding garlic powder, onion powder, paprika, or even a touch of cayenne pepper for a spicy kick.
- Herb Infusion: Mix fresh herbs like parsley, thyme, or oregano into the bread crumbs for a more aromatic flavor.
- Parmesan Crust: Add grated Parmesan cheese to the bread crumbs for an extra cheesy and savory crust.
FAQs (Frequently Asked Questions)
Q: Can I use regular bread crumbs instead of panko?
A: Yes, you can, but panko bread crumbs will give you a crispier texture. If using regular bread crumbs, make sure they are finely ground.
Q: Can I skip the freezing step?
A: Freezing is crucial. Without it, the cheese will likely melt completely and spread all over the baking sheet.
Q: My cheese curds are leaking during baking. What am I doing wrong?
A: A little leakage is normal, but excessive leakage means the cheese wasn’t frozen long enough or the oven temperature is too high. Try freezing for a longer period and reducing the baking time slightly.
Q: Can I make these ahead of time and bake them later?
A: Yes! You can bread the cheese curds and freeze them for up to a month. When ready to bake, simply follow the baking instructions.
Q: What dipping sauces go well with baked cheese curds?
A: Marinara sauce is a classic choice, but ranch dressing, spicy aioli, or even a simple honey mustard also work well.
Final Thoughts
These baked Wisconsin cheese curds are a delicious and surprisingly easy way to enjoy a taste of the Midwest. The double breading and freezing technique ensure a perfectly crispy crust and a gooey, melty interior. Whether you’re a cheese curd connoisseur or a curious newcomer, I encourage you to give this recipe a try. Don’t be afraid to experiment with different seasonings and dipping sauces to create your own unique version. And most importantly, enjoy every cheesy, crispy bite!