
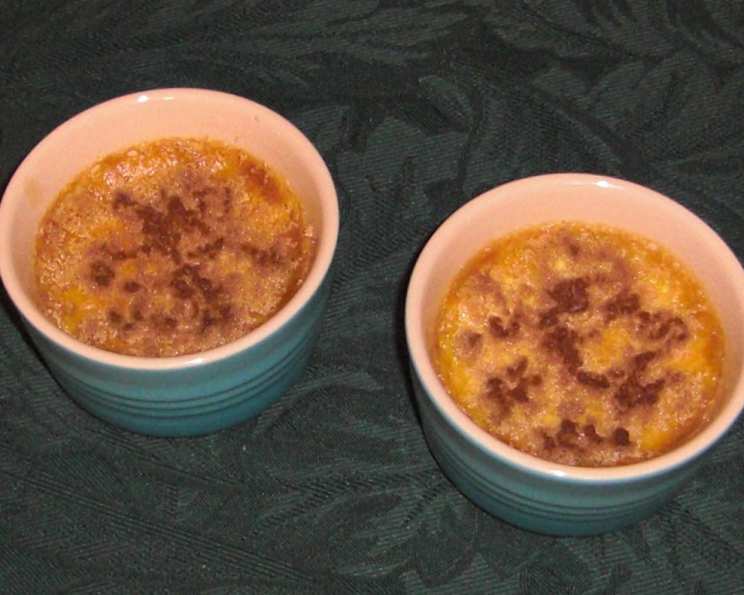
Baker’s Creme: A Decadent Custard Delight
My grandmother, Nana Elsie, wasn’t much of a cook, bless her heart. She preferred a bridge game to a baking pan any day. However, there was one dessert she made that I adored: a velvety smooth custard, topped with a crackling layer of caramelized sugar. I remember the pure joy of tapping the brittle surface with my spoon, the satisfying crack, and the rich, creamy flavor that followed. This Baker’s Creme is my attempt to recapture that childhood memory, to bring back that simple, elegant pleasure in every bite.
Recipe Overview
- Prep Time: 20 minutes
- Cook Time: 45 minutes
- Total Time: 1 hour 5 minutes (plus chilling time)
- Servings: 10
- Yield: 10 individual custards
- Dietary Type: Gluten-Free
Ingredients
- 4 cups whipping cream
- 10 large egg yolks
- 1 cup sugar
- 2 tablespoons vanilla extract
- Light brown sugar (for topping)
Equipment Needed
- Large heavy saucepan
- Electric mixer
- Large bowl
- Whisk
- Ten 6-ounce custard cups
- Large baking pan
- Sieve or fine-mesh strainer
Instructions
-
Preheat your oven to 350°F (175°C). This ensures even cooking of the custards.
-
In a large heavy saucepan, bring the whipping cream to a simmer over medium heat. Watch carefully, as cream can easily scorch. Simmering, not boiling, is the key – you want tiny bubbles forming around the edges.
-
While the cream is heating, in a large bowl, using an electric mixer, beat the egg yolks and sugar together. Continue beating until the mixture becomes pale yellow and forms a slowly dissolving ribbon when you lift the beaters. This indicates the yolks are properly aerated and will contribute to the custard’s smooth texture.
-
Gradually beat the hot cream into the yolk mixture. It’s crucial to add the cream slowly and in a thin stream to temper the eggs and prevent them from scrambling. Whisk constantly as you pour.
-
Stir in the vanilla extract. Vanilla enhances the richness of the custard and adds a beautiful aroma. Use a good quality vanilla extract for the best flavor.
-
Pour the custard into ten 6-ounce custard cups, dividing it evenly.
-
Arrange the custard cups in a large baking pan. Add enough warm water to the pan to come halfway up the sides of the cups. This creates a water bath (bain-marie), which helps the custards cook gently and evenly, preventing them from curdling.
-
Bake until the centers of the custards are just set, about 45 minutes. The custards should jiggle slightly when the pan is gently shaken. An instant-read thermometer inserted into the center should read around 175°F (80°C). If they are still too liquid, bake for a few more minutes, checking frequently. Overbaking will result in a rubbery texture.
-
Remove the cups from the water bath and allow them to cool slightly at room temperature.
-
Cover the cooled custards and refrigerate until well chilled, at least 4 hours, or preferably overnight. This allows the flavors to meld and the custard to fully set. You can prepare the custards up to one day ahead.
-
Just before serving, preheat your broiler. Keep a close eye on it; broilers vary in intensity and can quickly burn the sugar.
-
Press enough light brown sugar through a sieve over each custard to lightly and evenly cover the surface. The sieve ensures a fine, consistent layer of sugar, which will caramelize beautifully.
-
Broil the custards in batches until the sugar caramelizes and turns a deep golden brown, about 1 minute. Watch them like a hawk! The sugar can go from perfectly caramelized to burnt in seconds.
-
Cover the caramelized custards and refrigerate until well chilled again, at least one, and up to two hours, before serving. This allows the caramelized sugar to harden and create a satisfyingly crisp top.
Expert Tips & Tricks
- Tempering the eggs is crucial: Pouring the hot cream slowly into the egg yolk mixture while whisking constantly prevents the eggs from scrambling and ensures a smooth, creamy custard.
- The water bath is your friend: Don’t skip the water bath! It’s essential for even cooking and prevents the custards from curdling or cracking.
- Adjust baking time based on your oven: Ovens vary, so check the custards frequently after 40 minutes of baking. They are done when the centers are just set but still jiggle slightly.
- For a deeper caramel flavor, use dark brown sugar instead of light brown sugar.
- If your broiler is very strong, you can position the custards further away from the heat source to prevent burning. Alternatively, use a kitchen torch for more precise caramelization.
- Make it boozy! Add a tablespoon of your favorite liqueur, such as rum or brandy, to the custard mixture along with the vanilla extract.
Serving & Storage Suggestions
Baker’s Creme is best served chilled, allowing the contrast between the crisp caramelized sugar and the cool, creamy custard to shine. Garnish with fresh berries, a sprig of mint, or a dusting of cocoa powder for an elegant presentation.
Leftover custards, covered tightly, can be stored in the refrigerator for up to 3 days. The caramelized sugar topping will soften over time, so it’s best to broil the sugar just before serving. The custards are not suitable for freezing as the texture will change significantly.
Nutritional Information
| Nutrient | Amount per Serving | % Daily Value |
|---|---|---|
| Calories | 468 kcal | 23% |
| Total Fat | 39.7 g | 61% |
| Saturated Fat | 23.6 g | 118% |
| Cholesterol | 340.2 mg | 113% |
| Sodium | 44.6 mg | 2% |
| Total Carbohydrate | 23.6 g | 8% |
| Dietary Fiber | 0 g | 0% |
| Sugars | 20.5 g | 41% |
| Protein | 4.7 g | 9% |
Note: Nutritional information is an estimate and may vary based on specific ingredients and portion sizes.
Variations & Substitutions
- Infused Cream: For a hint of flavor, infuse the cream with citrus zest (lemon, orange, or lime) or spices (cinnamon, cardamom, or star anise) while it’s simmering. Remove the zest or spices before adding the cream to the egg yolks.
- Chocolate Baker’s Creme: Add 2 ounces of melted bittersweet chocolate to the custard mixture along with the vanilla extract.
- Coffee Baker’s Creme: Dissolve 1 tablespoon of instant espresso powder in the hot cream before adding it to the egg yolks.
- Dairy-Free Option: While this recipe traditionally uses whipping cream, you could experiment with full-fat coconut cream for a dairy-free version. The texture and flavor will be slightly different, but still delicious.
- Individual ramekins vs. One Large Dish: While the recipe calls for individual custard cups, you can also bake the custard in one large oven-safe dish. Adjust the baking time accordingly, checking for doneness as described above.
FAQs (Frequently Asked Questions)
Q: Why is my custard curdled?
A: Curdling usually happens when the eggs are cooked too quickly or at too high a temperature. Using a water bath and tempering the eggs properly will help prevent curdling.
Q: Can I use a different type of sugar for the caramelized topping?
A: While light brown sugar is recommended, you can also use granulated sugar or turbinado sugar. Brown sugar provides a richer, molasses-like flavor.
Q: How do I know when the custards are done baking?
A: The custards are done when the edges are set and the center jiggles slightly when the pan is gently shaken. An instant-read thermometer inserted into the center should read around 175°F (80°C).
Q: Can I make these ahead of time?
A: Yes! The custards can be prepared up to one day ahead and stored in the refrigerator until ready to broil the sugar topping.
Q: What can I do if I don’t have a broiler?
A: You can use a kitchen torch to caramelize the sugar topping. Alternatively, you can skip the caramelized topping altogether and simply serve the custards chilled.
Final Thoughts
Baker’s Creme is more than just a dessert; it’s a celebration of simple pleasures. The creamy texture, the rich vanilla flavor, and the satisfying crunch of the caramelized sugar create a symphony of sensations that will delight your taste buds. I encourage you to try this recipe and experience the joy of creating something truly special. Share it with your loved ones, experiment with variations, and most importantly, savor every delicious bite. Pair it with a glass of dessert wine or a strong cup of coffee for the perfect ending to any meal. And if you happen to make it, I’d love to hear about your experience – feel free to share your thoughts and photos!