
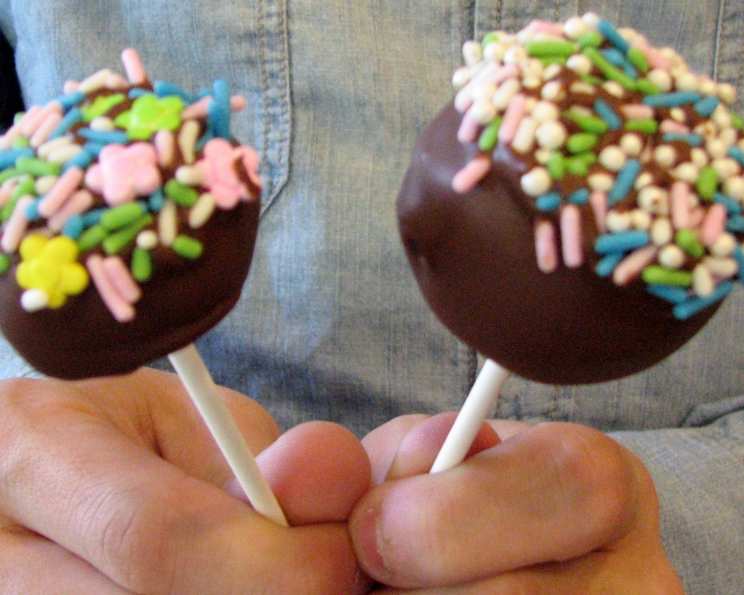
Banana Cake Balls Wrapped in Chocolate
My grandmother, bless her heart, wasn’t much of a baker. But she had a few tricks up her sleeve, mostly involving doctoring up store-bought staples. I remember being utterly delighted by her “surprise” desserts – simple things elevated with a bit of cleverness. This recipe reminds me of those sweet memories. It’s wonderfully playful and approachable, perfect for getting kids involved in the kitchen. Biting into one of these chocolate-covered spheres brings me right back to her sunny kitchen, the scent of vanilla hanging in the air, and the pure joy of a simple treat.
Recipe Overview
- Prep Time: 30 minutes
- Cook Time: 1 1/2 minutes (for melting chocolate)
- Total Time: 1 hour 31 1/2 minutes (including freezing time)
- Servings: 36 Cake Balls
- Yield: 36 Cake Balls
- Dietary Type: Not specified
Ingredients
- 1/2 cup cold milk
- 1 (3 1/2 ounce) package vanilla flavor instant pudding mix
- 1 fully ripe banana, mashed
- 10 3/4 ounces pound cake, thawed, crumbled into fine crumbs (another yellow cake could work well)
- Milk chocolate candy bar, chopped
- 2 tablespoons multi-colored candy sprinkles (or another decoration; nuts also work nicely)
Equipment Needed
- Medium bowl
- Large spoon
- Cookie scoop
- Waxed paper
- Rimmed baking sheet
- Microwaveable bowl
- Disposable fork (or lollipop/popsicle sticks)
Instructions
- In a medium bowl, stir together the cold milk and vanilla flavor instant pudding mix with a large spoon just until the pudding mix is moistened. It should come together quickly.
- Immediately add the mashed banana and cake crumbs to the pudding mixture. Mix everything well until evenly combined. This step might be a little messy, but it’s crucial to ensuring the banana is distributed throughout the cake.
- To portion the cake balls, use a cookie scoop. This will help ensure that all your cake balls are uniform in size.
- After scooping, roll the cake mixture between the palms of your hands to form smooth, round balls. Aim for about 36 (1-inch) balls.
- Place the shaped cake balls on a rimmed baking sheet that has been covered with waxed paper. This prevents them from sticking and makes them easier to transfer later.
- Freeze the baking sheet with the cake balls for 1 hour. This is a very important step! Freezing helps the balls firm up, making them easier to dip in chocolate without falling apart. Don’t skip this step.
- While the cake balls are freezing, prepare the chocolate. Chop the milk chocolate candy bar into small pieces and place them in a medium microwaveable bowl.
- Melt the chocolate in the microwave on HIGH for 1 1/2 minutes, stirring after 1 minute. Keep a close eye on it to prevent burning. If the chocolate isn’t fully melted after 1 1/2 minutes, microwave it in 15-second intervals, stirring in between, until smooth.
- To easily coat the cake balls, remove the inner tines of a disposable fork; set aside. This creates a sort of cradle for the balls while dipping and draining excess chocolate. Alternatively, use lollipop or popsicle sticks.
- Remove the frozen cake balls from the freezer. Working in batches, add the cake balls to the bowl of melted chocolate.
- Use a spoon or rubber scraper to evenly coat each ball with chocolate. Ensure every part of the cake ball is covered for a beautiful finish.
- Remove the coated cake balls with the prepared fork (or skewer each pop with a lollipop/popsicle stick). Gently tap the fork on the edge of the bowl to remove any excess chocolate.
- Place the chocolate-covered cake balls back onto the waxed paper-covered baking sheet.
- Immediately top the chocolate-covered balls with multi-colored candy sprinkles or your desired decoration. Adding the sprinkles right away ensures they stick to the melted chocolate before it sets.
- Let the cake balls stand until the chocolate coating is firm. This will take about 20-30 minutes at room temperature, or you can speed up the process by placing them in the refrigerator for 10-15 minutes.
Expert Tips & Tricks
- Cake Selection: While the recipe calls for pound cake, don’t hesitate to experiment with other types of yellow cake or even vanilla cake. The key is to use a cake that’s not too dry and has a good flavor.
- Chocolate Melting: Be cautious when melting chocolate in the microwave. It can burn quickly. Start with shorter intervals and stir frequently. If you prefer, you can melt the chocolate using a double boiler.
- Preventing Cracks: To prevent cracks in the chocolate coating, ensure the cake balls are thoroughly frozen and the melted chocolate isn’t too hot.
- Decoration Adherence: If your sprinkles or decorations aren’t sticking well, lightly brush the chocolate-covered balls with a small amount of melted chocolate before adding the toppings. This provides a stickier surface.
Serving & Storage Suggestions
These banana cake balls are best served slightly chilled, but they are also delicious at room temperature. Arrange them on a platter for an eye-catching dessert, or package them in small cellophane bags for party favors.
To store leftovers, place the cake balls in an airtight container and keep them in the refrigerator for up to 3 days. You can also freeze them for longer storage (up to 1 month). Let them thaw in the refrigerator before serving. They are not recommended for reheating, as the chocolate can melt.
Nutritional Information
| Nutrient | Amount per Serving | % Daily Value (estimated) |
|---|---|---|
| Calories | 120 kcal | 6% |
| Total Fat | 6g | 8% |
| Saturated Fat | 4g | 20% |
| Cholesterol | 5mg | 2% |
| Sodium | 50mg | 2% |
| Total Carbohydrate | 15g | 5% |
| Dietary Fiber | 0.5g | 2% |
| Sugars | 10g | |
| Protein | 1g | 2% |
Variations & Substitutions
- Different Cake Flavors: Swap the pound cake for chocolate cake, red velvet cake, or even spice cake for a different flavor profile.
- Chocolate Variations: Use dark chocolate, white chocolate, or flavored melting wafers instead of milk chocolate.
- Nut Butter Swirl: Before freezing the cake balls, swirl a small amount of peanut butter or almond butter into the mixture for a nutty twist.
- Gluten-Free Option: Use a gluten-free cake mix to make the cake crumbs, ensuring the recipe is suitable for those with gluten sensitivities.
- Vegan Modification: Substitute the milk with a plant-based alternative like almond milk or soy milk. Ensure the pudding mix and chocolate are also vegan-friendly.
FAQs (Frequently Asked Questions)
Q: Can I make these cake balls ahead of time?
A: Absolutely! You can make the cake balls and freeze them for up to a month. Just thaw them in the refrigerator before dipping them in chocolate.
Q: My chocolate is seizing up. What can I do?
A: This usually happens when a little bit of water gets into the chocolate. Try adding a teaspoon of vegetable oil or shortening and stirring vigorously. If it’s too far gone, it might be best to start with fresh chocolate.
Q: Can I use a different type of pudding mix?
A: Yes, you can experiment with different flavors like chocolate, butterscotch, or cheesecake pudding mix to complement the banana flavor.
Q: What can I use instead of sprinkles?
A: Get creative! Chopped nuts, shredded coconut, mini chocolate chips, or even crushed cookies would make delicious toppings.
Q: Why are my cake balls falling apart when I dip them?
A: This usually means they weren’t frozen long enough. Make sure the cake balls are firm before dipping them in the melted chocolate.
Final Thoughts
This recipe for Banana Cake Balls Wrapped in Chocolate is a guaranteed crowd-pleaser. They are easy to make, customizable, and utterly irresistible. Gather your friends and family, get into the kitchen, and create some sweet memories together. Whether you stick to the classic recipe or experiment with different flavors and toppings, these little treats are sure to bring a smile to everyone’s face. I encourage you to give this recipe a try and share your own creative twists. After all, the best recipes are those that evolve with our own personal touches.