
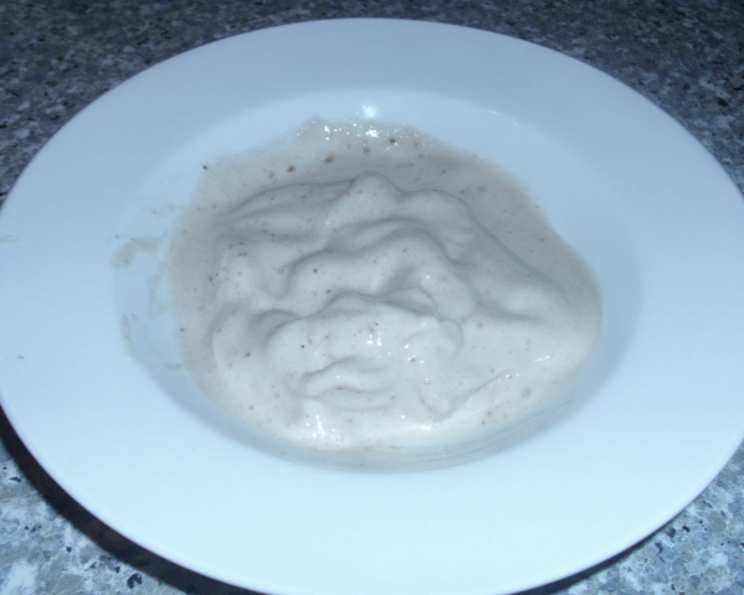
One-Ingredient Wonder: The Magic of No-Machine Banana Ice Cream
I’ll never forget the summer my grandfather, a true champion of simple pleasures, introduced me to this magical dessert. We were sweltering in the Texas heat, and the ice cream truck was nowhere to be found. He winked, pulled out a bag of frozen bananas from the freezer, and, with a whir of his ancient food processor, created the most delicious, naturally sweet “ice cream” I had ever tasted. It was pure, unadulterated banana bliss, a reminder that the best things in life are often the simplest. This recipe isn’t just a dessert; it’s a shortcut to a childhood memory, one perfectly frozen bite at a time.
Recipe Overview
- Prep Time: 10 minutes
- Cook Time: 0 minutes
- Total Time: 10 minutes
- Servings: 3
- Yield: 3 servings
- Dietary Type: Gluten-Free, Vegan (adaptable), Dairy-Free (adaptable)
Ingredients
- 500 g ripe bananas (peeled, sliced thin, and frozen)
- 1/4 cup milk (dairy or non-dairy such as rice milk or even orange juice)
- 2-3 tablespoons sugar (adjust to taste)
Equipment Needed
- Food Processor (a high-powered blender may work but results may vary)
- Measuring Cups and Spoons
- Freezer-safe container (optional, for storing leftovers)
Instructions
- Begin by ensuring your bananas are properly frozen. They should be peeled, thinly sliced, and frozen solid. The thinner the slices before freezing, the easier the blending process will be. A good rule of thumb is to freeze them for at least 2 hours, but overnight is ideal.
- Place the frozen banana slices and sugar into the bowl of your food processor.
- Process the bananas and sugar until the mixture starts to pulverize. This will take a few minutes, and you’ll need to be patient. The mixture will likely look crumbly and dry at first.
- With the food processor running, gradually add the milk (or rice milk or orange juice) one tablespoon at a time. Continue to process until the mixture transforms into a smooth, creamy texture resembling soft-serve ice cream. This is the crucial step, so don’t rush it! Stop occasionally to scrape down the sides of the food processor to ensure everything is evenly blended.
- Taste and adjust the sweetness as needed. If you prefer a sweeter ice cream, add another tablespoon of sugar and process until incorporated.
- Serve immediately for a soft-serve consistency. If you prefer a firmer texture, transfer the banana ice cream to a freezer-safe container and freeze for about 30 minutes to an hour before serving.
Expert Tips & Tricks
- Ripeness is Key: Use very ripe bananas, as they are naturally sweeter and will produce a smoother ice cream. Bananas with brown spots are perfect!
- Freezing Technique: Freeze the sliced bananas in a single layer on a baking sheet before transferring them to a freezer bag. This prevents them from clumping together and makes them easier to process.
- Patience is a Virtue: The process of transforming frozen bananas into ice cream takes time. Don’t be discouraged if the mixture looks crumbly at first. Just keep processing and adding the liquid gradually.
- Liquid Alternatives: Experiment with different liquids to customize the flavor. Coconut milk adds richness, while almond milk provides a subtle nutty flavor. A splash of coffee or a tablespoon of peanut butter can also elevate the flavor profile.
- Food Processor Power: The power of your food processor will affect the outcome. A high-powered machine will produce a smoother ice cream in less time. If you have a less powerful processor, you may need to add a bit more liquid and process for a longer time.
Serving & Storage Suggestions
Serve your freshly made banana ice cream immediately for the best soft-serve texture. You can garnish it with fresh fruit, chocolate shavings, chopped nuts, or a drizzle of honey or maple syrup.
If you have leftovers, store them in an airtight container in the freezer for up to a week. Keep in mind that the texture will become firmer over time. To soften the ice cream before serving, let it sit at room temperature for a few minutes or pulse it in the food processor again until it reaches the desired consistency.
It’s best enjoyed within a few days for optimal flavor and texture, and due to its natural ingredients, it might develop ice crystals if stored for longer periods.
Nutritional Information
(Approximate values per serving – using dairy milk and 2 tablespoons sugar)
| Nutrient | Amount per Serving | % Daily Value |
|---|---|---|
| Calories | 220 kcal | 11% |
| Total Fat | 3g | 4% |
| Saturated Fat | 2g | 10% |
| Cholesterol | 10mg | 3% |
| Sodium | 50mg | 2% |
| Total Carbohydrate | 48g | 17% |
| Dietary Fiber | 4g | 14% |
| Sugars | 30g | |
| Protein | 4g | 8% |
Variations & Substitutions
- Vegan Banana Ice Cream: Use rice milk, almond milk, coconut milk, or orange juice in place of dairy milk.
- Chocolate Banana Ice Cream: Add 2 tablespoons of cocoa powder to the food processor along with the bananas and sugar.
- Peanut Butter Banana Ice Cream: Add 2 tablespoons of peanut butter to the food processor for a rich, nutty flavor.
- Berry Banana Ice Cream: Add a handful of frozen berries (strawberries, blueberries, raspberries) to the food processor for a fruity twist.
- Spice it Up: Add a pinch of cinnamon, nutmeg, or cardamom for a warm, comforting flavor.
- Tropical Twist: Substitute some of the milk with pineapple juice and add shredded coconut for a taste of the tropics.
FAQs (Frequently Asked Questions)
Q: Can I use a blender instead of a food processor?
A: A high-powered blender may work, but a food processor is generally recommended for its ability to handle frozen ingredients more effectively. You may need to add more liquid to get it to blend, but be careful not to add too much.
Q: How do I prevent the banana ice cream from becoming icy in the freezer?
A: To minimize ice crystals, ensure the ice cream is stored in an airtight container and freeze it for a shorter period (30 minutes to an hour) if you prefer a softer consistency.
Q: Can I use any type of banana for this recipe?
A: While any banana will work, ripe bananas with brown spots are ideal as they are sweeter and will result in a smoother, more flavorful ice cream.
Q: How much sugar should I add?
A: The amount of sugar is adjustable based on your preference and the ripeness of your bananas. Start with 2 tablespoons and add more to taste.
Q: My banana ice cream is too soft. What can I do?
A: If the ice cream is too soft, transfer it to a freezer-safe container and freeze for 30 minutes to an hour to firm it up.
Final Thoughts
This no-machine banana ice cream is a revelation in simplicity. It’s a testament to the fact that delicious, satisfying treats don’t always require complex ingredients or fancy equipment. Whether you’re looking for a healthy dessert alternative, a quick and easy snack, or a way to use up those overripe bananas, this recipe is a guaranteed winner. So, go ahead, give it a try, and prepare to be amazed by the magic of frozen bananas! Feel free to experiment with different flavors and share your creations with friends and family. This recipe is a blank canvas, waiting for your personal touch. Enjoy!