
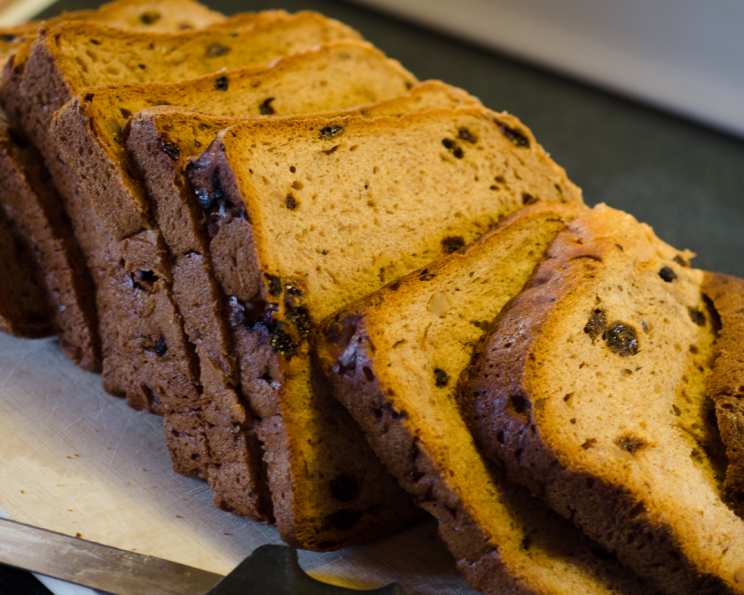
The Easiest, Most Delicious Banana Nut Raisin Bread (ABM Recipe!)
The aroma of warm banana bread baking is one of my earliest and fondest childhood memories. I remember standing on a step stool, mesmerized as my grandmother carefully measured ingredients, her hands dusted with flour. The comforting scent would fill her cozy kitchen, promising a treat that was both simple and utterly satisfying. This Banana Nut Raisin Bread recipe, adapted for the bread machine, brings back those cherished moments with every slice, offering that same sense of home and happiness.
Recipe Overview
- Prep Time: 15 minutes
- Cook Time: 3 hours
- Total Time: 3 hours 15 minutes
- Servings: 12
- Yield: 1 1.5 lb loaf
- Dietary Type: Vegetarian
Ingredients
- 1 cup milk
- 2 tablespoons butter
- 2 ripe bananas
- 3 1/2 cups all-purpose flour
- 2 tablespoons white sugar
- 1 teaspoon salt
- 1 teaspoon ground cinnamon
- 2 teaspoons dry active yeast
- 1/2 cup raisins
- 1/2 cup walnuts, chopped
Equipment Needed
- Bread machine
- Measuring cups and spoons
- Chopping board
- Knife
Instructions
- Add the ingredients to your bread machine pan in the order recommended by the manufacturer. Typically, this involves placing the wet ingredients first: milk, butter, and bananas (no need to mash them beforehand; the bread machine will take care of that!).
- Next, add the dry ingredients: flour, sugar, salt, cinnamon, and yeast. Ensure the salt and yeast are kept separate initially to prevent the salt from inhibiting the yeast activity.
- Secure the bread machine pan in the appliance.
- Select the basic setting on your bread machine.
- Press start.
- If your bread machine has a fruit/nut dispenser, add the raisins and walnuts to the dispenser. The machine will automatically add them at the appropriate time (usually during the last kneading cycle). If your machine doesn’t have a dispenser, add the raisins and walnuts manually about 5 minutes before the end of the kneading cycle. This prevents them from being overly processed.
- Allow the bread machine to complete its cycle, which typically takes around 3 hours.
- Once the baking cycle is complete, carefully remove the bread machine pan from the appliance.
- Use oven mitts, as the pan will be very hot.
- Turn the pan upside down and gently shake to release the bread onto a cooling rack. If the bread sticks, use a non-stick spatula to loosen it.
- Let the bread cool completely on the rack before slicing. This prevents the bread from becoming gummy and ensures cleaner slices. Cooling time can vary, but 30 minutes to an hour is generally sufficient.
Expert Tips & Tricks
- For a richer flavor, use browned butter. To brown the butter, melt it in a saucepan over medium heat. Continue cooking, swirling occasionally, until the butter turns a nutty brown color and has a fragrant aroma. Let it cool slightly before adding it to the bread machine.
- If you want to intensify the banana flavor, use overripe bananas with dark spots. The riper the banana, the sweeter and more flavorful it will be.
- Ensure your yeast is fresh. Expired yeast will not activate properly, resulting in a dense, flat loaf. To test your yeast, dissolve a small amount in warm water with a pinch of sugar. If it foams within 5-10 minutes, it’s active.
- If you live in a dry climate, you might need to add a tablespoon or two of water to the dough to achieve the right consistency. The dough should be slightly tacky but not sticky. Conversely, in a humid climate, you might need to add a tablespoon or two of flour.
- Always measure your ingredients accurately, especially the flour. Using too much flour can result in a dry, dense loaf.
- Consider using a bread machine with a delayed start timer if you want to wake up to the aroma of freshly baked bread. Just set the timer before you go to bed, and the bread machine will automatically start the baking process at the designated time.
Serving & Storage Suggestions
Serve this Banana Nut Raisin Bread warm or at room temperature. It’s delicious on its own, but you can also spread it with butter, cream cheese, or your favorite jam. It’s also a great accompaniment to coffee or tea.
To store leftover bread, wrap it tightly in plastic wrap or place it in an airtight container. It will keep at room temperature for up to 3 days. For longer storage, you can freeze the bread for up to 2 months. To freeze, slice the bread first, wrap each slice individually in plastic wrap, and then place the slices in a freezer-safe bag or container. This makes it easy to thaw and enjoy just a few slices at a time.
To reheat frozen bread, thaw it at room temperature or in the microwave. You can also toast it for a warm, crispy slice.
Nutritional Information
| Nutrient | Amount per Serving | % Daily Value |
|---|---|---|
| Calories | 241 kcal | 12% |
| Total Fat | 8g | 10% |
| Saturated Fat | 3g | 15% |
| Cholesterol | 8mg | 3% |
| Sodium | 220mg | 9% |
| Total Carbohydrate | 37g | 14% |
| Dietary Fiber | 2g | 7% |
| Sugars | 8g | |
| Protein | 5g | 10% |
Nutritional information is an estimate and can vary based on specific ingredients and portion sizes.
Variations & Substitutions
- Chocolate Chip Banana Bread: Substitute 1/2 cup of the walnuts with 1/2 cup of chocolate chips (milk, dark, or semi-sweet).
- Spiced Banana Bread: Add 1/4 teaspoon of ground nutmeg or allspice to the batter for a warmer, spicier flavor.
- Vegan Banana Bread: Substitute the milk with almond milk or soy milk and the butter with vegan butter or coconut oil.
- Gluten-Free Banana Bread: Use a gluten-free all-purpose flour blend instead of regular all-purpose flour. You may need to add a binder like xanthan gum for the best texture (follow the instructions on your flour blend).
- Tropical Banana Bread: Add 1/2 cup of shredded coconut to the batter along with the raisins and walnuts.
- Cranberry Walnut Banana Bread: Swap out the raisins for dried cranberries for a tart and sweet twist.
FAQs (Frequently Asked Questions)
Q: Can I use frozen bananas in this recipe?
A: Yes, you can use frozen bananas. Thaw them completely before adding them to the bread machine. Be sure to drain any excess liquid, as this can affect the consistency of the dough.
Q: My bread machine doesn’t have a fruit/nut dispenser. How do I add the raisins and walnuts?
A: If your bread machine doesn’t have a dispenser, add the raisins and walnuts manually about 5 minutes before the end of the kneading cycle. This prevents them from being overly processed.
Q: The top of my bread is sinking in the middle. What could be the reason?
A: This can happen if there is too much moisture in the dough or if the yeast is too active. Try reducing the amount of liquid slightly or using less yeast in your next batch.
Q: Can I reduce the amount of sugar in this recipe?
A: Yes, you can reduce the amount of sugar slightly without significantly affecting the outcome. However, keep in mind that sugar contributes to both the sweetness and the texture of the bread, so reducing it too much might result in a less desirable result.
Q: How can I prevent the nuts from sinking to the bottom of the bread?
A: Toss the nuts in a tablespoon or two of flour before adding them to the bread machine. This helps them stay suspended in the dough during baking.
Final Thoughts
There’s something inherently comforting about a slice of warm, homemade Banana Nut Raisin Bread. This bread machine version simplifies the process without sacrificing any of the deliciousness. I encourage you to give this recipe a try and experience the joy of creating a treat that is both easy to make and deeply satisfying. Share your creations with friends and family, and don’t hesitate to experiment with different variations to make it your own. After all, the best recipes are those that are shared and adapted with love. Pair it with a steaming mug of coffee or a scoop of vanilla ice cream for the ultimate indulgence!