
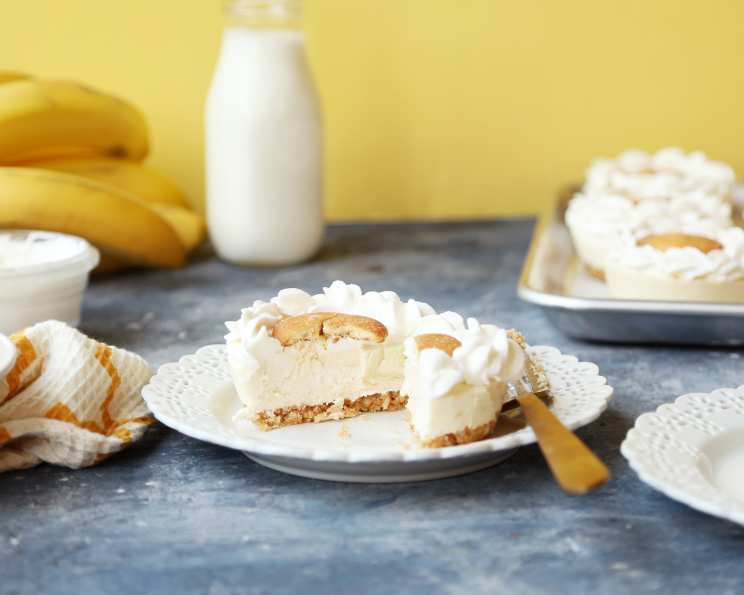
Banana Pudding Cheesecake Bites: A No-Bake Dream
The first time I tasted banana pudding was at my grandmother’s house, a staple at every summer barbecue. The creamy, sweet decadence layered with vanilla wafers was pure nostalgia in every bite. These Banana Pudding Cheesecake Bites capture that same comforting flavor, but with a delightful twist – the richness of a cheesecake, all without even turning on the oven. These little treats are a perfect blend of classic flavors and effortless preparation.
Recipe Overview
- Prep Time: 25 minutes
- Cook Time: 0 minutes
- Total Time: 4+ hours (chilling time required)
- Servings: 24
- Yield: 24 bites
- Dietary Type: Not specified (Contains dairy)
Ingredients
-
Nonstick cooking spray
-
For the Crust:
- 2 cups finely crushed vanilla wafer crumbs
- 6 tablespoons melted unsalted butter, cooled
- 2 tablespoons sugar
-
For the Filling:
- ½ cup sugar
- 1 (3 ½ ounce) package instant banana pudding mix
- 1 ½ cups whole milk
- 3 tablespoons Bourbon
- 2 (8 ounce) blocks cream cheese
- 2 cups Cool Whip, plus 2 cups for topping
- 1 cup whole vanilla wafers
Equipment Needed
- Two large silicone muffin tins
- Large bowl
- Medium bowl
- Whisk
- Stand mixer with paddle attachment (or electric hand mixer)
- Piping bag with medium star tip (optional)
Instructions
-
Begin by prepping your muffin tins. Generously spray two large silicone muffin tins with nonstick cooking spray. This is crucial for easy removal of the cheesecake bites later.
-
Prepare the Crust: In a large bowl, combine the vanilla wafer crumbs with the melted butter and 2 tablespoons sugar. Mix until evenly incorporated, ensuring all the crumbs are moistened with the butter.
-
Assemble the Crusts: Divide the crumb mixture evenly into the prepared muffin trays. Using your fingers or the back of a spoon, press down firmly to form a smooth, even crust in each muffin cup.
-
Chill the Crusts: Place the muffin pans in the freezer while you prepare the filling. This will help the crusts set and prevent them from crumbling when you add the filling.
-
Make the Pudding: In a medium bowl, whisk together the pudding mix, milk, and Bourbon until well combined. The Bourbon adds a lovely depth of flavor, but can be omitted for a non-alcoholic version.
-
Firm Up the Pudding: Place the pudding mixture in the refrigerator and let it chill until firm, about 15-20 minutes.
-
Cream the Cheese: In the bowl of a stand mixer fitted with the paddle attachment (or using an electric hand mixer), beat the cream cheese and ½ cup sugar until light and fluffy, about 2 minutes. Make sure the cream cheese is softened for easy mixing and a smooth texture.
-
Combine Filling Ingredients: Add the chilled pudding to the cream cheese mixture and mix until just combined. Be careful not to over-mix at this stage, as it can affect the texture of the cheesecake.
-
Fold in the Cool Whip: Gently fold in 2 cups of Cool Whip, being careful not to over-mix. Over-mixing can deflate the Cool Whip and result in a less airy filling.
-
Fill the Crusts: Divide the cheesecake filling evenly into the muffin pans over the prepared crusts. Spread to create a smooth surface on each cheesecake bite.
-
Chill Thoroughly: Place the filled muffin pans in the refrigerator and chill for at least 4 hours, or preferably overnight. This allows the cheesecake to fully set and develop its flavors.
-
Freeze Before Serving (Optional): For easier removal, place the muffin pans in the freezer for an hour before serving. This will firm up the cheesecakes, making them easier to pop out of the silicone molds.
-
Assemble and Decorate: Remove the chilled cheesecakes from the pans and place them on a plate or platter.
-
Add Final Touches: Place the remaining 2 cups of Cool Whip in a piping bag fitted with a medium star tip. Dollop each cheesecake with a bit of Cool Whip and spread it out into an even layer.
-
Garnish: Place a whole vanilla wafer in the center of each cheesecake, then pipe a decorative border around the edge of each cheesecake. This adds a beautiful finishing touch and a hint of extra vanilla flavor.
Expert Tips & Tricks
- For a smoother cheesecake filling, ensure your cream cheese is completely softened before mixing.
- Don’t have Bourbon? A teaspoon of vanilla extract or banana liqueur works well as a substitute.
- If you don’t have silicone muffin tins, line regular muffin tins with cupcake liners for easy removal.
- To prevent the crust from becoming soggy, brush it with a thin layer of melted white chocolate before adding the filling.
- For an even more intense banana flavor, add a sliced banana to the filling. Gently fold it in along with the Cool Whip.
Serving & Storage Suggestions
Serve these Banana Pudding Cheesecake Bites chilled. They are a perfect dessert for parties, potlucks, or a simple weeknight treat.
Storage: Store leftover cheesecake bites in an airtight container in the refrigerator for up to 3 days. They can also be frozen for longer storage (up to 1 month). To freeze, individually wrap each cheesecake bite in plastic wrap before placing them in a freezer-safe container. Thaw in the refrigerator before serving.
Nutritional Information
| Nutrient | Amount per Serving | % Daily Value |
|---|---|---|
| Calories | 497.9 kcal | N/A |
| Calories from Fat | 272 g | 55% |
| Total Fat | 30.3 g | 46% |
| Saturated Fat | 16.1 g | 80% |
| Cholesterol | 60 mg | 19% |
| Sodium | 374.7 mg | 15% |
| Total Carbohydrate | 50.7 g | 16% |
| Dietary Fiber | 0.8 g | 3% |
| Sugars | 22.2 g | 88% |
| Protein | 5 g | 10% |
Variations & Substitutions
- Gluten-Free: Use gluten-free vanilla wafers for the crust.
- Dairy-Free: Substitute the cream cheese with a plant-based cream cheese alternative. Use non-dairy milk and a non-dairy whipped topping. Be sure to check that your pudding mix is also dairy-free, as some contain milk derivatives.
- Different Flavors: Experiment with different flavors of pudding mix, such as vanilla or butterscotch, to create unique cheesecake bites.
- Seasonal Adaptation: Add a sprinkle of toasted pecans or walnuts for a fall-inspired twist.
FAQs (Frequently Asked Questions)
Q: Can I make these ahead of time?
A: Absolutely! These are perfect for making ahead of time. The longer they chill, the better the flavors meld. Prepare them up to 2 days in advance and store them in the refrigerator.
Q: Can I use a different type of cookie for the crust?
A: Yes, you can. Graham crackers or shortbread cookies would also work well. Just adjust the amount of butter as needed to bind the crumbs together.
Q: Do I have to use Bourbon?
A: No, you don’t. The Bourbon adds a subtle depth of flavor, but you can omit it entirely or substitute it with a teaspoon of vanilla extract or banana liqueur.
Q: How do I prevent the crust from getting soggy?
A: Make sure to press the crust firmly into the muffin tins and chill it in the freezer before adding the filling. Brushing it with melted white chocolate can also help create a moisture barrier.
Q: Can I freeze these cheesecake bites?
A: Yes, you can freeze them for up to 1 month. Wrap them individually in plastic wrap before placing them in a freezer-safe container to prevent freezer burn.
Final Thoughts
These Banana Pudding Cheesecake Bites are a delightful and easy way to enjoy the classic flavors of banana pudding in a fun, portable format. Whether you’re a seasoned baker or a novice in the kitchen, this recipe is sure to impress. Don’t hesitate to experiment with different flavor combinations and toppings to create your own signature version. I encourage you to give this recipe a try and share your creations with friends and family. Pair these bites with a refreshing iced coffee or a glass of sweet tea for the ultimate summer treat. Enjoy!