
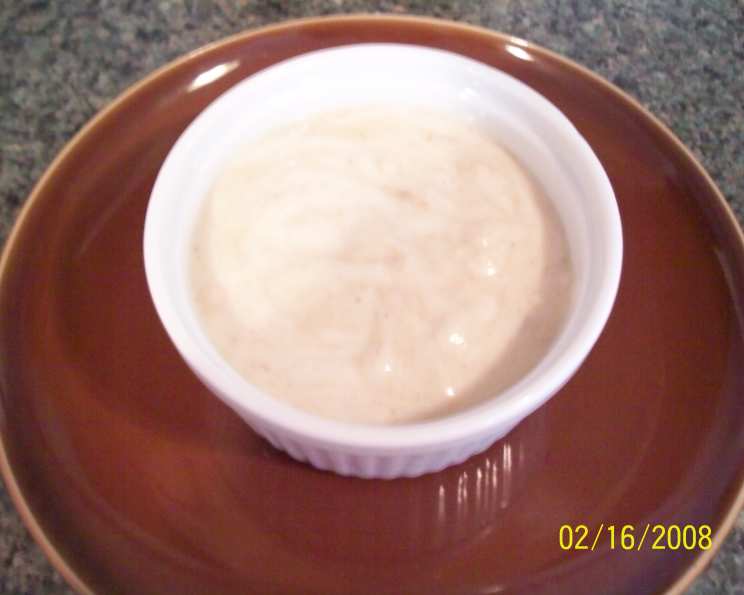
Banana Raita: A Symphony of Spice and Coolness
The memory still makes me smile – a sweltering summer afternoon in Rajasthan, India. I was visiting a friend’s family, and the heat was almost unbearable. Lunch arrived, a vibrant tapestry of curries and rice, but it was the bowl of Banana Raita that truly caught my attention. The cool, creamy yogurt, punctuated by sweet banana and the subtle warmth of spices, was a revelation. It wasn’t just a side dish; it was an oasis, a perfect counterpoint to the fiery flavors of the meal. This simple dish became an instant favorite, a taste of India I carry with me always.
Recipe Overview
- Prep Time: 10 minutes
- Cook Time: 5 minutes
- Total Time: 15 minutes
- Servings: 2
- Yield: About 2 cups
- Dietary Type: Vegetarian, Gluten-Free
Ingredients
- 1 teaspoon ghee or 1 teaspoon canola oil
- 1 1⁄2 teaspoons cumin seeds
- 1⁄4 teaspoon cardamom seed
- 1⁄4 teaspoon ground coriander
- 1⁄4 teaspoon cayenne pepper
- 2 cups ripe bananas, mashed
- 2 cups nonfat plain yogurt
Equipment Needed
- Small skillet
- Mortar and pestle (optional, for crushing spices)
- Serving dish
Instructions
-
Begin by melting the ghee (or canola oil) in a small skillet over low heat. Watch carefully to prevent burning.
-
If using whole cardamom seeds, lightly crush the cumin seeds, cardamom seeds, ground coriander, and cayenne pepper together using a mortar and pestle. This helps release their fragrant oils. If you don’t have a mortar and pestle, you can gently crush them with the back of a spoon or use pre-ground spices.
-
Add the crushed or ground spices to the melted ghee. Stir continuously until fragrant, about 30 seconds to 1 minute. Be careful not to burn the spices; they should just release their aroma.
-
Stir in the mashed ripe bananas and remove the skillet from the heat immediately. The heat from the spices will gently warm the bananas, enhancing their sweetness.
-
Gently stir in the nonfat plain yogurt until everything is well combined. Be careful not to overmix, as this can make the yogurt watery.
-
Transfer the Banana Raita to a serving dish.
-
Chill well in the refrigerator before serving. This allows the flavors to meld and the raita to thicken slightly. Allow at least 30 minutes for chilling.
Expert Tips & Tricks
- Spice it Up (or Down): Adjust the amount of cayenne pepper to your preference. If you’re spice-averse, start with a pinch and taste as you go. If you love the heat, add a bit more.
- Banana Ripeness: The ripeness of the bananas is key. Use very ripe bananas that are soft and speckled with brown spots. This will give the raita a natural sweetness and smooth texture.
- Yogurt Consistency: For a thicker raita, use Greek yogurt or hang your plain yogurt in cheesecloth for a few hours to remove excess whey.
- Spice Bloom: Toasting the spices in ghee or oil is crucial. This process, known as “blooming” the spices, releases their essential oils and intensifies their flavor. Be careful not to burn them.
- Avoid Overmixing: Overmixing the yogurt can cause it to become thin and watery. Gently fold the ingredients together until just combined.
Serving & Storage Suggestions
Serve Banana Raita chilled as a refreshing side dish with Indian meals, especially those with spicy curries or grilled meats. It’s also delicious on its own as a light snack or breakfast. Garnish with a sprinkle of chopped cilantro or a few slivered almonds for added visual appeal.
Store leftover Banana Raita in an airtight container in the refrigerator for up to 2 days. Be aware that the texture may change slightly as the bananas continue to break down. It’s not recommended to freeze Banana Raita, as this will significantly alter the texture of the yogurt.
Nutritional Information
(Estimated per serving)
| Nutrient | Amount per Serving | % Daily Value |
|---|---|---|
| Calories | 180 kcal | 9% |
| Total Fat | 4g | 5% |
| Saturated Fat | 2g | 10% |
| Cholesterol | 5mg | 2% |
| Sodium | 80mg | 3% |
| Total Carbohydrate | 30g | 11% |
| Dietary Fiber | 3g | 11% |
| Sugars | 20g | – |
| Protein | 8g | 16% |
Variations & Substitutions
- Vegan Raita: Substitute the nonfat plain yogurt with coconut yogurt or another plant-based yogurt alternative. Be sure to choose a plain, unsweetened variety.
- Fruity Twist: Add other fruits like finely chopped mango, pineapple, or pomegranate seeds for a burst of extra flavor and texture.
- Nutty Delight: Stir in a tablespoon or two of chopped nuts like almonds, cashews, or pistachios for added crunch and richness.
- Herbaceous Freshness: Add a handful of chopped fresh cilantro or mint for a vibrant, aromatic touch.
- Citrus Zing: As “The Vegetarian Epicure” suggests, a squeeze of orange, lemon, or lime juice can brighten the flavors and prevent the bananas from browning.
FAQs (Frequently Asked Questions)
Q: Can I make this raita ahead of time?
A: Yes, you can prepare the Banana Raita a few hours in advance. Store it in the refrigerator until ready to serve. The flavors will meld together nicely, but the texture may change slightly.
Q: Why is my raita watery?
A: Overmixing the yogurt or using yogurt with high water content can lead to a watery raita. Use Greek yogurt or strain your yogurt to remove excess whey.
Q: Can I use frozen bananas?
A: While you can use frozen bananas, be sure to thaw them completely and drain any excess liquid before mashing. This will help prevent the raita from becoming too watery.
Q: What if I don’t have all the spices?
A: The combination of spices is what gives this raita its unique flavor, but you can adjust based on what you have. Cumin is the most important, but you can omit the others if necessary, or substitute with a pinch of garam masala.
Q: Is this dish spicy?
A: The cayenne pepper adds a subtle warmth, but the dish is not overwhelmingly spicy. Adjust the amount of cayenne to your preference.
Final Thoughts
Banana Raita is more than just a recipe; it’s a culinary adventure, a journey to the heart of India with every spoonful. The sweetness of the bananas, the coolness of the yogurt, and the warmth of the spices create a symphony of flavors that will tantalize your taste buds. Don’t be afraid to experiment with variations and make it your own. I encourage you to try this recipe and share your feedback. Pair it with a spicy curry or enjoy it as a refreshing snack. Happy cooking!