
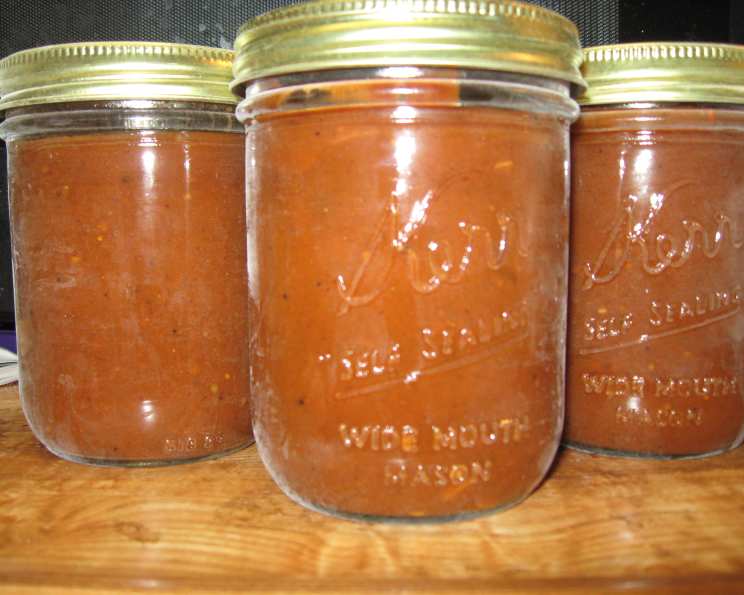
Canning Homemade Barbecue Sauce: A Taste of Summer, All Year Round
The scent of barbecue sauce simmering on the stove takes me right back to my childhood. My grandmother, a true canning queen, would spend late summer days transforming baskets overflowing with ripe tomatoes into jars of rich, tangy barbecue sauce. It wasn’t just a condiment; it was liquid sunshine, bottled up and ready to brighten even the coldest winter days. The best part was always sneaking a taste straight from the spoon – a forbidden pleasure that made the whole process feel like a delicious secret.
Recipe Overview
- Prep Time: 30 minutes
- Cook Time: 2 hours
- Total Time: 2 hours 30 minutes
- Yields: 8 (1/2 pint) jars
- Dietary Type: Vegetarian, Gluten-Free
Ingredients
- 5 lbs prepared tomatoes
- 2 cups coarsely chopped onions
- 1/2 cup brown sugar
- 1/2 teaspoon cayenne pepper
- 1 1/2 cups white vinegar
- 4 teaspoons coarse salt
- 2 cloves garlic, minced
- 1 teaspoon ground allspice
- 1 teaspoon ground cinnamon
- 1 teaspoon ground cloves
- 1 teaspoon ground ginger
Equipment Needed
- Large saucepan
- Blender or food processor
- Boiling water canner
- 8 (1/2 pint) mason jars
- Jar lifter
- Lids and rings for mason jars
- Spatula
Instructions
- Begin by preparing your tomatoes. Blanch the tomatoes in boiling water for about 30-60 seconds, until the skins begin to crack. Immediately transfer them to an ice bath to stop the cooking process. This makes peeling them much easier.
- Once cooled, peel the tomatoes, coarsely chop them, and measure out 10 cups.
- In a large saucepan, combine the tomatoes, coarsely chopped onions, brown sugar, and cayenne pepper.
- Bring the mixture to a boil over medium-high heat, stirring constantly to prevent sticking and burning.
- Once boiling, reduce the heat to low and boil gently, stirring occasionally, for about 30 minutes. This allows the flavors to meld and the mixture to slightly reduce.
- Carefully remove the saucepan from the heat and puree the mixture using a blender or food processor. Work in batches if necessary to avoid overflowing.
- Return the pureed mixture to the saucepan. Stir in the white vinegar, coarse salt, minced garlic, ground allspice, ground cinnamon, ground cloves, and ground ginger.
- Bring the mixture back to a boil over medium heat, stirring constantly.
- Once boiling, reduce the heat to low and boil gently for about 1 hour, stirring occasionally, until the sauce thickens to your desired consistency. Be patient; the longer it simmers, the richer the flavor will become.
- While the sauce is simmering, prepare your canning equipment. Fill a boiling water canner with enough water to cover the jars by at least an inch. Place 8 clean, half-pint mason jars in the canner. Bring the water to a boil over high heat.
- In a separate small saucepan, place the lids and seals in boiling water. Boil for 5 minutes to soften the sealing compound. This ensures a good seal.
- Once the sauce has thickened and the canning equipment is ready, it’s time to fill the jars. Using a ladle, carefully ladle the hot sauce into the hot jars, leaving 1/4 inch of headspace (the space between the sauce and the top of the jar).
- Use a spatula or bubble remover to remove any air bubbles trapped in the sauce. Gently run the spatula around the inside of the jar to release the bubbles. If necessary, refill the jar with more sauce to maintain the 1/4 inch headspace.
- Wipe the rim of each jar with a clean, damp cloth to remove any spills or stickiness. This is crucial for a proper seal.
- Place a lid on each jar, and then apply a screw band until it is just finger-tight. Do not overtighten, as this can prevent the air from escaping during processing.
- Using a jar lifter, carefully place the filled jars into the boiling water canner. Ensure the jars are not touching each other.
- Cover the canner and return the water to a rolling boil. Process the jars for 15 minutes. Start timing once the water is at a full boil.
- After 15 minutes, turn off the heat and remove the canner lid. Let the jars sit in the hot water for 5 minutes before removing them. This helps prevent siphoning (loss of liquid from the jars).
- Using the jar lifter, carefully remove the jars from the canner and place them on a towel-lined surface, leaving space between them.
- Allow the jars to cool completely for 24 hours. As the jars cool, you should hear a “pop” sound, indicating that the lids have sealed properly.
- After 24 hours, check the seals by pressing down on the center of each lid. If the lid doesn’t flex or move, it’s sealed. If the lid flexes, the jar didn’t seal and should be refrigerated and used within a few weeks, or reprocessed with a new lid.
- Store the sealed jars in a cool, dark place for up to a year.
Expert Tips & Tricks
- For a smoother sauce, use a high-powered blender to puree the tomatoes. You can also strain the pureed mixture through a fine-mesh sieve to remove any seeds or skins.
- Don’t be afraid to adjust the spices to your liking. If you prefer a spicier sauce, add more cayenne pepper. For a sweeter sauce, add more brown sugar.
- Using a stainless steel or enameled cast iron pot is preferable to avoid any unwanted metallic tastes in your finished sauce.
- To prevent sticking and burning during simmering, use a heavy-bottomed saucepan and stir the sauce frequently, especially as it thickens.
- If you don’t have a boiling water canner, you can use a large stockpot with a rack in the bottom. Just make sure the jars are completely submerged in water.
Serving & Storage Suggestions
This homemade barbecue sauce is incredibly versatile. Use it as a marinade for chicken, ribs, or pork. Brush it on grilled vegetables for added flavor. Serve it as a dipping sauce for chicken wings, fries, or onion rings.
Once opened, a jar of barbecue sauce should be stored in the refrigerator and used within a few weeks. Unopened jars stored in a cool, dark place will last up to a year.
Nutritional Information
Note: Nutritional information is an estimate and may vary depending on specific ingredients used.
| Nutrient | Amount per Serving | % Daily Value |
|---|---|---|
| Calories | 150 kcal | 8% |
| Total Fat | 1g | 1% |
| Saturated Fat | 0g | 0% |
| Cholesterol | 0mg | 0% |
| Sodium | 1200mg | 50% |
| Total Carbohydrate | 35g | 12% |
| Dietary Fiber | 5g | 20% |
| Sugars | 25g | – |
| Protein | 3g | 6% |
Variations & Substitutions
- Smoked Barbecue Sauce: Add a teaspoon of smoked paprika for a smoky flavor.
- Spicy Barbecue Sauce: Increase the amount of cayenne pepper or add a pinch of red pepper flakes. You can also include a finely minced jalapeño pepper (seeds removed for less heat).
- Honey Barbecue Sauce: Substitute 1/4 cup of honey for 1/4 cup of the brown sugar.
- Apple Cider Vinegar Barbecue Sauce: Replace the white vinegar with apple cider vinegar for a slightly sweeter and fruitier flavor.
- Peach Barbecue Sauce: Add 1 cup of pureed peaches to the sauce during the last 30 minutes of cooking.
FAQs (Frequently Asked Questions)
Q: Can I use frozen tomatoes to make this barbecue sauce?
A: Yes, you can use frozen tomatoes. Just make sure to thaw them completely and drain off any excess liquid before using them.
Q: Do I have to use coarse salt?
A: While coarse salt is recommended, you can substitute it with fine salt. If you do, use slightly less (about 3 teaspoons) as fine salt is more concentrated.
Q: How do I know if the jars have sealed properly?
A: After 24 hours, check the seals by pressing down on the center of each lid. If the lid doesn’t flex or move, it’s sealed. You should also hear a “pop” sound as the jars cool.
Q: Can I use this barbecue sauce on pork?
A: Absolutely! This barbecue sauce is delicious on pork ribs, pulled pork, and pork chops.
Q: What if my barbecue sauce is too thin?
A: If your barbecue sauce is too thin, continue to simmer it over low heat, stirring occasionally, until it reaches your desired consistency. You can also add a tablespoon of cornstarch mixed with a tablespoon of water to thicken it.
Final Thoughts
Canning your own barbecue sauce is more than just preserving food; it’s preserving a taste of summer, a memory, and a little bit of love. The satisfaction of pulling out a jar of homemade barbecue sauce in the middle of winter and knowing you created something special is truly rewarding. I encourage you to give this recipe a try, experiment with different flavors, and share your creations with friends and family. Don’t be afraid to make it your own, and most importantly, enjoy the process!