
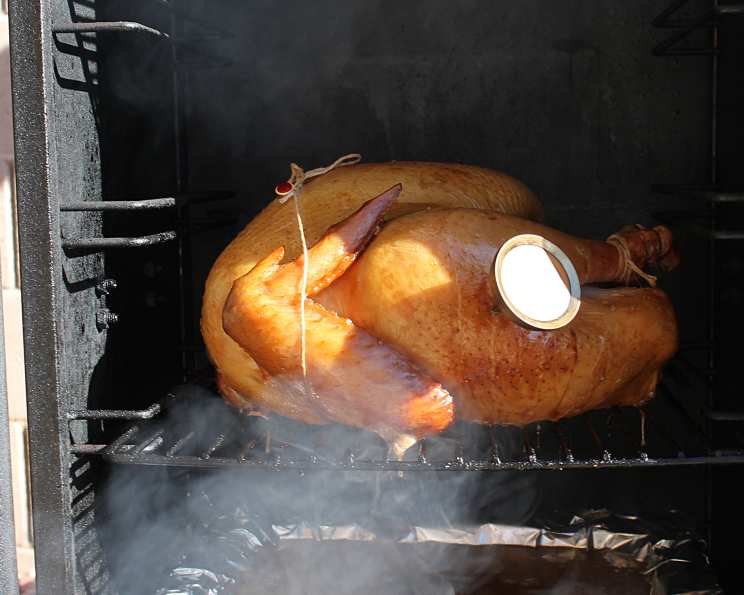
The Secret Weapon: My Go-To All-Purpose Brine for Unforgettable Flavor
I can still remember the first time I truly understood the magic of brining. It was Thanksgiving, years ago, and my family’s usual dry, lackluster turkey was the bane of my existence. Determined to avoid a repeat performance, I stumbled upon a basic brine recipe and tentatively gave it a try. The result? A juicy, flavorful bird that had everyone clamoring for seconds. From that day forward, brining became my secret weapon, transforming everything from everyday chicken breasts to holiday hams into culinary masterpieces. The subtle aromatics and infusion of moisture elevate the simplest cuts of meat to something truly special.
Recipe Overview
- Prep Time: 15 minutes
- Cook Time: 10 minutes
- Cool Time: 2 hours
- Total Time: 2 hours 25 minutes
- Yields: 1 quart
- Dietary Type: Varies depending on meat choice. Generally gluten-free, dairy-free.
Ingredients
- 1 tablespoon black peppercorns
- 2 sprigs fresh thyme
- 3 bay leaves
- 4-6 cloves garlic, sliced
- 4 cups water
- 1/2 cup light brown sugar, packed
- 1/2 cup kosher salt
Equipment Needed
- Saucepan
- Whisk or spoon
- Food-safe plastic bag (oven roasting bags are ideal)
- Container to support bag (bowl or pot)
Instructions
-
In a medium saucepan, combine the black peppercorns, fresh thyme, bay leaves, sliced garlic, water, light brown sugar, and kosher salt.
-
Bring the mixture to a boil over medium-high heat, stirring constantly to prevent scorching.
-
Continue stirring until the sugar and salt are completely dissolved. This ensures even flavor distribution throughout the brine.
-
Remove the saucepan from the heat and allow the brine to cool completely. This is crucial! Adding meat to a warm brine can promote bacterial growth. A good rule of thumb is to let it sit at room temperature for at least 2 hours, or transfer it to the refrigerator to speed up the cooling process.
-
Once the brine is completely cool, place your meat or poultry inside a food-safe plastic bag. Oven roasting bags work perfectly for this, providing a secure and leak-proof container. Important: Do NOT use garbage bags, as they are not food-safe.
-
Place the bag inside another container (a large bowl or pot) for added support and to prevent any potential leaks. This is especially important when brining larger items like a whole turkey.
-
Carefully pour the cooled brine into the bag, ensuring that the meat or poultry is fully submerged. If necessary, prepare additional batches of the brine to ensure complete coverage.
-
Squeeze out as much air as possible from the bag to maximize contact between the brine and the meat.
-
Seal the bag tightly with a twist tie or by tying a knot in the bag itself.
-
Refrigerate the bag for the appropriate amount of time, depending on the size and type of meat:
- 3-4 hours for 3 pounds of meat (such as pork ribs)
- 5-6 hours for a roasting hen
- 12-24 hours for a turkey (12 hours for smaller turkeys and up to 24 hours for turkeys around 20+ pounds).
-
After the brining time is complete, remove the meat from the bag and discard the brine. Never reuse brine!
-
Pat the meat dry with paper towels before cooking. This will help it to brown properly in the oven or on the grill.
-
If using poultry, consider adding citrus fruit (such as oranges or lemons), additional fresh herbs, or cloves of garlic into the cavity for extra flavor.
-
Prepare the meat as desired – roast, barbecue, grill, or pan-fry. The brining process will ensure a moist and flavorful result, regardless of the cooking method.
Expert Tips & Tricks
- Don’t over-brine: Exceeding the recommended brining time can result in overly salty meat. Stick to the guidelines for optimal results.
- Adjust the sweetness: If you prefer a less sweet brine, reduce the amount of brown sugar slightly. You can also substitute honey or maple syrup for a different flavor profile.
- Spice it up: Add a pinch of red pepper flakes to the brine for a subtle kick of heat.
- Use a thermometer: Always use a meat thermometer to ensure that your meat is cooked to the proper internal temperature. This is the best way to avoid overcooking and drying out your meat.
- Consider wet vs. dry brining: This recipe is a wet brine. Dry brining (using salt and spices rubbed directly onto the meat) is another option. Both work, but wet brines are particularly effective for leaner cuts.
Serving & Storage Suggestions
Serve your brined meat immediately after cooking for the best flavor and texture. If you have leftovers, store them in an airtight container in the refrigerator for up to 3-4 days. Reheat gently in the oven or microwave to avoid drying them out.
While brined meat generally doesn’t freeze as well as un-brined meat (the texture can become slightly softer), it can be frozen for up to 2-3 months if properly wrapped. Thaw overnight in the refrigerator before reheating.
Nutritional Information
Please note that the nutritional information can vary greatly depending on the specific cut of meat that is brined and the cooking method used. The values below are estimates and may not be entirely accurate.
| Nutrient | Amount per Serving (Brine Only) | % Daily Value |
|---|---|---|
| Calories | 50 kcal | 3% |
| Total Fat | 0g | 0% |
| Saturated Fat | 0g | 0% |
| Cholesterol | 0mg | 0% |
| Sodium | 1400mg | 58% |
| Total Carbohydrate | 13g | 4% |
| Dietary Fiber | 0g | 0% |
| Sugars | 12g | |
| Protein | 0g | 0% |
Variations & Substitutions
- Citrus Brine: Add the zest and juice of one orange and one lemon to the brine for a bright, citrusy flavor.
- Herb-Infused Brine: Experiment with different herbs, such as rosemary, sage, or oregano, to customize the flavor of the brine.
- Spicy Brine: Add a jalapeño pepper, sliced, to the brine for a bolder kick.
- Maple-Bourbon Brine: Replace the brown sugar with maple syrup and add a splash of bourbon for a richer, more complex flavor.
- Apple Cider Brine: Substitute apple cider for part of the water for a subtle apple flavor that pairs well with pork and poultry.
FAQs (Frequently Asked Questions)
Q: Can I brine frozen meat?
A: It’s best to thaw meat completely before brining to ensure even penetration of the brine. Brining partially frozen meat can lead to uneven seasoning.
Q: Can I reuse the brine?
A: No, never reuse brine. It contains raw meat juices and bacteria, making it unsafe to use again.
Q: What if I don’t have kosher salt?
A: Kosher salt is preferred because it dissolves easily and doesn’t contain additives. However, you can substitute sea salt or table salt. If using table salt, reduce the amount by about 25% since it’s more concentrated.
Q: Can I brine for longer than the recommended time?
A: While a slightly longer brining time (an hour or two) is generally fine, brining for too long can result in overly salty meat. It’s best to stick to the recommended guidelines.
Q: Does brining make the meat salty?
A: If done correctly, brining should not make the meat overly salty. The salt helps to denature the proteins in the meat, allowing it to retain more moisture during cooking. Be sure to use the correct amount of salt and brining time.
Final Thoughts
Now it’s your turn to experience the magic of brining! Don’t be intimidated – this simple recipe is a game-changer for adding flavor and moisture to your favorite meats. Whether you’re grilling chicken for a summer barbecue, roasting a Thanksgiving turkey, or simply looking to elevate your weeknight dinner, this all-purpose brine is your secret weapon. Give it a try, experiment with different variations, and let me know what you think. Happy cooking! I recommend pairing this with a crisp dry white wine like Sauvignon Blanc if you are serving poultry.