
The Secret to Incredibly Juicy Chicken and Turkey: A Simple Brine
My grandmother, bless her heart, was a woman of unwavering traditions, and Sunday dinner was sacred. While her roasts were legendary, I always felt the chicken, though lovingly prepared, was often… well, let’s just say it benefited greatly from a generous ladle of gravy. It wasn’t until I stumbled upon the magic of brining that I finally understood how to achieve chicken that practically melts in your mouth, bursting with flavor and juiciness in every bite. This simple brine is the foundation of so many of my favorite poultry dishes, and it’s the key to unlocking truly exceptional results every time. Now my family always clamors for “my” chicken – Grandma would be proud, and maybe a little jealous!
Recipe Overview
- Prep Time: 5 minutes
- Yields: 1 gallon
- Dietary Type: Generally applicable to most diets, but high in sodium.
Ingredients
- 1 gallon cold water
- ½ cup kosher salt (reduce to ¼ cup if using regular table salt)
- ⅔ cup light brown sugar
Equipment Needed
- Large bowl or container (food-safe plastic or glass)
- Whisk
- Large pot or brining bag (if brining a turkey)
- Refrigerator or insulated cooler
Instructions
- In a large bowl or container, combine the cold water, kosher salt, and light brown sugar.
- Use a whisk to thoroughly mix the brine until both the salt and sugar are completely dissolved. This is crucial to ensure even flavor distribution throughout the poultry.
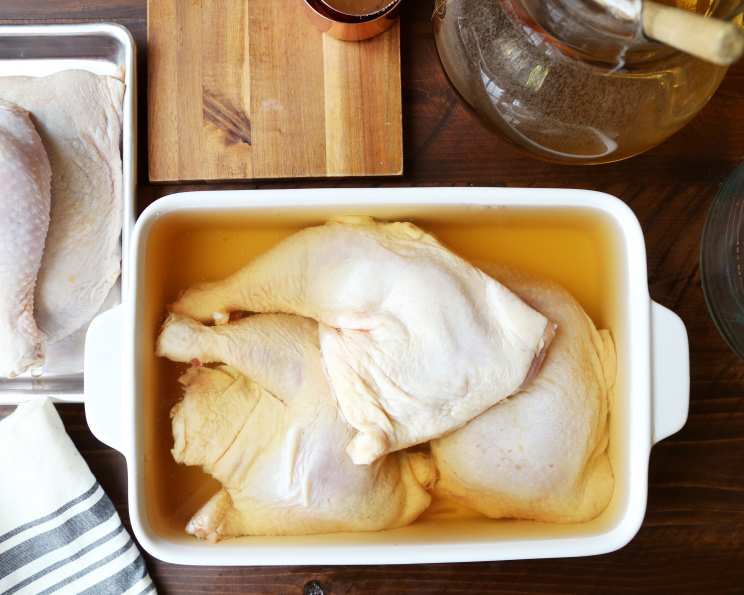
- Place your whole chicken (thawed or frozen – yes, you can brine from frozen, although thawing first is recommended for faster results!) or chicken parts into the brine. Ensure the chicken is fully submerged. If needed, use a plate or weight to keep it submerged.
- Cover the container and store it in the refrigerator for a minimum of 2 hours and up to overnight. The longer the brining time, the more flavorful and juicy the chicken will be, but don’t exceed 12 hours for chicken pieces or 24 hours for a whole chicken to prevent the meat from becoming overly salty.
- Remove the chicken from the brine and rinse it thoroughly under cold running water. This step is essential to remove excess salt from the surface of the chicken. Pat the chicken dry with paper towels before proceeding with your recipe.
- You are now ready to cook your incredibly tender and juicy chicken dish using your favorite method – roasting, grilling, frying, or poaching.
Note for Turkey: For a whole turkey, increase the brine recipe proportionally to ensure the turkey is fully submerged. A good rule of thumb is to use the “servings” adjuster on a recipe website to increase the quantities to 6-10 servings. Place the turkey in an insulated cooler with enough brine to cover and add a 5-pound bag of ice to maintain a safe temperature during brining. Brine overnight in the cooler.
Expert Tips & Tricks
- Don’t Skip the Rinse: Rinsing the chicken after brining is crucial to remove excess salt. Not rinsing can result in an overly salty final product.
- Proper Salt Choice: Kosher salt is preferred due to its purity and consistency. If using table salt, reduce the amount to prevent over-salting.
- Temperature Control: Maintaining a safe temperature (below 40°F/4°C) is vital during brining to prevent bacterial growth. Use an insulated cooler with ice if your refrigerator isn’t large enough to accommodate the brining container.
- Brining from Frozen: While brining from frozen is possible, be aware that it will take longer for the salt and sugar to penetrate the meat. Ensure the chicken is fully submerged in the brine and adjust the brining time accordingly.
- Flavor Infusion: Experiment with adding other flavorings to the brine, such as herbs, spices, citrus zest, or garlic. These additions will infuse the chicken with even more flavor.
- Don’t Re-use Brine: Once used, discard the brine. It contains raw poultry juices and is not safe to reuse.
- Pat Dry: After rinsing, thoroughly pat the chicken dry with paper towels. This will help the skin crisp up better during cooking.
Serving & Storage Suggestions
Serve your brined and cooked chicken hot, accompanied by your favorite side dishes. The beauty of this basic brine is that it works well with nearly any flavor profile, so feel free to experiment with different sauces, rubs, and seasonings.
Leftovers: Store cooked chicken in an airtight container in the refrigerator for up to 3-4 days. Properly brined chicken retains moisture well, making leftovers significantly more enjoyable. You can also freeze cooked chicken for up to 2-3 months. For best results, wrap the chicken tightly in plastic wrap and then place it in a freezer bag.
Reheating: Reheat leftover chicken in the oven, microwave, or on the stovetop. To prevent drying out, add a little chicken broth or water during reheating.
Nutritional Information
Please note that the following nutritional information is an estimate and can vary depending on the size of the chicken and the specific ingredients used.
| Nutrient | Amount per Serving | % Daily Value |
|---|---|---|
| Calories | Varies Widely | N/A |
| Total Fat | Varies Widely | N/A |
| Saturated Fat | Varies Widely | N/A |
| Cholesterol | Varies Widely | N/A |
| Sodium | Extremely High | N/A |
| Total Carbohydrate | Moderate | N/A |
| Dietary Fiber | Low | N/A |
| Sugars | Moderate | N/A |
| Protein | Varies Widely | N/A |
Disclaimer: This brine primarily adds sodium and minimal calories/nutrients. Nutritional values for the final cooked chicken will depend heavily on the cooking method and additional ingredients.
Variations & Substitutions
- Herbed Brine: Add fresh herbs like thyme, rosemary, or sage to the brine for an aromatic flavor.
- Citrus Brine: Include citrus zest and juice (lemon, orange, or grapefruit) for a bright, tangy flavor.
- Spiced Brine: Add spices like peppercorns, garlic cloves, bay leaves, or red pepper flakes for a bolder flavor.
- Sweet Brine: Substitute honey or maple syrup for brown sugar for a different sweetness profile.
- Apple Cider Brine: Use apple cider instead of water for a subtle apple flavor.
- Vegetable Broth Brine: Substitute some of the water with vegetable broth for added depth of flavor.
FAQs (Frequently Asked Questions)
Q: Can I brine chicken for longer than overnight?
A: While it’s generally not recommended to brine chicken for much longer than overnight (about 12 hours max), extending it slightly won’t ruin the chicken. However, be mindful of the potential for it to become overly salty and potentially change the texture. Always rinse thoroughly afterward.
Q: Is it necessary to rinse the chicken after brining?
A: Yes, rinsing is crucial! It removes excess salt from the surface of the chicken, preventing it from becoming too salty during cooking.
Q: Can I use this brine for other types of poultry, like duck or Cornish hens?
A: Absolutely! This brine works well for most types of poultry. Adjust the brining time based on the size of the bird.
Q: My brine looks cloudy – is that normal?
A: Yes, some cloudiness is normal. As long as the salt and sugar are fully dissolved and the brine smells fresh, it’s perfectly safe to use.
Q: Can I reuse the brine?
A: No, never reuse brine. It contains raw poultry juices and poses a food safety risk. Discard it immediately after use.
Final Thoughts
This basic brine is more than just a recipe; it’s a foundation for countless delicious poultry creations. Don’t be afraid to experiment with different flavor combinations to create your signature brine. Whether you’re grilling, roasting, or frying, this simple step will elevate your chicken and turkey to a whole new level of juiciness and flavor. So go ahead, give it a try, and prepare to be amazed by the results! And, please, share your feedback, variations, and pairings – I’m always eager to learn from fellow culinary enthusiasts!