
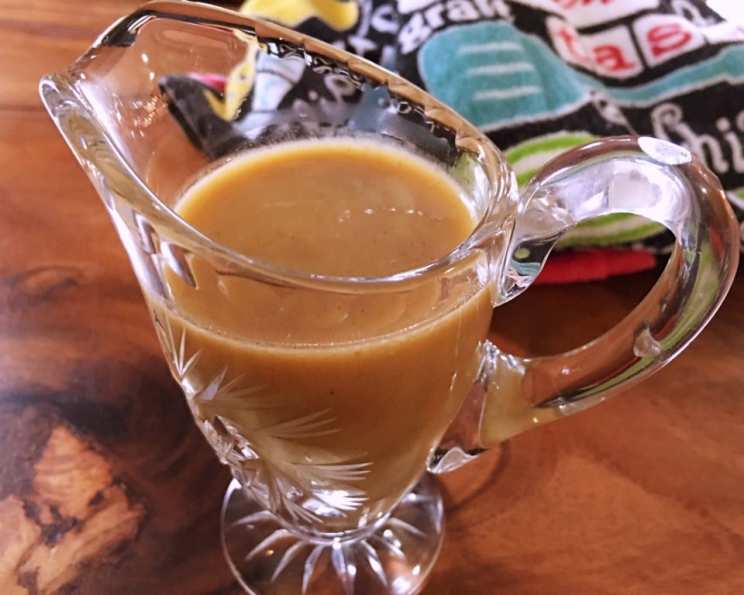
Mastering Basic Brown Sauce: A Chef’s Guide
The first time I tasted a truly exceptional brown sauce, I was a young apprentice chef, and it was a revelation. It wasn’t just a sauce; it was an experience. The rich, deep flavor clung to the perfectly seared steak, elevating the entire dish to something sublime. I remember thinking, “This is what cooking is all about.” Since then, I’ve spent countless hours perfecting my own version, and I’m excited to share the foundational techniques and nuances with you.
Recipe Overview
- Prep Time: 15 minutes
- Cook Time: 40 minutes
- Total Time: 55 minutes
- Servings: Varies depending on use
- Yield: 2 ½ cups
- Dietary Type: Varies depending on stock used
Ingredients
- 4 tablespoons clarified butter
- 1 cup red onion, chopped
- ½ cup celery, diced
- ½ cup carrot, diced
- ½ teaspoon chervil (substitute tarragon)
- 4 tablespoons unbleached all-purpose flour
- 4 cups cold beef stock
- ½ teaspoon fresh ground black pepper (to taste)
- ¼ teaspoon sea salt
- 1 large bay leaf
Equipment Needed
- Medium saucepan
- Wooden spoon or spatula
- Fine-mesh sieve or strainer
Instructions
-
In a medium saucepan over medium heat, add the clarified butter. Allow the butter to melt completely and become hot.
-
Add the mirepoix (the chopped red onion, celery, and carrot) to the saucepan. Stir frequently, ensuring the vegetables are evenly coated with the melted butter. Cook for 6-7 minutes, or until the vegetables have softened and become slightly translucent. This step is crucial for developing the base flavor of the sauce. Be careful not to brown them too much, as burnt vegetables can impart a bitter taste.
-
Add the chervil (or tarragon, if substituting) to the vegetables. Stir well to combine, allowing the herbs to release their aromatic oils.
-
Sprinkle the unbleached all-purpose flour evenly over the vegetable mixture. Stir continuously to coat the vegetables and create a roux. This step is essential for thickening the sauce. Cook the roux for 2 minutes, stirring constantly, to remove the raw taste of the flour. A light golden color is ideal. If the flour isn’t cooked enough, the sauce will have a pasty flavor.
-
Gradually add the cold beef stock to the roux, stirring constantly with a whisk or wooden spoon. This is important to prevent lumps from forming. Scrape the bottom of the pot to dislodge any browned bits (fond), as these add depth of flavor to the sauce.
-
Add the fresh ground black pepper, sea salt, and bay leaf to the sauce. Stir well to combine.
-
Bring the sauce to a boil, then immediately reduce the heat to medium-low. Simmer gently for 30 minutes, stirring occasionally to prevent sticking and ensure even cooking. As the sauce simmers, it will thicken and the flavors will meld together.
-
Remove the saucepan from the heat. Carefully pour the sauce through a fine-mesh sieve or strainer lined with cheesecloth into a clean bowl. This step removes the vegetables, herbs, and any lumps, resulting in a smooth and velvety sauce.
-
Squeeze the vegetables in the sieve to extract as much flavor as possible. Discard the solids after squeezing.
-
The sauce is now ready to use. You can use it immediately as a component of other dishes or pour it back into the pot to reduce it further for a more intense flavor, if desired. The sauce will thicken slightly as it cools.
Expert Tips & Tricks
-
Browning the Mirepoix: Don’t rush the initial cooking of the mirepoix. Allowing the vegetables to soften and lightly caramelize is crucial for developing a rich, complex flavor in the sauce.
-
The Roux is Key: The roux (butter and flour mixture) is the foundation of your sauce. Cook it properly to eliminate the raw flour taste and ensure a smooth, lump-free sauce.
-
Cold Stock is Essential: Using cold stock is a critical step in preventing lumps when combining it with the roux. The temperature difference helps the flour absorb the liquid more gradually.
-
Skimming for Clarity: During simmering, any impurities may rise to the surface. Skim these off with a spoon for an even cleaner sauce.
-
Adjusting Consistency: If the sauce is too thick, add a little more beef stock to thin it out. If it’s too thin, simmer it for a longer period to reduce it.
Serving & Storage Suggestions
Serve the basic brown sauce warm as an accompaniment to roasted meats, poultry, or vegetables. It’s also an excellent base for creating other sauces, such as mushroom sauce, peppercorn sauce, or red wine reduction.
Storage:
- Room Temperature: Do not leave the sauce at room temperature for more than 2 hours.
- Refrigerator: Store the sauce in an airtight container in the refrigerator for up to 3-4 days.
- Freezer: For longer storage, freeze the sauce in freezer-safe containers for up to 2-3 months. Thaw overnight in the refrigerator before reheating.
Reheating:
Gently reheat the sauce in a saucepan over low heat, stirring occasionally, until heated through. Avoid boiling the sauce, as this can cause it to separate. If the sauce has separated, whisk it vigorously to re-emulsify.
Nutritional Information
(Estimated per 1/4 cup serving, values may vary)
| Nutrient | Amount per Serving | % Daily Value |
|---|---|---|
| Calories | 60 kcal | 3% |
| Total Fat | 4g | 6% |
| Saturated Fat | 2.5g | 13% |
| Cholesterol | 10mg | 3% |
| Sodium | 250mg | 10% |
| Total Carbohydrate | 5g | 2% |
| Dietary Fiber | 0.5g | 2% |
| Sugars | 1g | – |
| Protein | 1g | 2% |
Variations & Substitutions
-
Vegetarian Brown Sauce: Use vegetable stock instead of beef stock for a vegetarian version.
-
Gluten-Free Brown Sauce: Substitute the all-purpose flour with a gluten-free flour blend or cornstarch. If using cornstarch, mix it with a little cold water to form a slurry before adding it to the sauce.
-
Rich & Decadent: For an even richer flavor, add a splash of red wine or Madeira wine to the sauce during the simmering process.
-
Mushroom Infusion: Sauté sliced mushrooms with the mirepoix to add an earthy, umami flavor to the sauce.
-
Spicy Kick: Add a pinch of red pepper flakes or a dash of hot sauce to give the sauce a little heat.
FAQs (Frequently Asked Questions)
Q: Can I use unsalted butter instead of clarified butter?
A: Yes, you can use unsalted butter, but be mindful of the milk solids that can burn at higher temperatures. Clarified butter has the milk solids removed, which makes it more stable for cooking.
Q: What if my sauce is too salty?
A: Add a small amount of unsalted stock or water to dilute the saltiness. You can also add a pinch of sugar to balance the flavors.
Q: Can I make this sauce ahead of time?
A: Absolutely! This sauce can be made 1-2 days in advance and stored in the refrigerator until ready to use.
Q: How can I make the sauce darker in color?
A: You can roast the beef bones before making the stock or add a small amount of Kitchen Bouquet browning sauce to deepen the color.
Q: What can I use this brown sauce for?
A: This basic brown sauce is incredibly versatile. Use it as a base for stews, gravies, or as an accompaniment to roasted meats, vegetables, or potatoes.
Final Thoughts
Crafting a truly exceptional basic brown sauce is a rewarding culinary endeavor. It’s a skill that will elevate your cooking and impress your family and friends. Don’t be afraid to experiment with variations and substitutions to create your own signature sauce. Embrace the process, savor the aromas, and most importantly, enjoy the delicious results. I encourage you to try this recipe and share your feedback. Consider pairing it with a perfectly roasted prime rib for an unforgettable meal. Bon appétit!