
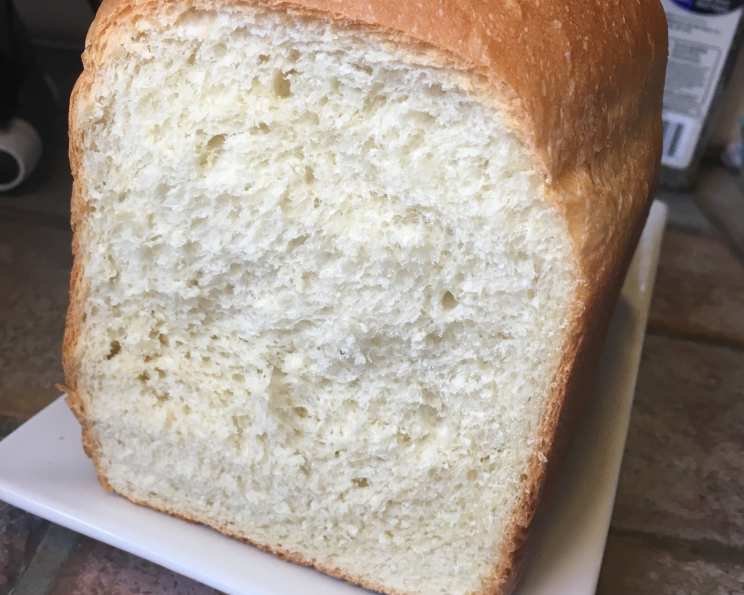
Basic Egg Bread for the Bread Machine
The aroma of baking bread is a powerful memory trigger for me. It instantly transports me back to my grandmother’s kitchen, a place filled with warmth, love, and the constant hum of her old bread machine. While she baked many types of bread, it was her simple egg bread that I remember most fondly. The golden crust, the slightly sweet taste, and the soft, almost pillowy texture were unlike anything I’d ever tasted. This bread was a staple at our family dinners, perfect for sopping up gravy or simply enjoying with a pat of butter. I’ve adapted her recipe for modern machines so you, too, can enjoy the simple pleasure of fresh-baked egg bread.
Recipe Overview
- Prep Time: 5 minutes
- Cook Time: 2 hours 10 minutes
- Total Time: 2 hours 15 minutes
- Servings: 12
- Yield: 1 loaf
- Dietary Type: Not Vegetarian, Not Vegan, Contains Gluten, Contains Dairy
Ingredients
- 2/3 cup milk
- 2 large eggs
- 2 tablespoons margarine or butter, softened
- 3 cups bread machine flour
- 2 tablespoons sugar
- 1 teaspoon salt
- 2 teaspoons bread machine yeast
Equipment Needed
- Bread machine
Instructions
- Begin by adding the milk to your bread machine pan. Ensure the pan is securely locked into the machine.
- Next, crack the two large eggs directly into the bread machine pan, on top of the milk.
- Add the softened margarine or butter to the pan. Softening the butter or margarine ensures it incorporates evenly into the dough, leading to a smoother texture.
- Carefully measure out 3 cups of bread machine flour and add it to the pan, covering the wet ingredients. Bread machine flour, also known as bread flour, has a higher protein content than all-purpose flour, leading to a chewier, more structured loaf.
- Sprinkle 2 tablespoons of sugar evenly over the flour. The sugar not only adds a touch of sweetness but also helps to feed the yeast, promoting a good rise.
- Add 1 teaspoon of salt to the pan. It is crucial to keep the salt separate from the yeast at this stage, as salt can inhibit yeast activity. I typically add it to one corner of the pan.
- Finally, measure out 2 teaspoons of bread machine yeast and add it to the pan. Make a small well in the flour and pour the yeast into it, ensuring it remains separate from the salt until the mixing process begins.
- Close the bread machine and select the white bread cycle. This cycle typically includes kneading, rising, and baking phases specifically tailored for white bread recipes.
- Press start to initiate the bread machine cycle. The machine will begin by kneading the ingredients together, followed by a rising period and finally, the baking process.
- Monitor the bread machine during the kneading process. If the dough appears too dry, add a tablespoon of water at a time until it forms a smooth, elastic ball. Conversely, if the dough is too wet and sticky, add a tablespoon of flour at a time until the desired consistency is achieved.
- Once the bread machine cycle is complete, carefully remove the bread pan from the machine using oven mitts, as it will be hot.
- Turn the pan upside down and gently shake it to release the bread loaf. If the bread sticks, use a non-stick spatula to loosen the sides.
- Place the freshly baked bread loaf on a wire rack to cool completely before slicing. This allows steam to escape, preventing the bread from becoming soggy.
- After the bread has cooled completely, slice it using a serrated bread knife. The serrated edge helps to cut through the crust without crushing the soft interior.
Expert Tips & Tricks
- Water Temperature: While this recipe doesn’t directly use water, the temperature of your milk can influence the yeast activity. Using milk that’s slightly warm (around 100-110°F or 37-43°C) can give your yeast a head start, especially in colder environments.
- Dough Consistency: Keep a close eye on the dough during the kneading process. The perfect consistency is slightly tacky but not overly sticky. Adjust with flour or water, a tablespoon at a time, if needed.
- Butter vs. Margarine: While the recipe allows for either butter or margarine, using butter will give your bread a richer flavor. Opt for unsalted butter to better control the salt level in your bread.
- Ingredient Order: While bread machines are designed to handle ingredients added in any order, I find that adding the wet ingredients first, followed by the dry, and then the yeast on top helps ensure a more even mix.
- High Altitude Adjustments: If you live at a high altitude, you may need to reduce the amount of yeast by ¼ teaspoon and increase the liquid by 1-2 tablespoons to compensate for the drier air.
Serving & Storage Suggestions
This egg bread is fantastic served warm with a pat of butter or alongside a bowl of soup or stew. It’s also excellent for making sandwiches or toast.
To store the bread, allow it to cool completely and then wrap it tightly in plastic wrap or place it in an airtight bag. It will stay fresh at room temperature for 2-3 days. For longer storage, you can freeze the bread for up to 2 months. Slice the loaf before freezing for easier portioning. To reheat frozen bread, simply thaw it at room temperature and then warm it in a toaster or oven.
Nutritional Information
Please note that these values are estimates and may vary based on specific ingredients and bread machine settings.
| Nutrient | Amount per Serving | % Daily Value |
|---|---|---|
| Calories | 139 kcal | 7% |
| Total Fat | 5g | 6% |
| Saturated Fat | 2g | 10% |
| Cholesterol | 33mg | 11% |
| Sodium | 235mg | 10% |
| Total Carbohydrate | 22g | 8% |
| Dietary Fiber | 1g | 4% |
| Sugars | 2g | N/A |
| Protein | 4g | 8% |
Variations & Substitutions
- Sweet Bread: For a sweeter bread, increase the sugar to 4 tablespoons and add ½ teaspoon of vanilla extract.
- Herb Bread: Add 1-2 tablespoons of dried herbs, such as rosemary, thyme, or oregano, to the flour for a savory twist.
- Cheese Bread: Add ½ cup of shredded cheese, such as cheddar or mozzarella, to the dough during the kneading process.
- Whole Wheat: Substitute up to 1 ½ cups of bread machine flour with whole wheat flour for a healthier option. Note that this may result in a denser loaf.
- Dairy-Free: Use a dairy-free milk alternative, such as almond or soy milk, and substitute the butter with a dairy-free margarine.
FAQs (Frequently Asked Questions)
Q: Can I use all-purpose flour instead of bread machine flour?
A: While you can, the bread will likely be less chewy and may not rise as high. Bread machine flour has a higher gluten content, which is essential for a good structure.
Q: My bread is sinking in the middle. What went wrong?
A: This could be due to too much yeast, too much liquid, or the bread not being fully baked. Ensure you are using the correct amount of yeast and liquid, and check the internal temperature of the bread with a thermometer (it should be around 200°F or 93°C) before removing it from the machine.
Q: Can I add nuts or seeds to this recipe?
A: Yes! Add up to ½ cup of chopped nuts or seeds, such as walnuts, pecans, or sunflower seeds, to the dough during the kneading process.
Q: My bread is too dark on top. How can I prevent this?
A: Some bread machines have a crust color setting. Choose a lighter setting. Alternatively, you can tent the top of the bread with foil during the last 15-20 minutes of baking.
Q: How do I know if the yeast is still good?
A: You can test the yeast by mixing it with warm water and a teaspoon of sugar. If it foams up within 5-10 minutes, it is still active.
Final Thoughts
I truly hope you’ll give this basic egg bread recipe a try. It’s more than just a loaf of bread; it’s a connection to simpler times and a taste of home. Don’t be afraid to experiment with different variations and flavors to create your own signature loaf. Share your creations with friends and family, and let the aroma of freshly baked bread fill your home with warmth and happiness. If you have any questions or feedback, please don’t hesitate to share them. Happy baking!