
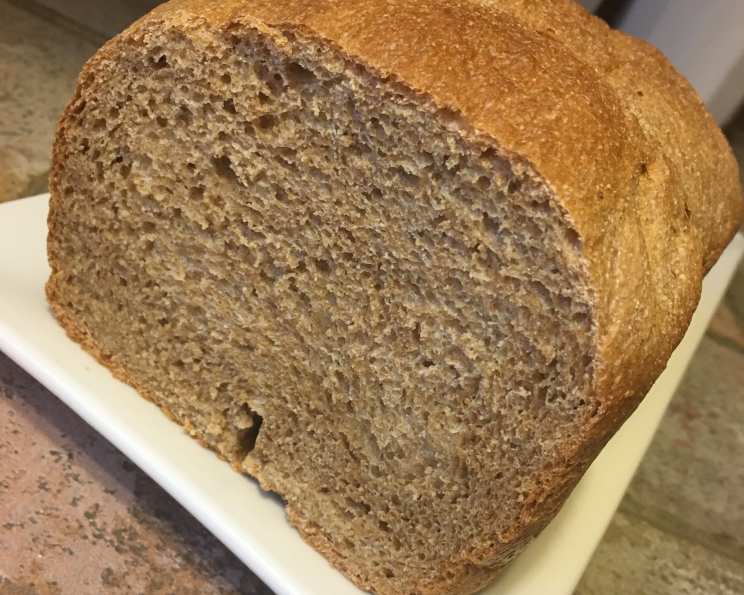
Basic, Light & Easy Whole Wheat Bread
The scent of baking bread… it’s a time machine, isn’t it? For me, it instantly whisks me back to my grandmother’s kitchen, a warm and bustling haven filled with the comforting aroma of yeast and gently browning crusts. She always had a loaf on the go, a simple whole wheat wonder that somehow managed to be both hearty and ethereally light. I remember sneaking warm slices, slathered with butter, a taste of pure, unadulterated happiness. This recipe is an homage to her, a nod to those simple pleasures, and a testament to the fact that even the humblest ingredients can create something truly extraordinary.
Recipe Overview
- Prep Time: 20 minutes
- Cook Time: 30 minutes
- Total Time: 2 hours 10 minutes (includes rising time)
- Servings: 12
- Yield: 1 loaf (1 1/2 – 2 lbs)
- Dietary Type: Vegetarian
Ingredients
- 3 cups whole wheat flour (high-quality recommended)
- 3 tablespoons vital wheat gluten
- 1 1/2 teaspoons salt
- 1/4 cup honey
- 9-10 ounces warm water (around 105-115°F)
- 2 1/4 teaspoons yeast (1 packet, active dry or instant)
Equipment Needed
- Bread machine (ABM) or stand mixer
- Loaf pan (if baking in the oven)
- Measuring cups and spoons
- Thermometer (optional, for water temperature)
- Cooling rack
Instructions
-
Prepare the Dough: If using a bread machine, add the ingredients in the order recommended by your machine’s manufacturer. Typically, liquids go in first, followed by dry ingredients. This usually means starting with the warm water, then the honey, followed by the whole wheat flour, vital wheat gluten, salt, and finally, the yeast.
-
Knead the Dough: If using a bread machine, select the dough cycle. If using a stand mixer, combine all ingredients in the bowl and knead with the dough hook for 8-10 minutes on medium speed until a smooth and elastic dough forms. The dough should be slightly tacky but not sticky. Adjust the amount of water slightly if necessary to achieve the desired consistency.
-
First Rise (Proofing): Whether using a bread machine or stand mixer, after the dough cycle is complete (or after kneading in a stand mixer), let the dough rise in a warm place for about 1 to 1.5 hours, or until doubled in size. If using a bread machine, simply leave the dough in the machine after the dough cycle finishes. If using a stand mixer, place the dough in a lightly oiled bowl, turning to coat, and cover with plastic wrap or a clean kitchen towel.
-
Shape the Loaf (Oven Baking Only): If you are baking in your bread machine, skip this step and proceed to step 6. Otherwise, once the dough has doubled, gently punch it down to release the air. Turn it out onto a lightly floured surface. Shape the dough into a loaf that will fit your loaf pan.
-
Second Rise (Oven Baking Only): Place the shaped loaf into a greased loaf pan. Cover with plastic wrap or a clean kitchen towel and let rise in a warm place for another 30-45 minutes, or until the dough has almost doubled again, rising slightly above the rim of the pan.
-
Bake the Bread: If using a bread machine, select the bake cycle and follow your machine’s instructions for crust color. If baking in the oven, preheat the oven to 375°F (190°C).
-
Baking Time: If baking in the oven, bake for approximately 30 minutes, or until the crust is golden brown and the internal temperature reaches 200-210°F (93-99°C) when measured with an instant-read thermometer.
-
Cooling: Once the bread is baked, remove it from the bread machine or oven. If baking in the oven, immediately turn the loaf out onto a wire cooling rack. Let cool completely before slicing. This is crucial for preventing a gummy texture.
Expert Tips & Tricks
-
High-Quality Flour Matters: Using a good quality whole wheat flour will significantly impact the flavor and texture of your bread. Look for flour that is freshly milled and has a slightly nutty aroma.
-
Vital Wheat Gluten is Key: Don’t skip the vital wheat gluten! Whole wheat flour is lower in gluten than all-purpose flour, and the added gluten helps to create a lighter, more elastic dough and a better rise.
-
Water Temperature: The warm water is essential for activating the yeast. Too cold, and the yeast won’t activate properly; too hot, and you’ll kill the yeast. Use a thermometer to ensure the water is between 105-115°F (40-46°C).
-
Don’t Over-Knead: Over-kneading can result in a tough loaf. If using a stand mixer, keep a close eye on the dough and stop kneading as soon as it becomes smooth and elastic.
-
Oven Spring: For a better oven spring (the rapid rise of the dough in the first few minutes of baking), you can create steam in your oven. Place a baking sheet on the bottom rack of the oven and pour a cup of hot water into it just before placing the bread in the oven. Be careful to avoid steam burns!
-
Checking for Doneness: The best way to ensure your bread is fully baked is to use an instant-read thermometer. Insert it into the center of the loaf. It should read 200-210°F (93-99°C). If the crust is browning too quickly, tent the loaf with foil.
Serving & Storage Suggestions
This Basic, Light & Easy Whole Wheat Bread is delicious served warm with butter, jam, or honey. It also makes excellent sandwiches and toast.
-
Room Temperature: Store the cooled loaf in a bread box or airtight container at room temperature for up to 3 days.
-
Refrigerator: For longer storage, you can refrigerate the bread for up to a week. However, it may become slightly drier.
-
Freezer: To freeze the bread, slice it first and wrap it tightly in plastic wrap, then place it in a freezer bag. It can be stored in the freezer for up to 3 months. Thaw at room temperature or in the microwave.
-
Reheating: To reheat the bread, wrap it in foil and warm it in a 350°F (175°C) oven for 10-15 minutes. You can also toast slices in a toaster or toaster oven.
Nutritional Information
Note: Nutritional information is an estimate and may vary based on specific ingredients and serving size.
| Nutrient | Amount per Serving | % Daily Value |
|---|---|---|
| Calories | 125.4 kcal | N/A |
| Calories from Fat | 5 g | 4% |
| Total Fat | 0.6 g | 0% |
| Saturated Fat | 0.1 g | 0% |
| Cholesterol | 0 mg | 0% |
| Sodium | 293.3 mg | 12% |
| Total Carbohydrate | 27.9 g | 9% |
| Dietary Fiber | 3.8 g | 15% |
| Sugars | 5.9 g | N/A |
| Protein | 4.4 g | 8% |
Variations & Substitutions
-
Add Seeds and Nuts: Incorporate 1/4 to 1/2 cup of seeds (such as sunflower, flax, or sesame) or chopped nuts (such as walnuts or pecans) to the dough for added flavor and texture.
-
Sweeten it Up: For a sweeter loaf, increase the amount of honey to 1/3 cup or add 1-2 tablespoons of maple syrup or molasses.
-
Spice it Up: Add a teaspoon of ground cinnamon, nutmeg, or cardamom to the dough for a warm, comforting flavor.
-
Herbaceous Delight: Mix in 1-2 tablespoons of chopped fresh herbs, such as rosemary, thyme, or oregano, for a savory twist.
-
Different Flours: Experiment with substituting a portion of the whole wheat flour with other flours, such as spelt flour, rye flour, or all-purpose flour, for different flavor profiles and textures.
FAQs (Frequently Asked Questions)
Q: Why is my whole wheat bread so dense?
A: Whole wheat flour can sometimes result in a denser loaf than white flour due to its higher bran content. Make sure you’re using vital wheat gluten and allowing the dough to rise sufficiently. Also, avoid adding too much flour during kneading.
Q: Can I use instant yeast instead of active dry yeast?
A: Yes, you can substitute instant yeast (also called bread machine yeast) for active dry yeast. You can add it directly to the dry ingredients without proofing it first.
Q: How do I know if my bread is done?
A: The best way is to use an instant-read thermometer. The internal temperature should reach 200-210°F (93-99°C). You can also tap the bottom of the loaf; it should sound hollow.
Q: My bread is browning too quickly. What should I do?
A: If the crust is browning too quickly, tent the loaf with foil to prevent it from burning.
Q: Can I make this recipe without a bread machine?
A: Absolutely! The recipe works just as well using a stand mixer or even kneading by hand. Follow the instructions for kneading and rising times carefully.
Final Thoughts
I hope this recipe for Basic, Light & Easy Whole Wheat Bread brings the same joy to your kitchen as it does to mine. There’s something truly special about the aroma of freshly baked bread, and this recipe is a simple yet satisfying way to create that magic in your own home. Don’t be afraid to experiment with variations and make it your own. And most importantly, enjoy every delicious slice! Feel free to share your creations and feedback – I’d love to hear how it turns out! Consider pairing this delightful bread with a hearty soup or a simple salad for a complete and wholesome meal.