
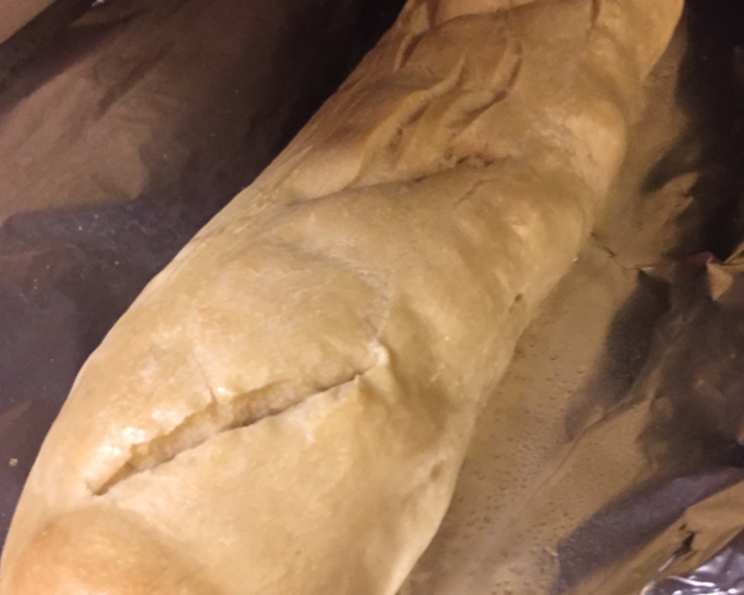
The Simple Joy of Homemade Machine French Bread
I’ll never forget the aroma that would fill our tiny apartment every Sunday morning. My mom, always the baker, would be up early, the rhythmic kneading of dough a comforting soundtrack to my still-sleepy mornings. While she was a wizard with yeasted doughs, I was intimidated – until I discovered the magic of the bread machine. It unlocked a world of possibilities, starting with this wonderfully simple French bread, a recipe I’ve tweaked and perfected over the years. Now, the familiar scent fills my own kitchen, a reminder of home and the simple pleasure of sharing freshly baked bread with loved ones.
Recipe Overview
- Prep Time: 10 minutes
- Cook Time: 3 hours 5 minutes (including machine cycles)
- Total Time: 3 hours 15 minutes
- Servings: 12
- Yield: 1 2lb loaf
- Dietary Type: Vegetarian
Ingredients
- 1 1/2 cups water, at about 105 degrees Fahrenheit
- 4 cups flour (a flour with at least 4 grams protein per serving is best)
- 1 1/2 teaspoons salt (I use kosher)
- 2 1/2 teaspoons dry yeast
Equipment Needed
- Bread Machine
Instructions
- Ensure your bread machine’s pan is clean and dry.
- Add the water to the bread pan first. This is crucial for proper hydration of the flour and yeast.
- Measure out half of the flour and add it to the pan, covering the water.
- Sprinkle the salt over the flour. Ensure the salt doesn’t come into direct contact with the yeast, as salt can inhibit yeast activity.
- Add the remaining flour on top of the salt.
- Make a small indentation in the center of the flour and add the dry yeast. This placement helps the yeast activate properly.
- Place the bread pan into the bread machine, following the manufacturer’s instructions.
- Select the desired cycle: Normal, Rapid, or Delay Start. This recipe is designed to work well with all three options.
- Start the bread machine. The machine will handle the kneading, rising, and baking processes.
- Once the cycle is complete, carefully remove the bread pan from the machine. Use oven mitts as the pan will be hot.
- Turn the pan upside down and gently shake or tap to release the loaf. If the loaf sticks, use a heat-resistant spatula to loosen the sides.
- Place the freshly baked French bread on a cooling rack to cool completely before slicing and serving. This allows the internal moisture to redistribute, resulting in a better texture.
- Cooling time will typically be 30 minutes to 1 hour, but smaller loaves will cool quicker.
Expert Tips & Tricks
- Flour Power: The type of flour you use significantly impacts the final product. A flour with a protein content of at least 4 grams per serving will provide the necessary gluten development for a good rise and chewy texture. Bread flour is ideal, but all-purpose flour will also work.
- Water Temperature is Key: The water should be warm, but not hot. Aim for around 105 degrees Fahrenheit. Too hot, and you risk killing the yeast. Too cold, and the yeast won’t activate properly.
- Yeast Placement: Keep the yeast separate from the salt until the bread machine starts mixing. This prevents the salt from inhibiting yeast activity.
- Dough Consistency: If, after the initial mixing, the dough seems too dry, add a tablespoon of water at a time until it forms a smooth, elastic ball. If it seems too wet, add a tablespoon of flour at a time. However, be careful not to add too much, as this can result in a dense loaf.
- Machine Variations: Bread machines vary in their cycles and temperatures. Monitor the dough during the first few minutes of kneading to ensure it forms a proper ball. Adjust the water or flour as needed.
- Crust Color: If you prefer a darker crust, you can brush the loaf with an egg wash (1 egg beaten with 1 tablespoon of water) before baking.
- Enhance the Flavor: For added flavor, consider adding a teaspoon of garlic powder or onion powder to the dough.
Serving & Storage Suggestions
Serve this French bread warm with soups, stews, salads, or alongside your favorite cheeses and charcuterie. It’s also delicious simply spread with butter or dipped in olive oil.
- Room Temperature: Store cooled bread in a breadbox or airtight container at room temperature for up to 2 days.
- Refrigerator: For longer storage (up to 5 days), store in an airtight container in the refrigerator. However, refrigeration can dry out the bread, so it’s best to reheat it before serving.
- Freezer: To freeze, slice the cooled bread, wrap tightly in plastic wrap, and then place in a freezer bag. Freeze for up to 2 months. Thaw at room temperature or in the refrigerator.
- Reheating: To reheat, wrap the bread in foil and bake in a preheated oven at 350 degrees Fahrenheit for 10-15 minutes, or until warmed through. You can also lightly toast slices in a toaster.
Reviving Stale Bread: Sprinkle lightly with water and place in a 350F oven for 5-10 minutes to refresh.
Nutritional Information
| Nutrient | Amount per Serving | % Daily Value |
|---|---|---|
| Calories | 154.4 kcal | N/A |
| Calories from Fat | 4 g | 3% |
| Total Fat | 0.5 g | 0% |
| Saturated Fat | 0.1 g | 0% |
| Cholesterol | 0 mg | 0% |
| Sodium | 292.8 mg | 12% |
| Total Carbohydrate | 32.1 g | 10% |
| Dietary Fiber | 1.4 g | 5% |
| Sugars | 0.1 g | 0% |
| Protein | 4.6 g | 9% |
Variations & Substitutions
- Whole Wheat French Bread: Substitute up to 2 cups of the all-purpose flour with whole wheat flour for a nuttier flavor and increased fiber. You may need to add a little extra water to compensate for the increased absorption of the whole wheat flour.
- Herb-Infused French Bread: Add 1-2 tablespoons of your favorite dried herbs, such as rosemary, thyme, or oregano, to the dough for a savory twist.
- Garlic French Bread: Mix 2-3 cloves of minced garlic into the dough for a delicious garlic flavor.
- Cheese French Bread: Add 1 cup of shredded cheese, such as cheddar, mozzarella, or Parmesan, to the dough for a cheesy delight.
- Gluten-Free French Bread: Use a gluten-free bread flour blend. Note that the texture and rise may differ from traditional French bread.
FAQs (Frequently Asked Questions)
Q: Can I use instant yeast instead of active dry yeast?
A: Yes, you can. Instant yeast can be added directly to the flour without needing to be proofed in water first. Use the same amount (2 1/2 teaspoons).
Q: My bread always comes out dense. What am I doing wrong?
A: The most common causes of dense bread are using old yeast, not using enough water, or using too much flour. Make sure your yeast is fresh, measure your ingredients accurately, and adjust the water or flour as needed during the kneading process.
Q: Can I add a pre-ferment, like a poolish or biga, to this recipe?
A: While this recipe is designed for simplicity, you can certainly adapt it by adding a pre-ferment. Reduce the amount of flour and water in the main dough to compensate for the flour and water in the pre-ferment. This will add flavor complexity to your bread.
Q: How do I get a crispier crust?
A: For a crispier crust, try lightly spraying the top of the dough with water before baking. Also, ensure your bread machine is properly vented to allow steam to escape during baking.
Q: My bread machine doesn’t have a 2-pound loaf setting. Can I still use this recipe?
A: Yes, you can. If your machine only has a 1.5-pound loaf setting, you’ll need to reduce the ingredients proportionally. You can also divide the dough in half and bake two smaller loaves, either in the bread machine (one after the other) or in a conventional oven.
Final Thoughts
This basic machine French bread recipe is your gateway to the wonderful world of homemade bread. It’s simple, reliable, and endlessly adaptable to your own tastes and preferences. Don’t be afraid to experiment with different flours, herbs, and spices to create your signature loaf. And most importantly, enjoy the process and the satisfaction of sharing freshly baked bread with those you love. I hope you’ll give it a try and let me know how it turns out – happy baking!