
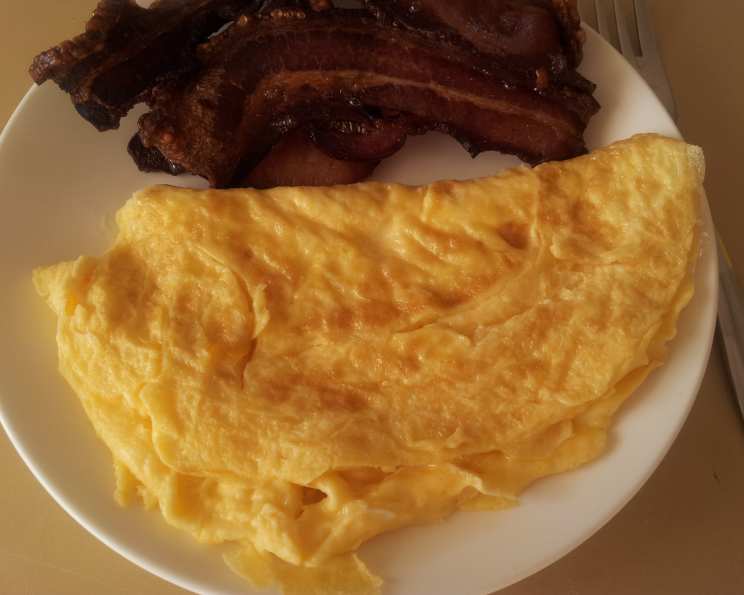
Mastering the Basic Omelette: A Chef’s Guide to Fluffy Perfection
The first omelette I ever made was a disaster. I was maybe ten years old, armed with a non-stick pan that definitely wasn’t non-stick anymore and a hopeful heart. The result? A rubbery, misshapen mess that tasted vaguely of burnt egg and desperation. But even that culinary catastrophe sparked a lifelong fascination with the simple, yet endlessly versatile omelette. Over the years, I’ve learned the secrets to achieving that perfect balance of light, fluffy, and flavorful, and I’m here to share them with you.
Recipe Overview
- Prep Time: 2 minutes
- Cook Time: 2 minutes
- Total Time: 4 minutes
- Servings: 1
- Yield: 1 omelette
- Dietary Type: Varies depending on filling (generally Gluten-Free)
Ingredients
- 2 eggs
- 2 tablespoons water
- Salt and pepper, to taste
- 1 tablespoon butter
- Optional fillings of your choice (cheese, vegetables, meats, herbs)
Equipment Needed
- 8-inch skillet (non-stick recommended)
- Whisk or fork
- Spatula
Instructions
-
In a small bowl, thoroughly beat together the eggs and water with a whisk or fork. This step is crucial for incorporating air and creating a light, fluffy texture. Season generously with salt and pepper. Don’t be afraid to be bold with your seasoning; it will enhance the overall flavor of the omelette.
-
Place the skillet over medium-high heat. Allow the pan to heat up properly before adding the butter. This ensures the omelette doesn’t stick.
-
Once the pan is hot, add the butter. Let it melt completely and coat the entire surface of the skillet. The butter should sizzle gently; if it browns too quickly, reduce the heat slightly.
-
Pour the egg mixture into the hot skillet. The eggs should begin to set almost immediately around the edges.
-
As the mixture sets, use a spatula to gently push the cooked portions towards the center of the pan. Tilt and rotate the pan to allow the uncooked egg to flow into the empty spaces. This technique ensures even cooking and creates those desirable layers of delicate egg.
-
Continue this process until the egg is almost set on the surface but still looks slightly moist. It’s important not to overcook the omelette at this stage. A slightly moist surface is ideal for achieving a tender final product.
-
Now it’s time to add your fillings. Carefully spread your desired fillings over one half of the omelette. Be mindful not to overload it; too much filling can make the omelette difficult to fold.
-
Using the spatula, gently slip it under the unfilled side of the omelette. Fold the omelette in half, covering the fillings.
-
Finally, gently slide the omelette onto a warm plate. This prevents the omelette from cooling down too quickly.
Expert Tips & Tricks
-
The Right Pan is Key: Invest in a good quality non-stick skillet. An 8-inch skillet is ideal for a 2-egg omelette. The sloping sides make it easier to maneuver the omelette and slide it onto the plate.
-
Don’t Overbeat the Eggs: Overbeating can result in a tougher omelette. Aim for just enough whisking to combine the eggs and water.
-
Temperature Control: Maintaining the correct heat is critical. Too low, and the omelette will be pale and greasy; too high, and it will be brown and rubbery.
-
Practice Makes Perfect: Don’t be discouraged if your first few attempts aren’t perfect. Like any cooking skill, mastering the omelette takes practice.
-
Butter Matters: Using clarified butter (ghee) can prevent the butter from browning too quickly, imparting a richer flavor and higher smoke point.
-
Gentle is Best: Handle the omelette gently throughout the cooking process. Avoid excessive stirring or flipping.
Serving & Storage Suggestions
Serve your omelette immediately while it’s still warm and fluffy. A sprinkle of fresh herbs or a dollop of sour cream can add a touch of elegance.
Leftover omelette can be stored in the refrigerator for up to 24 hours. However, it’s best enjoyed fresh. To reheat, gently warm it in a microwave or a non-stick skillet over low heat.
Do not freeze cooked omelettes, as the texture will become rubbery and unappetizing upon thawing.
Nutritional Information
| Nutrient | Amount per Serving | % Daily Value |
|---|---|---|
| Calories | 245 kcal | 12% |
| Total Fat | 21g | 27% |
| Saturated Fat | 10g | 50% |
| Cholesterol | 403mg | 134% |
| Sodium | 244mg | 11% |
| Total Carbohydrate | 1g | 0% |
| Dietary Fiber | 0g | 0% |
| Sugars | 0g | 0% |
| Protein | 13g | 26% |
Nutritional information is an estimate and may vary based on specific ingredients and portion sizes.
Variations & Substitutions
- Western Omelette: In 2 tablespoons melted butter, cook 1/4 cup finely chopped ham, 2 tablespoons chopped green peppers, and 1 tablespoons finely chopped onions until vegetables are tender but not browned. Pour into omelette.
- Strawberry-Orange Omelette: Replace water in Basic Omelette recipe with orange juice. Cook as directed. Fill with 1/2 cup sliced fresh strawberries. Sprinkle omelette with icing sugar or garnish with a dollop of whipped cream.
- Fine Herb Omelette: To the basic omelette recipe, add 2 tablespoons finely chopped parsley, 1 teaspoons finely chopped green onion, 1/2 teaspoons dried tarragon and 1/8 teaspoons finely chopped garlic. Cook as directed.
- Cheese Omelette: Add your favorite shredded cheese (cheddar, mozzarella, Gruyere) just before folding.
- Vegetarian Omelette: Sauté a medley of your favorite vegetables (mushrooms, spinach, bell peppers) and add them as fillings.
- Dairy-Free Omelette: Use plant-based butter or oil and experiment with dairy-free cheese alternatives.
FAQs (Frequently Asked Questions)
Q: What is the secret to a light and fluffy omelette?
A: Beating the eggs thoroughly with water incorporates air, creating a lighter texture. Also, avoid overcooking the omelette; a slightly moist surface is ideal.
Q: Why is my omelette sticking to the pan?
A: Ensure you are using a non-stick skillet and that the pan is properly heated before adding the butter. Using enough butter is also important.
Q: Can I make an omelette ahead of time?
A: Omelettes are best enjoyed fresh. Making them ahead of time will result in a rubbery texture.
Q: What is the best temperature for cooking an omelette?
A: Medium-high heat is generally recommended. Adjust the heat as needed to prevent burning or undercooking.
Q: How do I prevent my omelette from browning?
A: Avoid using too high of a heat and do not overcook the omelette.
Final Thoughts
The basic omelette is more than just a breakfast staple; it’s a blank canvas for culinary creativity. Don’t be afraid to experiment with different fillings and flavor combinations to create your own signature omelette. Whether you’re a seasoned chef or a beginner cook, I encourage you to give this recipe a try. With a little practice and a dash of inspiration, you’ll be whipping up perfect omelettes in no time. Enjoy!