
Mastering Onigiri: A Culinary Journey to Japanese Rice Balls
My first real taste of Japan wasn’t in a fancy restaurant, but on a bullet train hurtling through the countryside. The rhythmic clatter of the rails was my soundtrack as I unwrapped a simple onigiri, purchased from a station kiosk. The cool, slightly salty rice, perfectly formed into a triangle, held a savory nugget of pickled plum. It was humble, yet utterly satisfying – a taste of tradition and a reminder of the journey. From that moment on, I was hooked on the simple perfection of onigiri.
Recipe Overview
- Prep Time: 10 minutes
- Cook Time: 25 minutes
- Total Time: 35 minutes
- Servings: Variable, depends on size
- Yield: 4-6 Onigiri
- Dietary Type: Gluten-Free, Vegetarian (adaptable to Vegan)
Ingredients
- 1 cup medium grain rice (Japanese or Korean)
- 1 1/4 cups water
- Salt
- Sushi nori, 1 inch by 5 inch strips (seaweed laver) (optional)
- Chinese five spice powder (optional)
- Umeboshi (Japanese Pickled Plums) (optional)
- Toasted sesame seeds (optional)
- Canned tuna (optional) or smoked salmon (optional)
Equipment Needed
- Medium saucepan or rice cooker
- Mixing bowl
- Small bowl for water
Instructions
- First, prepare the rice. Rinse the rice thoroughly under cold water until the water runs clear. This removes excess starch and prevents the rice from becoming gummy.
- In a medium saucepan, combine the rinsed rice with 1 1/4 cups of water. Bring to a boil over medium-high heat.
- Once boiling, reduce the heat to low, cover tightly, and simmer for 20 minutes, or until all the water is absorbed. Avoid lifting the lid during cooking, as this releases steam essential for even cooking.
- Remove the saucepan from the heat and let it stand, covered, for 5 minutes. This allows the rice to fully steam and become perfectly fluffy.
- Transfer the cooked rice to a mixing bowl and gently fluff with a rice paddle or fork. Allow the rice to cool slightly, until it’s comfortable to handle but still warm. Warm rice is easier to shape.
- Now, it’s time to prepare your hands. This is crucial for preventing the rice from sticking. Wash your hands thoroughly with soap and water.
- Rinse your hands with cold water, leaving them wet. Sprinkle a generous pinch of salt onto your palms and rub them together. The salt adds flavor and also helps to prevent bacterial growth.
- Take a handful of the cooled rice and gently form a ball in your hands.
- Using the palm of your left hand as a base, gently press and shape the rice into a triangle. Use the palm and fingers of your right hand to form the two sides of the triangle.
- Toss and rotate the onigiri so that the side that was on your left palm is now rotated to one of the sides on your right hand. This helps to create a uniform shape.
- Repeat the shaping process until you have a neat triangle shape. Be gentle; pressing too hard will result in a dense onigiri.
- Repeat steps 6-11 for each onigiri, rinsing and salting your hands each time.
- If using fillings like umeboshi, canned tuna, or smoked salmon, gently press a divot into one of the flat sides of the onigiri with your finger. Fill the divot with the desired stuffing. You can leave the filling exposed or cover it with a strip of sushi nori.
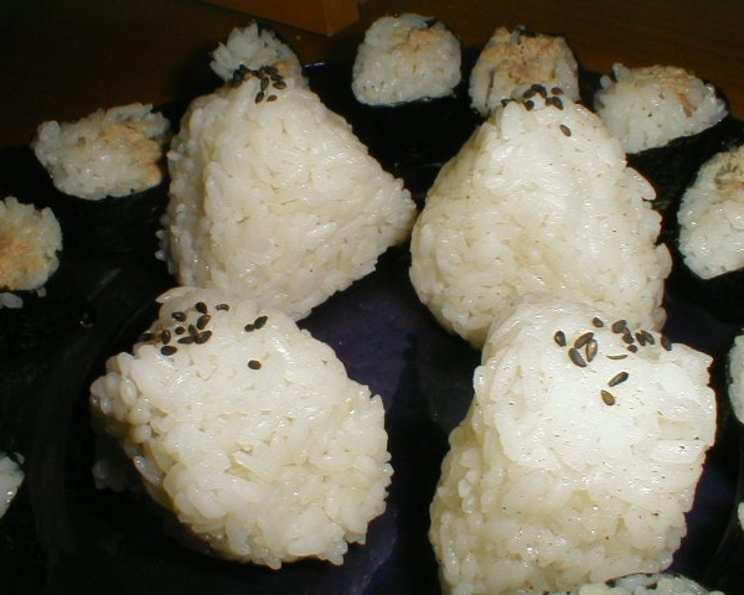
- For added flavor and presentation, you can wrap a strip of sushi nori around the base of the onigiri. Alternatively, you can sprinkle toasted sesame seeds on top.
- If using Chinese five spice powder, add a dash to the salt on your hands before shaping the onigiri.
Expert Tips & Tricks
- Rice is King: The quality of your rice is paramount. Using a good quality Japanese or Korean medium-grain rice will make a huge difference in the texture and flavor of your onigiri.
- Don’t Overwork the Rice: Be gentle when shaping the onigiri. Overworking the rice will make it sticky and dense.
- Keep Hands Wet and Salty: This is crucial for preventing the rice from sticking to your hands and adding flavor.
- Vary the Fillings: Experiment with different fillings to find your favorites. Salmon flakes, seasoned ground meat, or even a small piece of cooked chicken are all great options.
- Use a Mold (Optional): If you’re having trouble shaping the onigiri by hand, you can use a special onigiri mold. These are readily available online and in Japanese grocery stores.
- Flavor Boost: Add a small amount of furikake (Japanese rice seasoning) to the rice for an extra layer of flavor.
- Seaweed Secrets: Lightly toast the nori for a more intense flavor and crispier texture.
Serving & Storage Suggestions
Serve onigiri at room temperature or slightly chilled. They are perfect as a snack, light lunch, or part of a bento box. Onigiri are best eaten fresh, but they can be stored in the refrigerator for up to 24 hours. To prevent the rice from drying out, wrap each onigiri tightly in plastic wrap or store them in an airtight container.
Do not leave onigiri at room temperature for more than 2 hours, as this can encourage bacterial growth.
To reheat, you can microwave the onigiri for a short period of time (about 20-30 seconds) or warm them gently in a dry skillet over low heat. Note that the nori will lose its crispness when reheated. Freezing is not generally recommended, as it affects the texture of the rice.
Nutritional Information
| Nutrient | Amount per Serving | % Daily Value |
|---|---|---|
| Calories | 150 kcal | 8% |
| Total Fat | 1g | 1% |
| Saturated Fat | 0g | 0% |
| Cholesterol | 0mg | 0% |
| Sodium | 200mg | 9% |
| Total Carbohydrate | 33g | 12% |
| Dietary Fiber | 1g | 4% |
| Sugars | 0g | 0% |
| Protein | 3g | 6% |
Note: Nutritional information is an estimate and may vary depending on the specific ingredients used.
Variations & Substitutions
- Vegan Onigiri: Omit the tuna or smoked salmon and use fillings like pickled vegetables, seasoned tofu, or edamame.
- Spicy Onigiri: Add a pinch of chili flakes or a dash of sriracha to the rice for a spicy kick.
- Brown Rice Onigiri: Substitute brown rice for white rice for a healthier option. Note that brown rice may require a longer cooking time.
- Gluten-Free Onigiri: Ensure that all fillings and seasonings used are gluten-free. Tamari (gluten-free soy sauce) can be used as a substitute for soy sauce.
- Regional Variations: Explore different regional variations of onigiri from across Japan. Each region has its own unique fillings and flavors.
FAQs (Frequently Asked Questions)
Q: Can I use a rice cooker to cook the rice?
A: Yes, absolutely! Using a rice cooker is a convenient way to cook the rice perfectly. Follow the rice cooker’s instructions for the rice-to-water ratio.
Q: Can I make onigiri ahead of time?
A: Yes, you can make onigiri ahead of time. Wrap them tightly in plastic wrap and store them in the refrigerator for up to 24 hours.
Q: What can I use as a substitute for nori?
A: If you don’t have nori, you can omit it altogether or use other edible wrappers like lettuce leaves or thinly sliced omelet.
Q: How do I prevent the rice from drying out?
A: To prevent the rice from drying out, wrap the onigiri tightly in plastic wrap or store them in an airtight container.
Q: Can I add other seasonings to the rice?
A: Absolutely! Feel free to experiment with different seasonings like furikake, sesame oil, or soy sauce to add flavor to the rice.
Final Thoughts
Onigiri are more than just rice balls; they are a blank canvas for your culinary creativity. Don’t be afraid to experiment with different fillings and seasonings to create your own signature onigiri. Whether you’re packing a lunch for work, planning a picnic, or simply craving a taste of Japan, these simple rice balls are sure to satisfy. So, roll up your sleeves, wet your hands, and embark on your own onigiri adventure. I encourage you to try this recipe and share your creations with friends and family! Pair them with a steaming bowl of miso soup or a refreshing cup of green tea for a truly authentic Japanese experience.