
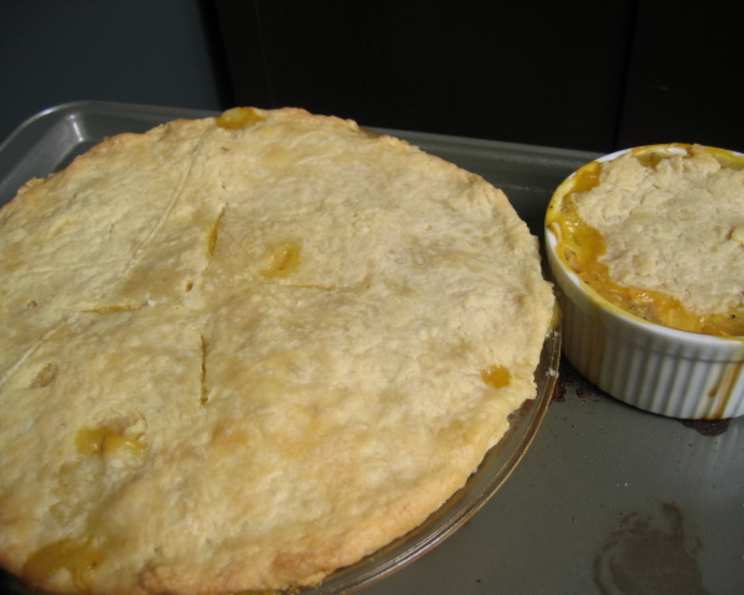
The Cornerstone of Every Great Pie: Mastering the Basic Pie Crust
The aroma of a freshly baked pie is pure nostalgia for me. I remember standing on a stool next to my grandmother, her hands dusted with flour, as she patiently guided me through the art of pie crust. The rhythmic rolling of the pin, the satisfying crimp of the edges, and the anticipation of that first bite – these are memories woven into the very fabric of my culinary passion. This recipe, a testament to simple ingredients and time-honored techniques, brings that comforting feeling to my kitchen every time.
Recipe Overview
- Prep Time: 20 minutes
- Cook Time: Varies depending on filling/pre-baking needs
- Total Time: At least 1 hour 20 minutes (includes chilling)
- Servings: 8
- Yield: 1 9-inch single crust pie or half of a double crust pie
- Dietary Type: Vegetarian (can be made vegan with substitution)
Ingredients
Single Crust
- 1 1/2 cups all-purpose flour
- 1/4 teaspoon salt
- 9 tablespoons (1 stick + 1 tablespoon) unsalted butter, chilled and cut into 9 pieces
- 3 tablespoons ice water
Double Crust
- 2 1/2 cups all-purpose flour
- 1/2 teaspoon salt
- 13 1/2 tablespoons (1 stick + 5 1/2 tablespoons) unsalted butter, chilled and cut into 14 pieces
- 4 1/2 tablespoons ice water
Ingredient Notes:
- For a vegan crust, substitute the butter with a high-quality vegan butter alternative that’s solid when chilled.
- Ensure your butter is properly chilled! This is crucial for creating flaky layers.
- Ice water is important as well. The colder, the better.
Equipment Needed
- Food processor
- Measuring cups and spoons
- Plastic wrap
- Lightly floured surface
- Rolling pin
- Waxed paper (optional, but recommended)
- 9-inch pie plate (greased if not pre-baking)
Instructions
- Combine Dry Ingredients: In the food processor, add the flour and salt. Process for 20 seconds to ensure they are evenly mixed.
- Incorporate the Butter: Distribute the chilled butter pieces evenly over the flour mixture. Process until the mixture resembles coarse meal, about 15-20 seconds. You should still see small bits of butter – this is what creates flakiness.
- Add the Ice Water: With the food processor running, slowly pour the ice water in a steady stream through the feed tube. Process just until the dough starts to come together. Be careful not to over-process; you want to avoid developing too much gluten.
- Form the Dough: Turn the dough out onto a lightly floured surface. Gently knead the dough for just a few turns to bring it together into a cohesive mass.
- Shape and Chill: Shape the dough into a thick disk (or two disks for a double crust pie). Wrap tightly in plastic wrap and refrigerate for at least one hour. This chilling period allows the gluten to relax, making the dough easier to roll out and preventing shrinkage during baking.
- Roll Out the Dough: Place the chilled dough between two pieces of waxed paper. This helps prevent sticking and makes rolling out much easier. Roll the dough out into a circle about 2 inches larger than the size of your pie plate. If the dough becomes too warm and sticky while rolling, return it to the refrigerator for a few minutes to firm up.
- Transfer to Pie Plate: Carefully peel off one piece of waxed paper and invert the dough over your 9-inch pie plate (which should be greased unless you’re pre-baking the crust). Gently press the dough into the plate, ensuring it fits snugly into the bottom and up the sides.
- Trim and Crimp: Trim the excess dough around the edges of the pie plate. You can use a sharp knife or kitchen shears. Crimp the edges of the crust to create a decorative border. There are many different crimping techniques – experiment and find your favorite! A simple fork crimp works well too.
- Chill Again: Keep the crust in the refrigerator for at least 30 minutes before filling and baking. For even better results, stick it in the freezer for 15-20 minutes. This helps prevent the crust from shrinking during baking and helps keep it flaky.
- Pre-baking (Blind Baking): If you are pre-baking the crust (also known as blind baking), line the crust with parchment paper and fill it with pie weights or dried beans. This will prevent the crust from puffing up during baking. Bake in a preheated oven at 375°F (190°C) for 15-20 minutes, or until the edges are lightly golden. Remove the parchment paper and weights and bake for another 5-10 minutes, or until the bottom of the crust is golden brown.
Expert Tips & Tricks
- Keep Everything Cold: The key to a flaky pie crust is keeping the butter cold. Use cold butter, ice water, and chill the dough thoroughly before rolling and baking.
- Don’t Overwork the Dough: Overworking the dough develops the gluten, resulting in a tough crust. Process the dough in the food processor just until it comes together. Knead it gently and briefly.
- Use the Right Flour: All-purpose flour works well for most pie crusts, but you can also experiment with pastry flour or a combination of all-purpose and whole wheat flour for a different flavor and texture.
- Blind Baking for Soggy Bottoms: If you’re making a pie with a wet filling (like a custard or fruit pie), blind baking the crust will help prevent a soggy bottom.
- Egg Wash for Shine: Brush the crust with an egg wash (1 egg beaten with 1 tablespoon of water) before baking for a golden-brown, shiny finish.
- Docking: If not pre-baking, use a fork to prick the bottom of the crust several times (docking). This prevents it from puffing up unevenly during baking.
Serving & Storage Suggestions
Serve your pie warm or at room temperature, depending on the filling. A dollop of whipped cream or a scoop of vanilla ice cream are classic accompaniments.
Store leftover pie in the refrigerator. Cover loosely with plastic wrap or store in an airtight container. It will last for 2-3 days. For longer storage, you can freeze the baked pie. Wrap it tightly in plastic wrap and then in foil. It will last for up to 2 months in the freezer. Thaw in the refrigerator overnight before serving.
Nutritional Information
Note: Nutritional information is an estimate and may vary based on specific ingredients and serving size.
| Nutrient | Amount per Serving | % Daily Value |
|---|---|---|
| Calories | 250 kcal | 13% |
| Total Fat | 16g | 25% |
| Saturated Fat | 10g | 50% |
| Cholesterol | 40mg | 13% |
| Sodium | 100mg | 4% |
| Total Carbohydrate | 22g | 7% |
| Dietary Fiber | 1g | 4% |
| Sugars | 0g | 0% |
| Protein | 3g | 6% |
Variations & Substitutions
- Gluten-Free Crust: Use a gluten-free flour blend designed for baking. You may need to add a binder like xanthan gum to help hold the crust together.
- Whole Wheat Crust: Substitute up to half of the all-purpose flour with whole wheat flour for a nuttier flavor.
- Sweet Crust: Add 1-2 tablespoons of sugar to the flour mixture for a slightly sweeter crust, perfect for fruit pies.
- Herb Crust: Add dried herbs like rosemary or thyme to the flour mixture for a savory crust that pairs well with quiches or savory pies.
- Nut Crust: Add finely ground nuts (like almonds or pecans) to the flour mixture for a nutty flavor and texture.
FAQs (Frequently Asked Questions)
Q: Why is my pie crust tough?
A: Overworking the dough develops the gluten, leading to a tough crust. Avoid over-processing in the food processor and knead the dough gently and briefly.
Q: How do I prevent my pie crust from shrinking?
A: Chill the dough thoroughly before rolling and baking. Blind baking with pie weights also helps prevent shrinkage.
Q: Can I make the pie dough ahead of time?
A: Absolutely! The dough can be made up to 2 days in advance and stored in the refrigerator, wrapped tightly in plastic wrap. You can also freeze the dough for up to 2 months.
Q: Why is my pie crust soggy?
A: Soggy crusts are often caused by wet fillings. Blind baking the crust before adding the filling can help prevent this.
Q: Can I use shortening instead of butter?
A: Shortening can be used, but it won’t provide the same rich flavor as butter. A combination of butter and shortening can also work well.
Final Thoughts
Making a pie crust from scratch can seem daunting, but with a little practice and these helpful tips, you’ll be creating beautiful, flaky crusts in no time. Don’t be afraid to experiment with different flavors and fillings to create your own signature pies. Share your creations with loved ones and savor the delicious results. This basic pie crust is your canvas – now go create a masterpiece!