
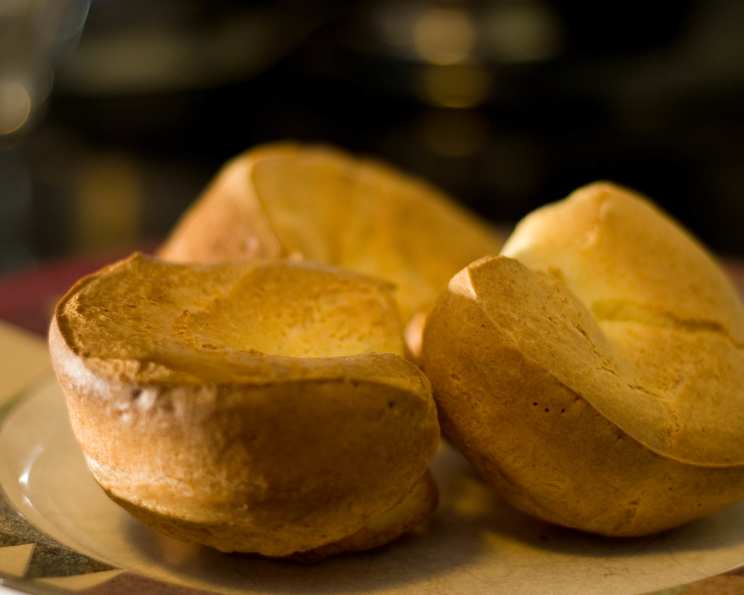
The Humble Popover: A Culinary Blank Canvas
I still remember the first time I witnessed a popover emerge, seemingly by magic, from a hot oven. My grandmother, a woman whose kitchen was a constant source of warmth and delicious smells, carefully pulled the pan from the oven. The towering, golden-brown puffs, with their crisp exteriors and hollow, airy interiors, were unlike anything I’d ever seen. She’d let me peek inside each one, a cavern waiting to be filled with butter, jam, or whatever my heart desired. That day, the popover transcended the realm of simple bread; it became a symbol of possibility and homemade love, a culinary foundation upon which endless flavors could be built.
Recipe Overview
- Prep Time: 10 minutes
- Cook Time: 40 minutes
- Total Time: 50 minutes
- Servings: 6
- Dietary Type: Not Gluten-Free
Ingredients
- 1 tablespoon unsalted butter, melted
- 1 teaspoon unsalted butter, for pan
- 4 3/4 ounces unbleached all-purpose flour
- 1 1/2 teaspoons kosher salt
- 2 large eggs, room temperature
- 1 cup whole milk, room temperature
Equipment Needed
- 6-cup popover pan
- Food processor or blender
- Cooling rack
Instructions
- Preheat your oven to 400 degrees F (200 degrees C). It’s crucial that the oven is fully heated before the popovers go in, as this high initial heat is what creates the steam and lift.
- Grease a 6-cup popover pan generously with the 1 teaspoon of butter. Make sure to get into all the nooks and crannies of each cup. Even better than greasing is to use a cooking spray specifically designed for baking.
- Place all of the ingredients – the melted butter, flour, salt, eggs, and milk – into a food processor or blender. Room temperature ingredients are key here, as they emulsify more easily, resulting in a smoother batter.
- Process or blend the ingredients for 30 seconds. You’re looking for a smooth batter with no lumps. Don’t overmix, however, as this can develop the gluten in the flour and result in tougher popovers.
- Divide the batter evenly between the cups of the popover pan, filling each cup about 1/3 to 1/2 full. Resist the urge to overfill them; they will expand significantly in the oven.
- Bake the popovers on the middle rack of the preheated oven for 40 minutes. Do not open the oven door during baking! This is essential for achieving maximum puff. Opening the door releases the heat and steam, causing the popovers to collapse.
- Remove the popovers from the oven and immediately transfer them to a cooling rack.
- Pierce each popover in the top with a knife to allow steam to escape. This prevents them from becoming soggy.
- Serve the popovers warm.
Expert Tips & Tricks
- Temperature is Key: Ensure your eggs and milk are at room temperature for optimal emulsification and a smoother batter.
- Don’t Peek! Resist the urge to open the oven door during baking. The sudden temperature change can cause the popovers to collapse.
- Preheat the Pan: For extra lift, consider preheating the popover pan in the oven for a few minutes before adding the batter. This gives the batter an immediate burst of heat.
- Achieving Maximum Puff: The initial high heat is crucial. Some bakers even suggest starting at 450°F (230°C) for the first 15 minutes, then reducing the temperature to 350°F (175°C) for the remaining time. This can help maximize the pop.
- Gluten Development: Be careful not to overmix the batter. Overmixing develops the gluten in the flour, leading to a tougher popover.
- Flavor Infusions: You can easily infuse flavor into your popovers by adding herbs, spices, or cheese to the batter.
Serving & Storage Suggestions
Popovers are best served warm, straight from the oven. They can be served with sweet or savory accompaniments. For a sweet treat, try them with butter and jam, whipped cream, or a drizzle of honey. For a savory option, serve them alongside soups, stews, or roasts. They are also delicious filled with scrambled eggs, cheese, and bacon for a breakfast treat.
Leftover popovers are best stored in an airtight container at room temperature. They will lose some of their crispness, but they can be reheated in a preheated oven at 350°F (175°C) for a few minutes to restore some of their texture. They can also be stored in the refrigerator, but they will become even softer. Reheating in the oven is recommended. Freezing is not recommended as it significantly alters the texture. Stored at room temperature, they’ll be good for a day or two. In the fridge, extend that to about 3 days.
Nutritional Information
| Nutrient | Amount per Serving | % Daily Value |
|---|---|---|
| Calories | 153.9 kcal | N/A |
| Calories from Fat | 51 kcal | 34% |
| Total Fat | 5.8 g | 8% |
| Saturated Fat | 2.9 g | 14% |
| Cholesterol | 81.3 mg | 27% |
| Sodium | 476.4 mg | 19% |
| Total Carbohydrate | 19.2 g | 6% |
| Dietary Fiber | 0.6 g | 2% |
| Sugars | 2.3 g | N/A |
| Protein | 5.8 g | 11% |
Note: Nutritional information is an estimate and may vary based on specific ingredients and preparation methods.
Variations & Substitutions
- Gluten-Free Popovers: Substitute a gluten-free all-purpose flour blend for the regular flour. Be sure to use a blend that contains xanthan gum for proper binding.
- Dairy-Free Popovers: Use a plant-based milk alternative, such as almond milk, soy milk, or oat milk, in place of the whole milk. Ensure the milk is at room temperature. Melted coconut oil can be used in place of melted butter, too.
- Herb & Cheese Popovers: Add 1-2 tablespoons of chopped fresh herbs (such as thyme, rosemary, or chives) and 1/4 cup of grated cheese (such as Parmesan, cheddar, or Gruyere) to the batter before processing.
- Sweet Popovers: Add 1-2 tablespoons of sugar and a pinch of cinnamon to the batter for a sweeter version. Consider adding a splash of vanilla extract as well.
- Savory Spice Popovers: Try adding a pinch of garlic powder, onion powder, or smoked paprika to the batter for a savory kick.
FAQs (Frequently Asked Questions)
Q: Why didn’t my popovers pop?
A: Several factors can contribute to this. The oven may not have been hot enough, or the oven door may have been opened during baking. Ensure the oven is fully preheated to 400°F (200°C) and resist the urge to peek! Also, make sure your ingredients are at room temperature.
Q: My popovers are soggy. What did I do wrong?
A: Soggy popovers are often the result of not releasing the steam immediately after baking. Pierce each popover with a knife as soon as they come out of the oven to allow the steam to escape.
Q: Can I make the batter ahead of time?
A: It’s best to bake the popovers immediately after making the batter. The batter can be made up to 30 minutes in advance, but the longer it sits, the less likely the popovers are to rise properly.
Q: Can I use a muffin tin instead of a popover pan?
A: While you can use a muffin tin, popover pans are taller and narrower, which encourages the batter to rise vertically, creating the characteristic popover shape. Muffin tins will result in a shorter, wider product.
Q: What kind of flour works best for popovers?
A: Unbleached all-purpose flour is the standard choice. However, some bakers prefer bread flour for a slightly chewier texture. Avoid using cake flour, as it has a lower protein content and will not provide enough structure for the popovers to rise properly.
Final Thoughts
The popover, in its simplicity, is a testament to the transformative power of basic ingredients. It’s more than just a bread; it’s a vessel for memories, a canvas for flavor, and a reminder that even the humblest recipes can yield extraordinary results. So, preheat your oven, gather your ingredients, and prepare to witness the magic of the popover. Don’t be afraid to experiment with variations and toppings to create your own signature version. And most importantly, share your creations with those you love. After all, food is best enjoyed in good company. Bon appétit!