
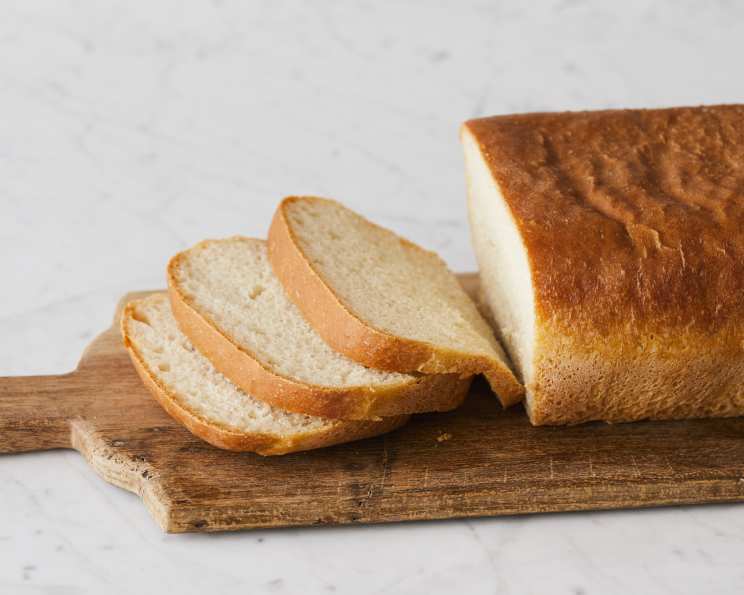
The Soul of Simplicity: Mastering Basic Sourdough Bread
The scent of sourdough baking in the oven always transports me back to my grandmother’s kitchen. I can almost see her now, flour dusting her apron as she kneaded the dough with practiced ease. The tangy aroma would fill the entire house, promising warm, comforting slices slathered with butter and homemade jam. It wasn’t just bread; it was love, patience, and a connection to something timeless all baked into one beautiful loaf. This recipe is my attempt to capture that same magic.
Recipe Overview
- Prep Time: 3 hours 10 minutes (plus starter proofing)
- Cook Time: 40-50 minutes
- Total Time: 4 hours 50 minutes (plus starter proofing)
- Yield: 1 loaf
- Dietary Type: Vegetarian
Ingredients
- 2 cups proofed sourdough starter
- 1 tablespoon butter
- 1/2 cup milk
- 1 teaspoon salt
- 1 tablespoon sugar
- 3 cups white bread flour
Equipment Needed
- Mixing bowl
- Microwave (optional, for melting butter)
- Floured board or work surface
- Lightly greased loaf pan
- Oven
- Wire rack
Instructions
-
Proofing the Starter: This is the heart of sourdough. Before you even think about measuring, ensure your starter is lively and active. To proof, combine 1 cup of your starter with 1 1/2 cups of flour and 1 1/2 cups of warm water in a bowl. Stir well to combine.
-
Rest and Rise: Cover the mixture loosely and let it sit at room temperature for 8 to 12 hours. The longer it sits, the more pronounced the sour flavor will be. This process allows the wild yeasts and bacteria to thrive, giving sourdough its characteristic tang and rise.
-
Measure and Reserve: After proofing, measure out the 2 cups of starter required for the recipe. Return any leftover starter to the refrigerator for future baking adventures.
-
Combine Starter and Butter: Pour the 2 cups of proofed starter into a mixing bowl. Melt the 1 tablespoon of butter. A microwave works perfectly fine for this, but you can also melt it in a small saucepan over low heat.
-
Warm the Milk: Add the 1/2 cup of milk to the melted butter and warm the mixture briefly until it reaches approximately 85 degrees F. You don’t want it too hot, just slightly warmer than lukewarm. This temperature helps activate the yeast.
-
Dissolve and Blend: Add the 1 teaspoon of salt and 1 tablespoon of sugar to the warm milk and butter mixture. Stir until both are completely dissolved.
-
Mix the Wet Ingredients: Pour the milk mixture into the mixing bowl with the starter. Mix well to combine the wet ingredients.
-
Gradually Add Flour: Begin adding the 3 cups of white bread flour, one cup at a time, to the wet ingredients. Stir until the dough becomes too stiff to mix easily by hand. This is where elbow grease comes in!
-
Kneading is Key: Turn the dough out onto a lightly floured board or work surface. Knead in the remaining flour until the dough is smooth and satiny. This process develops the gluten, giving the bread its structure and chewiness. Knead for about 8-10 minutes.
-
Shape the Loaf: Pat the dough into a 1-inch thick oval shape. Form the loaf by rolling the oval up from the long side, pinching the seam together as you roll. Tuck the ends under to form a neat loaf shape.
-
First Rise (Proofing): Place the shaped loaf in a lightly greased loaf pan. I find that cooking spray works best, but you can also use butter or oil. Cover the pan loosely with plastic wrap or a damp kitchen towel and let it rise in a warm place (around 85 degrees F) for 1 1/2 to 3 hours. The ideal environment for rising is warm and humid.
-
Check for Readiness: The dough is ready to bake when it has risen 1 to 2 inches above the edges of the loaf pan. Be patient and allow the dough to rise fully. Under-proofed dough will result in a dense, heavy loaf.
-
Preheat the Oven: Preheat your oven to 375 degrees F (190 degrees C).
-
Bake: Bake the loaf for 10 minutes at 375 degrees F (190 degrees C), then reduce the heat to 350 degrees F (175 degrees C) and bake for an additional 30 to 40 minutes. Baking time can vary depending on your oven and your desired crust color.
-
Check for Doneness: To check for doneness, insert a wooden skewer or toothpick into the center of the loaf. If it comes out clean, the bread is done. You can also tap the bottom of the loaf; it should sound hollow.
-
Finishing Touches: Remove the loaf from the oven and brush the top lightly with melted butter. This will give it a beautiful shine and a richer flavor.
-
Cooling: Turn the loaf out of the pan and place it on a wire rack to cool completely before slicing. This prevents the bottom from becoming soggy. Resist the temptation to cut into it while it’s still hot – allowing it to cool properly is crucial for the texture.
-
Alternative Shaping: If you prefer, you can shape the dough into a round or oval loaf and bake it directly on a baking sheet.
Expert Tips & Tricks
- Starter Strength: A strong, active starter is essential for sourdough success. Feed your starter regularly (once or twice a day) for several days before baking to ensure it’s at its peak.
- Kneading Technique: Don’t be afraid to knead the dough vigorously. Proper kneading develops the gluten, which gives sourdough its characteristic chew.
- Oven Temperature: Ovens can vary in temperature. Use an oven thermometer to ensure your oven is accurately calibrated.
- Steam: For a crustier loaf, try adding steam to the oven during the first 10 minutes of baking. You can do this by placing a pan of hot water on the bottom rack of the oven.
- Scoring: Scoring the top of the loaf before baking allows it to expand evenly in the oven and prevents it from cracking unpredictably. Use a sharp knife or lame to make a few shallow slashes across the surface.
- Adjust Flour: The amount of flour needed may vary depending on the humidity and the hydration of your starter. Add flour gradually until the dough is smooth and slightly tacky, but not sticky.
Serving & Storage Suggestions
Serve your freshly baked sourdough bread warm or at room temperature. It’s delicious on its own, toasted, or used for sandwiches. It pairs perfectly with soups, salads, and cheese boards. Store leftover bread in an airtight container at room temperature for up to 3 days. For longer storage, wrap the loaf tightly in plastic wrap and freeze it for up to 2 months. To reheat frozen bread, thaw it completely and then warm it in a 350 degrees F (175 degrees C) oven for 10-15 minutes.
Nutritional Information
| Nutrient | Amount per Serving | % Daily Value |
|---|---|---|
| Calories | 1593.7 kcal | N/A |
| Calories from Fat | N/A | 11% |
| Total Fat | 19.7g | 30% |
| Saturated Fat | 10.7g | 53% |
| Cholesterol | 47.6mg | 15% |
| Sodium | 2494.3mg | 103% |
| Total Carbohydrate | 304.4g | 101% |
| Dietary Fiber | 10.1g | 40% |
| Sugars | 13.6g | N/A |
| Protein | 42.9g | 85% |
Note: Nutritional information is an estimate and may vary depending on specific ingredients and serving sizes.
Variations & Substitutions
- Whole Wheat Sourdough: Substitute up to half of the white bread flour with whole wheat flour for a nuttier flavor and denser texture.
- Rye Sourdough: Add 1/2 to 1 cup of rye flour for a more complex flavor profile.
- Herb-Infused Sourdough: Knead in chopped fresh herbs, such as rosemary, thyme, or oregano, for an aromatic twist.
- Cheese Sourdough: Add shredded cheese, such as cheddar or Parmesan, to the dough during the last few minutes of kneading.
- Seed Sourdough: Sprinkle sesame seeds, poppy seeds, or sunflower seeds on top of the loaf before baking for added flavor and texture.
- Sweet Sourdough: Add dried fruits like raisins or cranberries, along with a touch of cinnamon, for a sweeter loaf perfect for breakfast.
FAQs (Frequently Asked Questions)
Q: My sourdough bread is dense and doesn’t rise well. What am I doing wrong?
A: This is likely due to a weak starter or under-proofing. Ensure your starter is active and bubbly before using it, and allow the dough sufficient time to rise in a warm place.
Q: How do I know when my sourdough starter is ready to use?
A: A ready starter will have doubled in size after feeding and will have a bubbly, airy texture. It should also have a slightly sour aroma.
Q: Can I use all-purpose flour instead of bread flour?
A: Bread flour is recommended for its higher protein content, which develops more gluten and results in a chewier texture. However, all-purpose flour can be used in a pinch, though the texture may be slightly different.
Q: My sourdough bread is too sour. How can I reduce the sourness?
A: Reduce the proofing time of the starter. The longer it ferments, the sourer it becomes. You can also use less starter in the recipe.
Q: Why is my sourdough crust so hard?
A: This can be due to baking at too high a temperature or for too long. Try lowering the oven temperature slightly and reducing the baking time. Adding steam to the oven can also help create a softer crust.
Final Thoughts
Baking sourdough bread is a journey, not just a recipe. It requires patience, attention, and a little bit of love. Don’t be discouraged if your first loaf isn’t perfect. Each batch is a learning experience. So, embrace the process, experiment with flavors, and enjoy the simple pleasure of creating something delicious from scratch. Share your creations with friends and family, and let the aroma of freshly baked sourdough fill your home with warmth and joy. Don’t hesitate to share your experiences and adaptations with other bakers, or better yet, pair your perfect loaf with a hearty stew and a glass of your favorite red wine!