
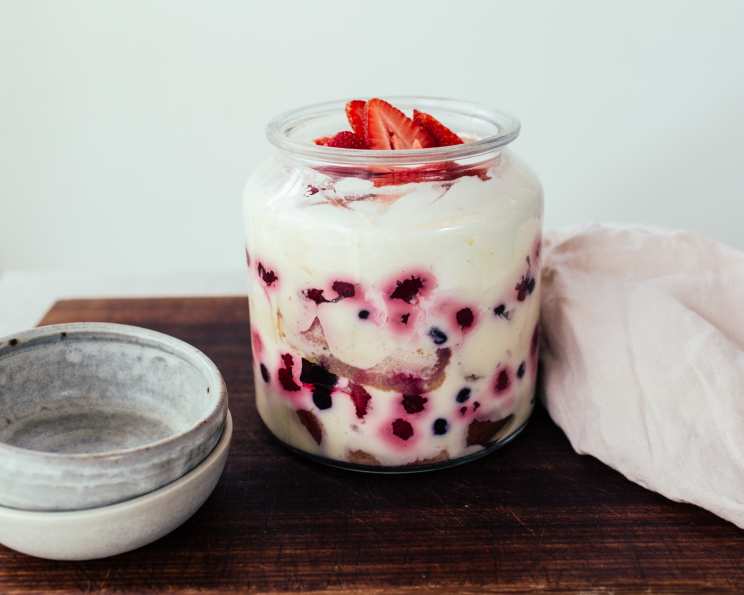
Basic Trifle Recipe: A Symphony of Flavors and Textures
The first trifle I ever made was a disaster. I was ten, attempting to recreate a dessert I’d seen on a British baking show. The cake was dry, the custard lumpy, and the fruit was… well, let’s just say it looked less than appealing. But amidst the chaos of spilled berries and slightly-too-sweet cream, I discovered the magic of layering flavors and textures. That wobbly, imperfect trifle sparked a lifelong love affair with this classic dessert, and it taught me that even a “basic” trifle can be extraordinary.
Recipe Overview
- Prep Time: 30 minutes
- Cook Time: 0 minutes (plus chilling time)
- Total Time: 2 hours 30 minutes (including chilling)
- Servings: 10-12
- Yield: 1 trifle
- Dietary Type: Varies depending on ingredient choices
Ingredients
- 1 pre-made cake (such as sponge cake or angel food cake)
- 1 package instant pudding mix (such as Bird’s custard mix or vanilla)
- 2 (1 lb) bags frozen fruit or 2 (1 lb) bags fresh fruit (berries, peaches, etc.)
- 1/3 cup sugar (adjust to taste based on fruit sweetness)
- 1/2 cup whipped cream
- Additional fresh fruit (to garnish)
- 1/3 cup juice (from the fruit) or 1/3 cup water
Equipment Needed
- Trifle bowl
- Mixing bowls
- Whisk
- Knife
- Cutting board
Instructions
-
Begin by preparing the pudding or custard according to the package directions. Once prepared, set it aside to cool completely. This is crucial to prevent the custard from melting the other layers.
-
In a separate bowl, gently mix the fruit with the sugar. If using frozen fruit, allow it to thaw slightly first. The sugar will help draw out the fruit’s natural juices, creating a delicious syrup. Let this mixture sit for at least 15 minutes, or longer if you have time, allowing the flavors to meld. Add the juice or water to the fruit mixture if desired.
-
Cut the cake into approximately 1-inch chunks. These don’t need to be perfect; slightly irregular pieces will add to the trifle’s rustic charm.
-
Now, the fun part: layering! Start by placing half of the cake chunks in the bottom of the trifle bowl, creating a base. Ensure that the cake is evenly distributed across the bottom.
-
Next, layer half of the fruit mixture on top of the cake. Distribute the fruit evenly, making sure to include some of the syrup.
-
Spoon half of the cooled pudding or custard over the fruit layer, gently spreading it to cover the fruit completely.
-
Repeat the layering process: Add the remaining cake chunks, then the remaining fruit mixture (including the syrup), and finally the remaining pudding or custard.
-
Once all the layers are assembled, top the trifle with whipped cream. You can either create a smooth, even layer or pipe decorative swirls using a piping bag.
-
Finally, garnish the trifle with additional fresh fruit. Arrange the fruit attractively on top of the whipped cream. Berries, sliced peaches, or even a few sprigs of mint can add a touch of elegance.
-
Chill the trifle thoroughly in the refrigerator before serving. This allows the flavors to meld together and the layers to set. A minimum of 2 hours is recommended, but longer chilling (up to overnight) is even better.
Expert Tips & Tricks
- Cake Selection: Don’t be afraid to experiment with different types of cake. Sponge cake is classic, but angel food cake offers a lighter option. For a richer flavor, try pound cake or even a chocolate cake.
- Fruit Choices: The possibilities are endless! Berries are always a crowd-pleaser, but peaches, mangoes, or even a mixed fruit cocktail can work well. Consider using seasonal fruits for the freshest flavors.
- Custard Consistency: If your custard seems too thick, whisk in a little milk or cream to thin it out. If it’s too thin, you can add a small amount of cornstarch or arrowroot powder while preparing it, making sure to cook it thoroughly to avoid a starchy taste.
- Liquor Infusion: For an adult twist, consider drizzling a tablespoon or two of sherry, brandy, or other liqueur over the cake layers before adding the fruit.
- Preventing Soggy Cake: To prevent the cake from becoming too soggy, you can lightly toast the cake cubes in the oven before assembling the trifle.
Serving & Storage Suggestions
Serve the trifle chilled, straight from the refrigerator. Use a large spoon to scoop out portions, ensuring that each serving includes all the layers. The trifle is best served within 24-48 hours of assembly. Store any leftovers covered tightly in the refrigerator. While it’s safe to eat after a few days, the cake may become soggy and the fruit may lose its vibrancy. Freezing the trifle is not recommended, as the texture of the custard and fruit will change.
Nutritional Information
| Nutrient | Amount per Serving | % Daily Value |
|---|---|---|
| Calories | 250 kcal | 13% |
| Total Fat | 8g | 10% |
| Saturated Fat | 5g | 25% |
| Cholesterol | 25mg | 8% |
| Sodium | 150mg | 7% |
| Total Carbs | 40g | 15% |
| Dietary Fiber | 2g | 7% |
| Sugars | 25g | – |
| Protein | 4g | 8% |
Note: Nutritional information is an estimate and may vary based on specific ingredients used.
Variations & Substitutions
- Low-Fat Trifle: Use angel food cake, fat-free pudding, and low-fat whipped topping.
- Strawberry Shortcake Trifle: Use yellow or angel food cake, vanilla custard, and sliced strawberries.
- Black Forest Trifle: Use chocolate cake, raspberries, and chocolate custard.
- Tropical Trifle: Use angel food cake, a mixture of pineapple, mangoes, and papayas, and vanilla or lemon pudding. Sprinkle with shredded coconut.
- Apples and Cream Trifle: Use spice cake, apple pie filling, and custard.
- Banana Crème Trifle: Use white or chocolate cake, sliced bananas, and custard.
- Vegan Trifle: Substitute the cake with a vegan sponge cake, the pudding with a plant-based custard (made with almond or coconut milk), and the whipped cream with coconut whipped cream.
- Gluten-Free Trifle: Use gluten-free cake and ensure the pudding mix is also gluten-free.
FAQs (Frequently Asked Questions)
Q: Can I use a homemade cake instead of a store-bought one?
A: Absolutely! Using a homemade cake will elevate the flavor of your trifle even further. Just be sure to let it cool completely before cutting it into chunks.
Q: What if I don’t have a trifle bowl?
A: No problem! You can use any large, clear bowl or even individual serving glasses. The clear glass allows you to see the beautiful layers.
Q: Can I make the trifle ahead of time?
A: Yes, in fact, it’s recommended! Chilling the trifle for at least 2 hours (or even overnight) allows the flavors to meld together and the layers to set.
Q: Can I use different types of fruit?
A: Absolutely! Feel free to experiment with your favorite fruits. Berries, peaches, mangoes, and even canned fruit cocktail can all work well.
Q: What if my custard is lumpy?
A: If your custard is lumpy, try whisking it vigorously or even blending it with an immersion blender until smooth.
Final Thoughts
Trifle isn’t just a dessert; it’s an experience. It’s a celebration of flavors and textures, a symphony of sweetness that delights the senses. Whether you stick to the basic recipe or experiment with different variations, I encourage you to embrace the fun of creating this classic dish. Don’t be afraid to get creative, and most importantly, enjoy every delicious bite! Share your creations and variations with friends and family, and let the joy of trifle making spread.