
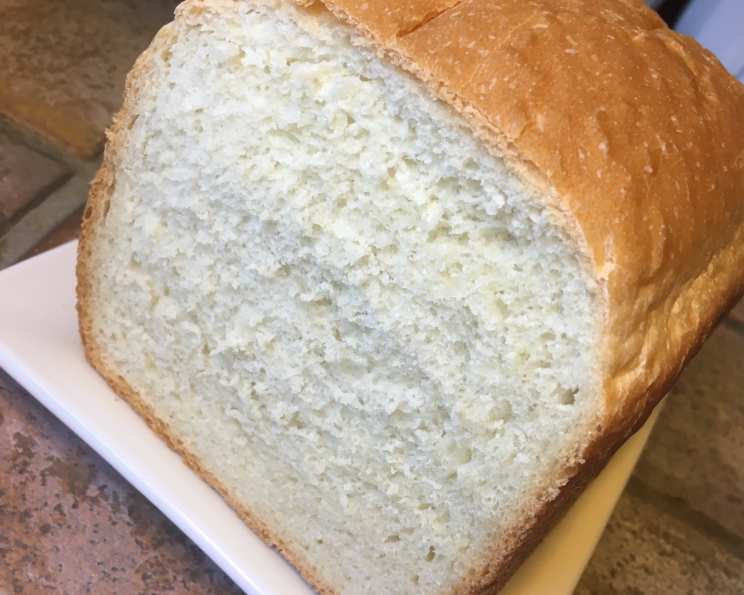
The Simple Joy of Homemade White Bread (Bread Machine Edition)
I can still picture my grandmother, apron dusted with flour, pulling a warm, fragrant loaf of white bread from her oven. The scent alone was enough to make your mouth water. While I may not have inherited her knack for traditional baking, I discovered the magic of the bread machine years ago, allowing me to recreate that same comforting experience with ease. This recipe, adapted from the booklet of my trusty bread maker, is the key to unlocking that simple pleasure.
Recipe Overview
- Prep Time: 5 minutes
- Cook Time: 4 hours 10 minutes
- Total Time: 4 hours 15 minutes
- Yields: 1 loaf
- Dietary Type: Vegetarian
Ingredients
- 1 1/3 cups lukewarm water
- 2 tablespoons powdered milk
- 1 1/2 teaspoons salt
- 1 tablespoon sugar
- 2 tablespoons butter or margarine
- 3 3/4 cups white flour or bread flour
- 1 teaspoon yeast
Equipment Needed
- Bread Machine
Instructions
-
Begin by carefully measuring the lukewarm water and adding it to the bread machine pan. The water temperature is important; too hot and it will kill the yeast, too cold and it won’t activate properly. Lukewarm, around 105-115°F (40-46°C), is ideal.
-
Add the powdered milk. This helps create a softer crumb and adds a touch of richness to the bread.
-
Next, measure and add the salt. Salt controls the yeast and strengthens the gluten, so don’t skip it!
-
Follow with the sugar. The sugar provides food for the yeast, helping it to rise and also adds a touch of sweetness.
-
Add the butter or margarine, cut into smaller pieces for even distribution. The fat contributes to the tenderness and flavor of the bread.
-
Now, carefully measure and add the white flour or bread flour. Bread flour has a higher protein content than all-purpose flour, resulting in a chewier texture. White flour will give you a softer, more tender loaf. Use whichever you prefer or have on hand.
-
Finally, measure and add the yeast. Make sure your yeast is fresh for optimal rising.
-
Insert the baking pan into the bread machine and close the lid securely.
-
Select the BASIC setting on your bread machine and choose your desired crust color: REGULAR or DARK.
-
Push the start button. Most bread machines have a delay before mixing begins. Don’t worry, this is normal!
-
The timer will signal when the baking cycle is complete. This typically takes around 4 hours and 10 minutes, but check your machine’s manual for exact timing.
-
Using pot holders, carefully remove the baking pan from the unit. Be cautious, as the pan will be very hot.
-
Gently turn the bread out of the baking pan onto a wire rack. If the bread sticks, try loosening the sides with a spatula.
-
Allow the bread to cool completely before slicing. This is crucial for preventing a gummy texture and ensuring clean slices.
For Buns:
-
Prepare the bread dough according to the recipe above, using the DOUGH setting on your bread machine.
-
When the dough cycle ends, remove the dough from the bread machine.
-
Divide the dough into either 16 small or 24 medium equal pieces.
-
Roll each piece into a smooth ball.
-
Place the dough balls on a greased baking sheet, leaving some space between each bun.
-
Cover the baking sheet with a clean kitchen towel and let the buns rise in a warm place until doubled in size, approximately 50 minutes.
-
Preheat your oven to 375 degrees Fahrenheit (190 degrees Celsius).
-
Bake the buns for 20 minutes, or until golden brown.
Expert Tips & Tricks
- Water Temperature: Ensuring your water is lukewarm (around 105-115°F) is crucial for activating the yeast without killing it. Use a kitchen thermometer for accuracy.
- Yeast Quality: Always check the expiration date on your yeast. Old yeast may not rise properly. You can test your yeast by mixing a teaspoon of yeast with a teaspoon of sugar in 1/4 cup of warm water. If it doesn’t bubble within 5-10 minutes, your yeast is likely dead.
- Ingredient Order: Adding ingredients in the order specified is important. The water should be added first, followed by the dry ingredients. This prevents the yeast from coming into direct contact with the salt, which can inhibit its activity.
- Kneading Check: If your bread machine has a viewing window, check the dough during the kneading process. It should form a smooth, elastic ball. If it’s too wet, add a tablespoon of flour at a time. If it’s too dry, add a tablespoon of water at a time.
- Crust Color: If you prefer a softer crust, try brushing the top of the loaf with melted butter or milk before baking.
- High Altitude Baking: If you live at a high altitude, you may need to adjust the recipe. Reduce the yeast by 1/4 teaspoon and add 1-2 tablespoons of water.
Serving & Storage Suggestions
Serve your homemade white bread warm with a pat of butter, alongside soups and stews, or use it to make sandwiches. For storage, allow the bread to cool completely before wrapping it tightly in plastic wrap or placing it in a bread bag. Store at room temperature for up to 3 days. For longer storage, slice the bread and freeze it in a freezer-safe bag for up to 2 months. To reheat frozen bread, simply toast it or thaw it at room temperature.
Nutritional Information
Note: These values are estimates and may vary based on specific ingredients and portion sizes.
| Nutrient | Amount per Serving | % Daily Value |
|---|---|---|
| Calories | 171 kcal | 9% |
| Total Fat | 3.8g | 6% |
| Saturated Fat | 2.3g | 12% |
| Cholesterol | 10.3mg | 3% |
| Sodium | 288mg | 12% |
| Total Carbohydrate | 30.1g | 10% |
| Dietary Fiber | 1.1g | 4% |
| Sugars | 2.3g | 5% |
| Protein | 4.6g | 9% |
Variations & Substitutions
- Whole Wheat Bread: Substitute up to half of the white flour with whole wheat flour for a heartier loaf.
- Herb Bread: Add 1-2 tablespoons of dried herbs, such as rosemary, thyme, or oregano, to the dough for a flavorful twist.
- Cheese Bread: Add 1/2 cup of shredded cheese, such as cheddar or parmesan, to the dough.
- Sweet Bread: Increase the sugar to 2-3 tablespoons and add 1/2 teaspoon of cinnamon for a sweet bread perfect for breakfast.
- Dairy-Free: Substitute the powdered milk with a dairy-free milk powder or omit it altogether. Use a dairy-free margarine or vegetable oil in place of butter.
FAQs (Frequently Asked Questions)
Q: Can I use all-purpose flour instead of bread flour?
A: Yes, you can use all-purpose flour, but the bread will have a slightly softer texture. Bread flour has a higher protein content, which results in a chewier crumb.
Q: My bread came out too dense. What did I do wrong?
A: This could be due to several factors, including using old yeast, not measuring the ingredients accurately, or not having enough liquid in the dough. Make sure your yeast is fresh and measure carefully.
Q: My bread is too brown on top. How can I prevent this?
A: If your bread is browning too quickly, try covering the top of the bread machine pan with a piece of aluminum foil during the last 15-20 minutes of baking.
Q: Can I add nuts or seeds to this recipe?
A: Yes, you can add up to 1/2 cup of nuts or seeds to the dough. Add them during the last few minutes of the kneading cycle.
Q: How long will the bread stay fresh?
A: Properly stored, the bread will stay fresh for up to 3 days at room temperature or up to 2 months in the freezer.
Final Thoughts
There’s nothing quite like the aroma of freshly baked bread filling your home. This simple white bread recipe, made easy with a bread machine, is a perfect starting point for beginner bakers and a reliable staple for experienced cooks. Don’t hesitate to experiment with variations and substitutions to create your own signature loaf. I encourage you to give this recipe a try and share your creations with family and friends. Pair it with a hearty soup, a comforting stew, or simply enjoy it toasted with your favorite spread. Happy baking!