
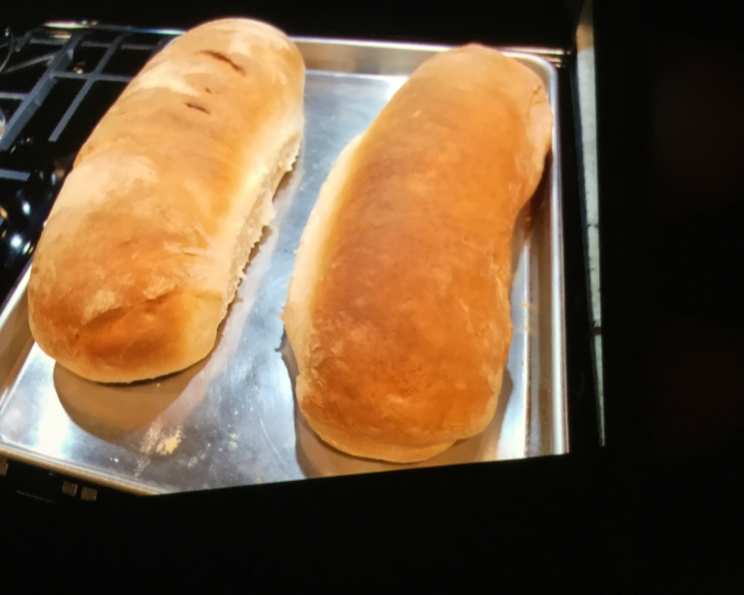
The Heart of Home: KitchenAid Basic White Bread
Baking bread, for me, has always been more than just following a recipe; it’s a way to connect with memories. I remember my grandmother’s kitchen, always warm and fragrant, the comforting aroma of yeast and flour hanging in the air. She’d let me punch down the dough, a task I relished with childish glee, feeling the soft resistance beneath my small fists. While her recipe was a closely guarded secret, this KitchenAid Basic White Bread brings me close to that feeling, the simple satisfaction of creating something wholesome and delicious from scratch. This is the bread I turn to when I want a taste of home, a taste of simpler times.
Recipe Overview
- Prep Time: 25 minutes
- Cook Time: 30 minutes
- Total Time: 2 hours 25 minutes (includes rising time)
- Servings: Varies
- Yield: 2 loaves or 12 bierocks
- Dietary Type: Vegetarian
Ingredients
- 1/2 cup milk
- 3 tablespoons sugar
- 2 teaspoons salt
- 3 tablespoons butter or margarine
- 2 (1/4 ounce) packages dry active yeast
- 1 1/2 cups warm water (105F to 115F)
- 5-6 cups all-purpose flour, plus more for dusting
Optional for Bierocks:
- 1 recipe of hamburger cabbage filling (such as recipe #50809)
- 1 egg, beaten (for egg wash)
- Coarse ground pepper
- Salt
Equipment Needed
- KitchenAid stand mixer with dough hook attachment
- Small saucepan
- Measuring cups and spoons
- Two 8 1/2 x 4 1/2 x 2 1/2-inch loaf pans
- Greased bowl
- Wire racks
- Baking sheet (if making bierocks)
Instructions
-
Prepare the Milk Mixture: In a small saucepan, combine the milk, sugar, salt, and butter. Heat over low heat, stirring constantly, until the butter melts and the sugar dissolves. Remove from heat and allow the mixture to cool to lukewarm. It’s crucial that the mixture is lukewarm and not hot, as high temperatures can kill the yeast. Aim for a temperature below 115°F.
-
Activate the Yeast: In the bowl of your KitchenAid stand mixer, dissolve the dry active yeast in the warm water. Let it stand for 5-10 minutes until foamy. This indicates that the yeast is active and ready to use. If the yeast doesn’t foam, it may be old or the water may have been too hot or too cold, and you should start again with fresh yeast.
-
Combine and Knead the Dough: Add the lukewarm milk mixture to the activated yeast mixture. Gradually add 4 1/2 cups of the flour. Attach the bowl to your KitchenAid stand mixer and attach the dough hook. Turn the mixer to speed 2 and mix for 1 minute.
-
Adjust Flour and Knead Further: Continuing on speed 2, add the remaining flour, 1/2 cup at a time, until the dough clings to the hook and cleans the side of the bowl. Be patient; the amount of flour needed can vary slightly depending on the humidity. Knead on speed 2 for 2 minutes longer, or until the dough is smooth and elastic. The dough will be slightly sticky to the touch – this is perfectly normal. Avoid adding too much flour, as this can result in a dry, dense bread.
-
First Rise: Place the dough in a greased bowl, turning to grease the top. Cover the bowl with plastic wrap or a clean kitchen towel. Let the dough rise in a warm place, free from drafts, until doubled in bulk, about an hour. The ideal temperature for rising is around 75-80°F. You can create a warm environment by placing the bowl in a slightly warmed oven (turned off!) or on top of the refrigerator.
-
Shape the Loaves: Punch the dough down to release the air. Divide the dough in half. Shape each half into a loaf and place in a greased 8 1/2 x 4 1/2 x 2 1/2-inch loaf pan. To shape the loaves, gently flatten each half of the dough into a rectangle. Roll the rectangle up tightly, pinching the seam closed. Tuck the ends underneath to create a smooth loaf.
-
Second Rise: Cover the loaf pans with plastic wrap or a clean kitchen towel. Let the dough rise in a warm place, free from drafts, until doubled in bulk, about 1 hour. This second rise is essential for a light and airy loaf.
-
Bake the Bread: Preheat your oven to 400 degrees F (200 degrees C). Bake the loaves for 30 minutes, or until golden brown and the internal temperature reaches 190-200°F. If the tops of the loaves are browning too quickly, tent them with foil during the last 10-15 minutes of baking.
-
Cool and Slice: Remove the loaves from the pans immediately and cool on wire racks completely before slicing. Cooling the bread completely prevents it from becoming gummy when sliced.
For Bierocks (Optional):
- After the dough rises the first time, punch it down and cut it into 12 equal pieces.
- Roll each piece into a circle approximately 4-5 inches in diameter.
- Fill each circle with a generous spoonful of hamburger cabbage filling (such as recipe #50809).
- Bring the edges of the dough circle up and pinch them together tightly to seal the filling inside. Fold the ends in for extra security.
- Place the filled bierocks on a greased baking sheet.
- Brush the tops of the bierocks with egg wash (1 beaten egg).
- Sprinkle with coarse ground pepper and salt.
- Bake at 350 degrees F (175 degrees C) for 25 to 30 minutes, or until golden brown.
- Cool on a rack before serving.
Expert Tips & Tricks
- Temperature is Key: Ensure your water is within the specified temperature range (105-115°F) for optimal yeast activation. Too hot, and you’ll kill the yeast; too cold, and it won’t activate.
- Don’t Overmix: Overmixing can lead to tough bread. Trust your KitchenAid and stop kneading as soon as the dough becomes smooth and elastic.
- Proofing Environment: A consistent, warm environment is crucial for successful rising. If your kitchen is cold, try placing the dough in a slightly warmed oven (turned off) with a bowl of hot water to create a humid atmosphere.
- Baking Stone: For a crispier crust, try baking the bread on a preheated baking stone.
- Egg Wash for Shine: For a glossy crust, brush the loaves with an egg wash (1 egg beaten with 1 tablespoon of water) before baking.
- Kneading by Hand: If you don’t have a KitchenAid mixer, you can knead the dough by hand on a lightly floured surface for 8-10 minutes, or until smooth and elastic.
- Bread Flour: For a slightly chewier texture, substitute 1-2 cups of the all-purpose flour with bread flour.
- Adjusting for Humidity: On humid days, you may need to add a bit more flour to prevent the dough from being too sticky. Conversely, on dry days, you may need a bit less.
Serving & Storage Suggestions
This basic white bread is incredibly versatile. Serve it warm with butter and jam, use it for sandwiches, toast, or French toast. It’s also perfect for making croutons or bread pudding. For the bierocks, serve them warm as a hearty and satisfying meal.
To store the bread, let it cool completely and then store it in an airtight container at room temperature for up to 3 days. For longer storage, you can freeze the bread. Slice the bread before freezing, or freeze the entire loaf. Wrap tightly in plastic wrap and then in foil, or place in a freezer bag. Frozen bread will keep for up to 2-3 months. Thaw at room temperature or in the oven. To refresh slightly stale bread, sprinkle it lightly with water and bake it in a preheated oven at 350°F for 5-10 minutes.
Nutritional Information
Note: Nutritional information is an estimate and can vary based on specific ingredients and portion sizes.
| Nutrient | Amount per Serving | % Daily Value* |
|---|---|---|
| Calories | 250 kcal | 13% |
| Total Fat | 8g | 10% |
| Saturated Fat | 5g | 25% |
| Cholesterol | 20mg | 7% |
| Sodium | 350mg | 15% |
| Total Carbohydrate | 40g | 15% |
| Dietary Fiber | 2g | 7% |
| Sugars | 5g | N/A |
| Protein | 6g | 12% |
| *Percent Daily Values are based on a 2000 calorie diet. |
Variations & Substitutions
- Whole Wheat Bread: Substitute 1-2 cups of the all-purpose flour with whole wheat flour for a heartier flavor and texture.
- Honey Bread: Replace the sugar with honey for a slightly sweeter and more flavorful bread.
- Herb Bread: Add 1-2 tablespoons of chopped fresh herbs, such as rosemary, thyme, or oregano, to the dough for an aromatic twist.
- Garlic Bread: Add 1-2 teaspoons of garlic powder to the dough for a savory flavor.
- Dairy-Free Bread: Substitute the milk with a plant-based milk alternative, such as almond milk or soy milk, and use a plant-based butter substitute.
- Gluten-Free Bread: While this recipe is not inherently gluten-free, you can attempt it with a gluten-free flour blend designed for bread making. Be aware that the texture and rise will likely be different. It will take some experimentation.
FAQs (Frequently Asked Questions)
Q: Can I use instant yeast instead of active dry yeast?
A: Yes, you can use instant yeast. You can skip the step of dissolving the yeast in warm water; just add it directly to the flour.
Q: My dough isn’t rising. What am I doing wrong?
A: There are several reasons why your dough might not be rising. Make sure your yeast is fresh and active. Also, ensure the water and milk mixture aren’t too hot, as this can kill the yeast. Finally, ensure the dough is in a warm, draft-free environment.
Q: How can I tell if the bread is done?
A: The bread is done when it’s golden brown and the internal temperature reaches 190-200°F. You can also tap the bottom of the loaf; it should sound hollow.
Q: Can I make this dough ahead of time and bake it later?
A: Yes, you can make the dough ahead of time and refrigerate it after the first rise. Punch it down, shape it, and let it rise again before baking.
Q: My bread is sinking in the middle. What happened?
A: This could be due to over-proofing (rising for too long) or baking at too low of a temperature. Make sure to follow the rising times closely and ensure your oven is properly preheated.
Final Thoughts
I truly believe that there is a unique kind of magic in the simple act of baking bread, especially this KitchenAid Basic White Bread. It’s a recipe that can be adapted and personalized to suit your tastes and preferences. Whether you use it for a simple sandwich, a delicious loaf of toast, or to make something special like bierocks, I encourage you to give it a try. The aroma of freshly baked bread filling your home is a reward in itself. And don’t hesitate to share your creations and any variations you come up with. Happy baking!