
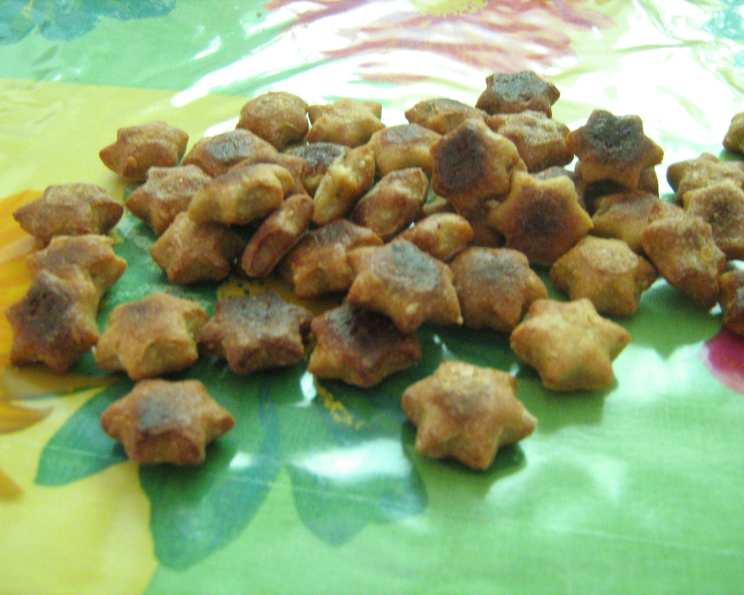
Beef Dog Biscuits: A Homemade Treat Your Furry Friend Will Love
There’s nothing quite like the happy dance my old golden retriever, Gus, would do when he knew a special treat was coming his way. His tail would wag so hard his whole body wiggled, and those soulful brown eyes would fixate on me with unwavering adoration. Store-bought dog biscuits were fine, but there was something about a homemade goodie that really set him off. These beef dog biscuits, packed with savory flavor, always brought out his inner puppy, no matter how old he got.
Recipe Overview:
- Prep Time: 20 minutes
- Cook Time: 1 hour
- Total Time: 1 hour 20 minutes
- Yields: 36-48 biscuits
- Dietary Type: Homemade Dog Treats
Ingredients:
- 1 cup beef broth
- ½ cup okara
- 6 tablespoons olive oil
- 70 g beef, cooked
- 2 teaspoons honey
- 2 teaspoons garlic, minced
- 1 teaspoon parsley
- 2 eggs
- 1 ½ cups whole wheat flour
- ½ cup milk
- ½ cup semolina meal
- ½ cup sesame
- 2 tablespoons beef broth
Equipment Needed:
- Blender
- Medium Bowl
- Wooden Spoon
- Rolling Pin
- Baking Sheets
- Pastry Brush
Instructions:
-
Preheat your oven to 325°F (160°C). This lower temperature ensures the biscuits dry out nicely without burning.
-
In a blender, combine 1 cup of beef broth, milk, olive oil, cooked beef, honey, minced garlic, parsley, and 1 egg. Blend until the mixture is well combined and relatively smooth. Don’t worry if there are a few small chunks of beef; they’ll add to the rustic charm of the biscuits.
-
In a medium bowl, whisk together the whole wheat flour, okara, semolina meal, and sesame seeds. This dry mixture forms the base of the biscuit and provides essential nutrients and fiber.
-
Using a wooden spoon, gradually stir the dry flour mixture into the wet ingredients. Add additional whole wheat flour if needed, until the dough becomes quite stiff and forms a ball. A slightly sticky dough is acceptable, but it should hold its shape.
-
Cover the dough with a clean kitchen towel or plastic wrap and let it rest for 10 minutes. This allows the gluten in the flour to relax, making the dough easier to roll out.
-
On a lightly floured surface, roll out the dough until it is approximately ½ inch thick. Use cookie cutters or a knife to cut out the biscuits into desired shapes. I like using bone-shaped cutters for a festive touch, but any shape will do.
-
Place the cut biscuits fairly close together on a couple of baking sheets lined with parchment paper. This helps with even baking and prevents sticking.
-
Place the baking sheets in the preheated oven and bake for 30 minutes.
-
While the biscuits are baking, prepare the glaze. In a small bowl, mix together 1 egg and the remaining 2 tablespoons of beef broth until frothy. This glaze will give the biscuits a beautiful sheen and enhance their savory flavor.
-
After 30 minutes, remove the baking sheets from the oven and brush both sides of the biscuits with the egg wash. Ensure you get an even coating for a consistent golden-brown color.
-
Place the baking sheets back in the oven and continue to bake for an additional 30 minutes. This second baking ensures the biscuits are completely dry and crunchy, which is essential for their longevity and your dog’s dental health.
-
Remove the biscuits from the oven and let them cool completely on a wire rack before serving them to your furry friend. This prevents them from becoming soggy and allows the flavors to fully develop.
Expert Tips & Tricks:
- For extra flavor, consider adding a pinch of dried rosemary or thyme to the dough. These herbs are safe for dogs and add a delightful aroma.
- If you don’t have okara on hand, you can substitute it with wheat bran or oat bran.
- Adjust the baking time depending on the thickness of your biscuits. Thicker biscuits may require a few extra minutes in the oven to ensure they are completely dry.
- To prevent the biscuits from sticking to the baking sheets, lightly grease the sheets with olive oil or line them with parchment paper.
- If you want to make a larger batch of biscuits, you can easily double or triple the recipe. Just be sure to adjust the baking time accordingly.
- For a shinier finish, brush the biscuits with a little bit of olive oil after they have cooled completely.
Serving & Storage Suggestions:
These beef dog biscuits are best served as a treat between meals. Limit the number of biscuits you give your dog based on their size, age, and activity level. Always ensure fresh water is available.
To store the biscuits, place them in an airtight container at room temperature. They will stay fresh for up to 2 weeks. For longer storage, you can freeze the biscuits for up to 3 months. Thaw them completely before serving. Be sure the container is properly sealed before freezing to avoid freezer burn.
Nutritional Information:
| Nutrient | Amount per Serving | % Daily Value (estimated for dogs) |
|---|---|---|
| Calories | 67.7 kcal | N/A |
| Total Fat | 4.1 g | N/A |
| Saturated Fat | 0.8 g | N/A |
| Cholesterol | 11.2 mg | N/A |
| Sodium | 34.1 mg | N/A |
| Total Carbohydrate | 6.3 g | N/A |
| Dietary Fiber | 0.9 g | N/A |
| Sugars | 0.3 g | N/A |
| Protein | 1.9 g | N/A |
Note: Nutritional information is estimated and may vary based on specific ingredients used. Consult your veterinarian for specific dietary recommendations for your dog.
Variations & Substitutions:
- Chicken or Turkey Biscuits: Substitute the cooked beef with cooked chicken or turkey for a different protein source.
- Vegetarian Biscuits: Replace the beef broth with vegetable broth and omit the cooked beef. Add finely chopped carrots, sweet potatoes, or zucchini for added nutrients and flavor.
- Grain-Free Biscuits: Substitute the whole wheat flour with a blend of almond flour and coconut flour. Be sure to adjust the liquid content as needed, as these flours absorb moisture differently.
- Peanut Butter Biscuits: Add a tablespoon or two of natural peanut butter to the wet ingredients for a nutty flavor that many dogs love. Make sure the peanut butter does not contain xylitol, which is toxic to dogs.
FAQs (Frequently Asked Questions):
Q: Can I use a different type of flour in this recipe?
A: Yes, you can experiment with other flours, but keep in mind that the texture of the biscuits may change. Whole wheat flour provides a good balance of nutrients and texture, but you can try oat flour or brown rice flour for a gluten-free option.
Q: How do I know when the biscuits are done?
A: The biscuits are done when they are firm to the touch and have a golden-brown color. They should also sound hollow when tapped. Make sure they are completely dry to ensure proper storage.
Q: Can I add other ingredients to the dough?
A: Absolutely! You can add finely chopped vegetables, such as carrots or sweet potatoes, or herbs like rosemary or thyme. Just be sure to choose ingredients that are safe for dogs.
Q: Are these biscuits suitable for all dogs?
A: While these biscuits are generally safe for most dogs, it’s always a good idea to consult with your veterinarian before introducing any new foods into your dog’s diet. If your dog has any allergies or sensitivities, be sure to adjust the recipe accordingly.
Q: Can I freeze the dog biscuits?
A: Yes, these dog biscuits freeze very well. Place the cooled biscuits in an airtight container or freezer bag and freeze for up to 3 months. Thaw completely before serving.
Final Thoughts:
Making these beef dog biscuits is a simple yet rewarding way to show your furry friend some extra love. Not only will you be providing them with a delicious and nutritious treat, but you’ll also have the peace of mind knowing exactly what ingredients are going into their snacks. So, grab your ingredients, preheat your oven, and get ready to see that happy tail wag with excitement. Experiment with different flavors and ingredients to create the perfect biscuit for your beloved companion. And don’t forget to share your baking adventures with other dog lovers! After all, a happy dog makes for a happy home.