
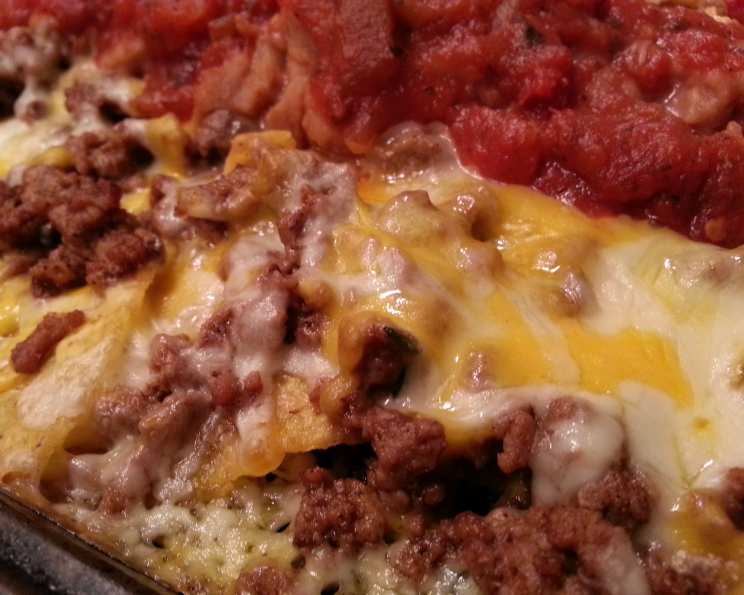
Epic Beef Nachos: A Culinary Crowd-Pleaser
I can still picture it – the faded, floral tablecloth, the smell of sizzling ground beef mingling with the sharp tang of jalapeños, and the excited chatter of friends gathered around. This wasn’t some fancy restaurant experience; it was a casual Saturday night at my best friend’s place, and the star of the show was a massive platter of beef nachos. Every chip, loaded with savory toppings and molten cheese, was a tiny explosion of flavor and pure, unadulterated comfort. It’s a memory I treasure, and a recipe I’ve tweaked and perfected over the years to bring that same joy to my own table.
Recipe Overview
- Prep Time: 15 minutes
- Cook Time: 15 minutes
- Total Time: 30 minutes
- Servings: 4-6
- Yield: 1 large platter
- Dietary Type: Not Gluten-Free (can be modified), Not Vegetarian
Ingredients
- ½ lb ground beef
- 1 teaspoon chili powder (Mexican blend)
- ½ teaspoon salt
- ½ teaspoon dried onion flakes
- ⅛ teaspoon sweet paprika
- 2 tablespoons water
- 8 restaurant-style corn tortilla chips (use gluten-free chips for a gluten-free option)
- ½ cup refried beans
- 1 ½ cups shredded cheddar cheese
- ½ cup shredded monterey jack cheese
- ¼ cup diced onion
- 1 large jalapeño pepper
Equipment Needed
- Skillet
- Small saucepan (or microwave-safe bowl)
- Small bowl
- Baking sheet or oven-proof plate (a large pie plate works well)
Instructions
- Preheat your oven to 375°F (190°C).
- In a skillet over medium heat, brown the ground beef. Use a spatula or spoon to crumble the beef into small pieces as it cooks.
- Cook the beef until it is no longer pink. Carefully drain off any excess grease from the skillet.
- Add the chili powder, paprika, salt, dried onion flakes, and water to the cooked ground beef.
- Simmer the beef mixture on low heat for about 10 minutes, stirring occasionally to ensure the spices are evenly distributed and the mixture doesn’t stick to the bottom of the pan. This step allows the flavors to meld together beautifully.
- While the beef is simmering, heat the refried beans in a small saucepan over low heat, or in a microwave-safe bowl in the microwave. Heat until the beans are hot and easily spreadable.
- In a small bowl, mix together the shredded cheddar cheese and shredded monterey jack cheese. Set aside. This cheese blend creates the perfect combination of sharpness and meltiness.
- Arrange the corn tortilla chips on a baking sheet or on an oven-proof plate. A large pie plate also works great for this!
- Spread about 1 tablespoon of the heated refried beans on each chip. This creates a delicious base that helps the other toppings adhere.
- Sprinkle about 2 tablespoons of the seasoned ground beef on each chip.
- Use a spoon to gently flatten the beef on each chip. This will create a stable surface to hold the cheese and prevent it from sliding off.
- Place a generous handful of the cheese mixture on top of the beef on each chip.
- Sprinkle the diced onion evenly over the cheese-covered chips.
- Thinly slice the jalapeño pepper into rounds. Place one slice of jalapeño on top of each chip. Adjust the number of jalapeños based on your spice preference. If you’re sensitive to heat, you can remove the seeds and membranes from the jalapeños before slicing.
- Bake the nachos in the preheated oven for 8-10 minutes, or until the cheese is completely melted and bubbly. Keep a close eye on them to prevent the chips from burning.
- Carefully remove the nachos from the oven and let them cool slightly before serving.
Expert Tips & Tricks
- Spice it Up: For an extra kick, add a pinch of cayenne pepper to the ground beef mixture or use a spicier chili powder.
- Crispy Chips: To ensure your chips stay crispy, lightly toast them in the oven for a few minutes before adding the toppings.
- Cheese Perfection: For the best melting, use freshly shredded cheese instead of pre-shredded. Pre-shredded cheese often contains cellulose, which can prevent it from melting smoothly.
- Make-Ahead Prep: You can cook the ground beef and heat the refried beans ahead of time and store them in the refrigerator until you’re ready to assemble the nachos. This is a great time-saver when you’re entertaining.
- Prevent Soggy Chips: Don’t overload the chips with toppings. Too much moisture can make them soggy.
- Broiler Boost: For an extra bubbly and slightly browned cheese topping, broil the nachos for a minute or two after baking, keeping a close eye to prevent burning.
Serving & Storage Suggestions
Serve the beef nachos immediately while the cheese is hot and melted. They are best enjoyed fresh! Offer a variety of toppings on the side, such as salsa, guacamole, sour cream, pico de gallo, or pickled jalapeños, so everyone can customize their nachos to their liking.
Leftover nachos can be stored in an airtight container in the refrigerator for up to 2 days. However, the chips will likely become soggy. To reheat, spread the nachos out on a baking sheet and bake in a preheated oven at 350°F (175°C) for about 5-7 minutes, or until heated through. You can also microwave them, but the chips will become even softer. Unfortunately, nachos don’t freeze well.
Nutritional Information
| Nutrient | Amount per Serving | % Daily Value |
|---|---|---|
| Calories | 634 kcal | N/A |
| Total Fat | 39.5g | 60% |
| Saturated Fat | 16.6g | 82% |
| Cholesterol | 95.6mg | 31% |
| Sodium | 1031.3mg | 42% |
| Total Carbohydrate | 40.9g | 13% |
| Dietary Fiber | 4.8g | 19% |
| Sugars | 1.6g | 6% |
| Protein | 30.5g | 60% |
Note: Nutritional information is an estimate and may vary based on specific ingredients and portion sizes.
Variations & Substitutions
- Vegetarian Nachos: Substitute the ground beef with black beans, pinto beans, or a vegetarian ground beef alternative.
- Chicken Nachos: Use shredded cooked chicken instead of ground beef. Season the chicken with taco seasoning for extra flavor.
- Spicy Nachos: Add diced green chilies to the cheese mixture or use a spicier variety of cheese, such as pepper jack.
- Supreme Nachos: Top the nachos with shredded lettuce, diced tomatoes, black olives, and a dollop of sour cream after baking.
- Gluten-Free Nachos: Use gluten-free corn tortilla chips and ensure all other ingredients are gluten-free.
- Vegan Nachos: Substitute the ground beef with a plant-based alternative, use vegan refried beans, and top with vegan cheese shreds. You can also add a dollop of vegan sour cream and guacamole for a complete vegan nacho experience.
FAQs (Frequently Asked Questions)
Q: Can I use different types of cheese?
A: Absolutely! Feel free to experiment with different cheese blends based on your preferences. Pepper jack, Colby jack, or even a sprinkle of cotija cheese would be delicious additions.
Q: Can I make these nachos ahead of time?
A: You can prepare the ground beef and refried beans ahead of time, but it’s best to assemble and bake the nachos just before serving to prevent the chips from becoming soggy.
Q: How do I prevent the cheese from burning?
A: Keep a close eye on the nachos while they’re baking and remove them from the oven as soon as the cheese is melted and bubbly. If the cheese starts to brown too quickly, you can lower the oven temperature slightly or tent the baking sheet with foil.
Q: What if I don’t have dried onion flakes?
A: You can substitute with a teaspoon of onion powder or a tablespoon of finely minced fresh onion.
Q: Can I use store-bought taco seasoning instead of the individual spices?
A: Yes, you can substitute with about 1 tablespoon of taco seasoning. Just be sure to adjust the salt accordingly, as taco seasoning often contains salt.
Final Thoughts
These beef nachos are more than just a snack; they’re an experience. They’re perfect for game day, movie night, or any occasion that calls for a delicious and shareable dish. Don’t be afraid to get creative with the toppings and make them your own. I encourage you to gather your friends and family, crank up the oven, and create some unforgettable memories with this epic nacho recipe. And don’t forget to let me know what you think! I’m always eager to hear about your culinary adventures.