
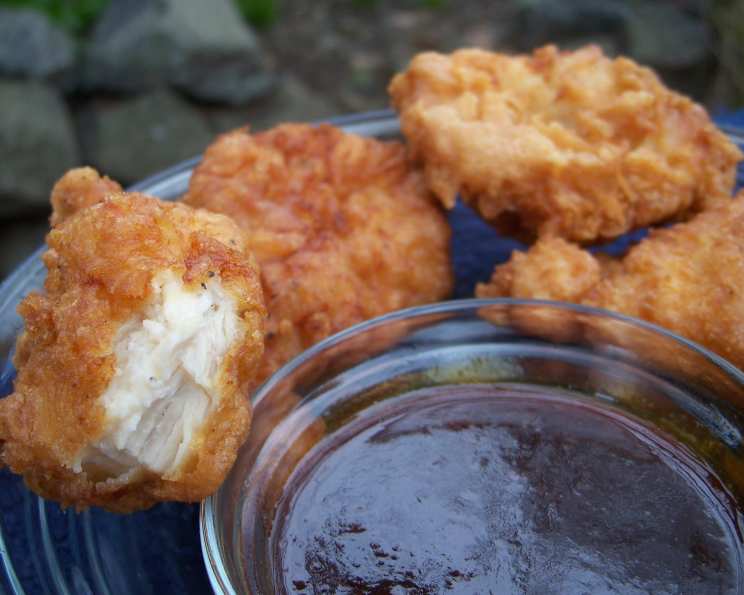
Crispy Beer Batter: The Secret to Perfect Halibut and Chicken
I’ll never forget my first taste of truly exceptional fried halibut. It was at a tiny roadside shack in Homer, Alaska, the air thick with the salty tang of the sea. The batter was unbelievably light and crispy, practically shattering with each bite, while the halibut inside remained succulent and flaky. That experience sparked a lifelong quest to recreate that perfect texture at home, and this beer batter recipe comes remarkably close. It’s equally fantastic with chicken, yielding juicy, flavorful pieces encased in a golden, irresistible crust.
Recipe Overview
- Prep Time: 10 minutes
- Cook Time: 4 minutes per batch
- Total Time: 15 minutes
- Servings: 4
- Yield: Varies depending on protein quantity
- Dietary Type: Not Gluten-Free
Ingredients
- Vegetable oil, for frying
- 1 Egg
- 1 teaspoon Salt
- 1 cup Flat beer (room temperature)
- 1 teaspoon Sugar
- 1 teaspoon Baking powder
- 1 cup Flour
- 2 lbs Halibut or 2 lbs Chicken, skinned and cut into bite-sized pieces
Equipment Needed
- Deep fryer or large skillet
- Paper towels
- Whisk
- Tongs or slotted spoon
Instructions
-
Begin by heating your vegetable oil in a deep fryer or a large, deep skillet. Ensure the oil is deep enough to completely submerge the pieces of halibut or chicken. Heat the oil to 375°F (190°C). Use a thermometer to ensure accurate temperature, as this is crucial for achieving the perfect crispy texture.
-
While the oil heats, prepare the beer batter. In a medium-sized bowl, beat the egg until light and frothy.
-
Add the remaining ingredients to the beaten egg: salt, flat beer, sugar, baking powder, and flour.
-
Whisk all the ingredients together until you have a smooth batter. It’s okay if there are a few small lumps, but avoid overmixing, as this can develop the gluten in the flour and result in a tougher batter.
-
Prepare the halibut or chicken. Rinse the pieces under cold water and then thoroughly dry them with paper towels. This is a crucial step, as excess moisture will prevent the batter from adhering properly and result in soggy fried food. The drier the protein, the better the batter will stick.
-
Once the oil has reached 375°F (190°C) and the halibut or chicken pieces are dry, begin the frying process. Dip each piece of halibut or chicken into the prepared batter, ensuring it is fully coated. Allow any excess batter to drip off before carefully placing the coated piece into the hot oil.
-
Fry the halibut or chicken in batches, being careful not to overcrowd the fryer or skillet. Overcrowding will lower the oil temperature, resulting in greasy, undercooked food.
-
Cook each batch for approximately 4 minutes, or until the batter is golden brown and crispy. The internal temperature of the chicken should reach 165°F (74°C). The halibut will be opaque and flake easily with a fork.
-
Remove the fried halibut or chicken from the oil using tongs or a slotted spoon and place them on paper towels to drain off any excess oil.
-
Repeat steps 6-9 until all of the halibut or chicken has been fried. Serve immediately for the best flavor and texture.
Expert Tips & Tricks
- Flat Beer is Key: Using flat beer is essential for this recipe. The lack of carbonation helps create a lighter, crispier batter. You can flatten beer by simply leaving it open at room temperature for a few hours. Alternatively, you can gently stir it to release the carbonation.
- Temperature Control: Maintaining a consistent oil temperature is crucial. Use a deep-fry thermometer and adjust the heat as needed. If the oil is too hot, the batter will burn before the halibut or chicken is cooked through. If the oil is too cool, the batter will absorb too much oil and become greasy.
- Don’t Overcrowd: Frying in batches prevents the oil temperature from dropping too much. This ensures even cooking and a crispy crust.
- Batter Consistency: The batter should be thick enough to coat the halibut or chicken evenly but not so thick that it’s gloppy. If the batter is too thick, add a little more beer until you reach the desired consistency.
- Double Dip for Extra Crispiness: For an extra crispy crust, try double dipping the halibut or chicken. Dip each piece in the batter, then back into the flour, and then back into the batter before frying.
Serving & Storage Suggestions
Serve the fried halibut or chicken immediately while it’s hot and crispy. It pairs perfectly with classic sides such as french fries, coleslaw, tartar sauce, lemon wedges, or malt vinegar.
Leftovers can be stored in an airtight container in the refrigerator for up to 2 days. To reheat, bake in a preheated oven at 350°F (175°C) for about 10-15 minutes, or until heated through and crispy. Reheating in the oven is preferable to microwaving, as it helps to maintain the crispness of the batter. Note that the batter will never be quite as crispy as it was when freshly fried. I don’t recommend freezing this dish.
Nutritional Information
(Estimated values, will vary based on portion size and specific ingredients)
| Nutrient | Amount per Serving | % Daily Value |
|---|---|---|
| Calories | 450 kcal | 23% |
| Total Fat | 25g | 38% |
| Saturated Fat | 5g | 25% |
| Cholesterol | 150mg | 50% |
| Sodium | 900mg | 38% |
| Total Carbohydrate | 30g | 10% |
| Dietary Fiber | 1g | 4% |
| Sugars | 2g | – |
| Protein | 30g | 60% |
Variations & Substitutions
- Gluten-Free Option: Substitute the all-purpose flour with a gluten-free flour blend for a gluten-free version. Be sure to use a gluten-free beer as well.
- Spice it Up: Add a pinch of cayenne pepper or chili powder to the batter for a little heat.
- Herbed Batter: Mix in some dried herbs, such as thyme, rosemary, or oregano, for added flavor.
- Different Proteins: This batter works well with other types of fish, such as cod or haddock, as well as shrimp or even onion rings.
- Beer Alternatives: If you don’t have beer on hand, club soda or sparkling water can be used as a substitute to provide some of the lift in the batter.
FAQs (Frequently Asked Questions)
Q: Why does the recipe call for flat beer?
A: Flat beer contributes to a lighter, crispier batter by reducing the amount of carbonation that can lead to a denser, less desirable result.
Q: Can I make the batter ahead of time?
A: It’s best to use the batter immediately after making it. However, you can prepare it up to 30 minutes in advance and keep it in the refrigerator. Whisk it gently before using it.
Q: How do I know when the oil is hot enough?
A: Use a deep-fry thermometer to ensure the oil reaches 375°F (190°C). If you don’t have a thermometer, you can test the oil by dropping a small piece of batter into it. If the batter sizzles and turns golden brown in about 4 minutes, the oil is ready.
Q: What can I serve with the fried halibut or chicken?
A: Classic sides such as french fries, coleslaw, tartar sauce, lemon wedges, and malt vinegar are all excellent choices.
Q: My batter is too thick/thin, what should I do?
A: If it’s too thick, add a little more beer, one tablespoon at a time, until you reach the desired consistency. If it’s too thin, add a little more flour, one tablespoon at a time.
Final Thoughts
This beer batter recipe is your ticket to achieving restaurant-quality fried halibut or chicken at home. The combination of simple ingredients and precise cooking techniques results in a light, crispy crust and tender, flavorful protein. Don’t be intimidated by frying – with a little practice and attention to detail, you’ll be enjoying perfectly fried delights in no time. Share your creations and feedback, and consider pairing this dish with a crisp, cold beer for the ultimate culinary experience!