
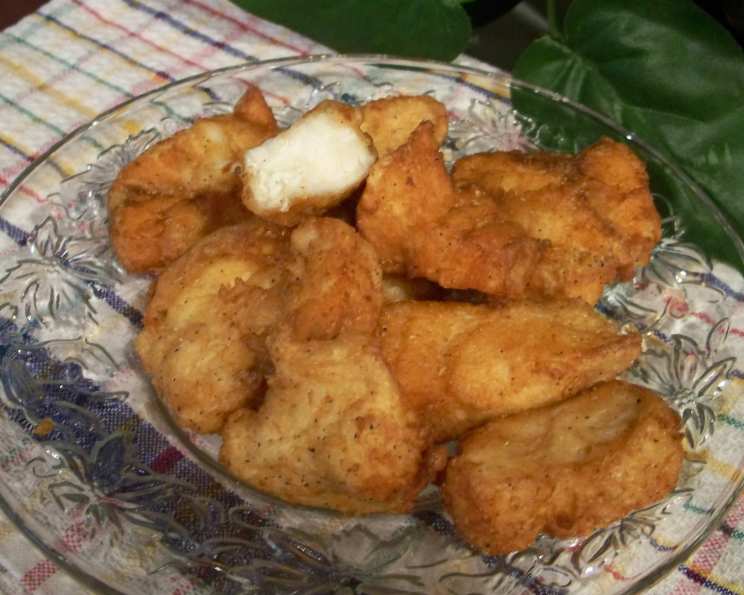
Beer Battered Halibut: A Taste of Alaskan Tradition
I can still picture my grandfather, a weathered Alaskan fisherman, returning from a long day at sea, his hands calloused but his eyes twinkling with stories of the deep. The smell of saltwater and diesel clung to him, a scent that meant comfort and adventure. And often, that scent was followed by the irresistible aroma of my grandmother’s beer-battered halibut frying in the kitchen – a simple yet exquisite reward after a hard day’s work, and a taste of home I’ll never forget. It’s more than just a recipe; it’s a taste of Alaska, a testament to resourcefulness, and a warm memory shared with loved ones.
Recipe Overview
- Prep Time: 15 minutes
- Cook Time: 14 minutes (approx. 2 minutes per side, per batch)
- Total Time: 29 minutes
- Servings: 2-4
- Yield: Varies depending on fillet size
- Dietary Type: Not Gluten-Free
Ingredients
- 1/4 cup flour
- 1 teaspoon baking powder
- 1 egg
- 1 (12 ounce) can beer
- 1 1/2 lbs halibut fillets
- Vegetable oil (for deep frying)
Equipment Needed
- Large frying pan or deep fryer
- Tongs
- Paper towel-lined plate
- Mixing bowl
- Fork
Instructions
- Begin by preparing the halibut. Divide the halibut fillets into approximately 1.5-inch cubes. This size allows for even cooking and a satisfying bite.
- In a mixing bowl, combine the flour and baking powder. Whisk together until well combined. This ensures the baking powder is evenly distributed, which will help create a light and airy batter.
- In a separate small bowl, lightly beat the egg. Add the beaten egg to the dry ingredients.
- Gradually pour in the beer, whisking constantly to avoid lumps. Continue adding beer until the batter reaches the proper consistency. The batter should be smooth and slightly runny, a little thicker than water. Remember, the remaining beer is yours to enjoy responsibly!
- Prepare for frying. Add vegetable oil to a large frying pan or deep fryer. The oil should be approximately half the height of the halibut cubes, ensuring they are mostly submerged during frying.
- Heat the oil over medium-high heat until it is hot enough for deep frying. A good way to test is to drop a small amount of batter into the oil. If it sizzles and turns golden brown in a few seconds, the oil is ready. Be careful not to overheat the oil, as this can cause the outside of the halibut to cook too quickly while the inside remains raw.
- Before frying all the halibut, make a test piece. This step is crucial for ensuring the oil temperature and cooking time are perfect.
- Coat a halibut piece in the batter, ensuring it is evenly covered. Carefully lower the battered halibut piece into the hot oil.
- Fry the halibut for approximately two minutes on one side. Then, using tongs (being very careful of oil spattering), gently turn the halibut and fry for another two minutes on the other side. The halibut should be golden brown and crispy.
- Transfer the finished test piece to a plate lined with paper towels. This will help absorb any excess oil.
- Using a fork, split the test piece to check for doneness. The halibut should split easily and the middle should appear opaque. If the halibut does not split easily, and/or the middle does not appear to be opaque, adjust the cooking time and/or oil temperature to ensure the remaining pieces are cooked through. If it is not cooked enough, increase the temperature slightly, and add a minute to either side. If it is too cooked, reduce temperature and shorten the cooking time.
- Once you are satisfied with the cooking time and temperature, repeat the process with the remaining halibut pieces. You can cook multiple pieces at once, but be careful not to overcrowd the pan, as this can lower the oil temperature and result in soggy halibut.
- Serve the beer-battered halibut warm with your favorite tartar sauce or dipping sauce.
Expert Tips & Tricks
- Keep the beer cold: Using cold beer will help create a lighter and crispier batter. The cold liquid inhibits gluten development in the flour, keeping it tender.
- Don’t overmix the batter: Overmixing the batter can develop the gluten in the flour, resulting in a tough and chewy coating. Mix just until the ingredients are combined.
- Pat the halibut dry: Before battering, gently pat the halibut cubes dry with paper towels. This helps the batter adhere better and prevents the oil from spattering too much.
- Maintain the oil temperature: Use a thermometer to monitor the oil temperature and keep it consistent throughout the frying process. This will ensure the halibut cooks evenly and doesn’t become greasy. Aim for an oil temperature of around 350-375°F (175-190°C).
- Rest the halibut after frying: Placing the fried halibut on a wire rack after removing it from the oil helps to keep it crispy by allowing excess oil to drain away.
Serving & Storage Suggestions
Serve the beer-battered halibut immediately while it’s hot and crispy. It pairs perfectly with tartar sauce, lemon wedges, coleslaw, french fries, or potato salad.
Leftovers can be stored in an airtight container in the refrigerator for up to 2 days. To reheat, bake in a preheated oven at 350°F (175°C) for 10-15 minutes, or until heated through. You can also reheat in an air fryer for a crispier result. Reheating in a microwave is not recommended, as it can make the halibut soggy.
The fried halibut is best enjoyed fresh, but it can be frozen for longer storage. Wrap individual pieces tightly in plastic wrap and then place them in a freezer-safe bag or container. Frozen fried halibut can be stored for up to 2 months. To reheat, bake directly from frozen in a preheated oven at 375°F (190°C) for 20-25 minutes, or until heated through.
Nutritional Information
| Nutrient | Amount per Serving | % Daily Value |
|---|---|---|
| Calories | 648.1 kcal | N/A |
| Calories from Fat | N/A | N/A |
| Total Fat | 113 g | 18% |
| Saturated Fat | 12.7 g | 19% |
| Cholesterol | 2.2 g | 11% |
| Sodium | 245.4 mg | 81% |
| Total Carbohydrate | 458.9 mg | 19% |
| Dietary Fiber | 19 g | 6% |
| Sugars | 0.4 g | 1% |
| Protein | 0.2 g | 0% |
| 96.5 g | 192% |
Note: Nutritional information is an estimate and may vary based on specific ingredients and portion sizes.
Variations & Substitutions
- Gluten-Free: Substitute the all-purpose flour with a gluten-free flour blend. Ensure the beer is also gluten-free; many breweries now offer gluten-free options.
- Spice it Up: Add a pinch of cayenne pepper or smoked paprika to the batter for a hint of heat.
- Herbed Batter: Incorporate fresh herbs like chopped parsley, dill, or chives into the batter for added flavor and aroma.
- Different Fish: While halibut is a classic choice, you can also use other white fish fillets such as cod, pollock, or tilapia. Adjust the cooking time accordingly.
- Non-Alcoholic: If you prefer a non-alcoholic version, substitute the beer with sparkling water or club soda. This will still provide the batter with the lightness and crispness you desire.
FAQs (Frequently Asked Questions)
Q: Can I make the batter ahead of time?
A: Yes, you can prepare the batter up to an hour in advance. Store it in the refrigerator until ready to use. You may need to whisk it again before using as it may settle.
Q: Why is my batter not sticking to the fish?
A: Make sure the halibut is patted dry before dipping it in the batter. Also, ensure the batter has the correct consistency – not too thick and not too thin.
Q: Can I use a different type of oil for frying?
A: Yes, you can use other high-smoke-point oils such as canola oil, peanut oil, or sunflower oil.
Q: How do I know when the halibut is cooked through?
A: The halibut is cooked through when it is opaque and flakes easily with a fork. The internal temperature should reach 145°F (63°C).
Q: My beer-battered halibut isn’t crispy, what went wrong?
A: The oil may not have been hot enough. Ensure the oil reaches the correct temperature before adding the battered halibut. Avoid overcrowding the pan, as this will lower the oil temperature.
Final Thoughts
This beer-battered halibut recipe is a simple yet satisfying way to enjoy the delicate flavor of fresh halibut. Whether you’re a seasoned chef or a beginner cook, this recipe is easy to follow and guaranteed to impress. So, gather your ingredients, pour yourself a cold beer (for the batter and for yourself!), and get ready to experience a taste of Alaskan tradition. Don’t be afraid to experiment with variations and share your creations with friends and family. And, if you have any tips or tricks of your own, please share them in the comments below. Happy cooking!