
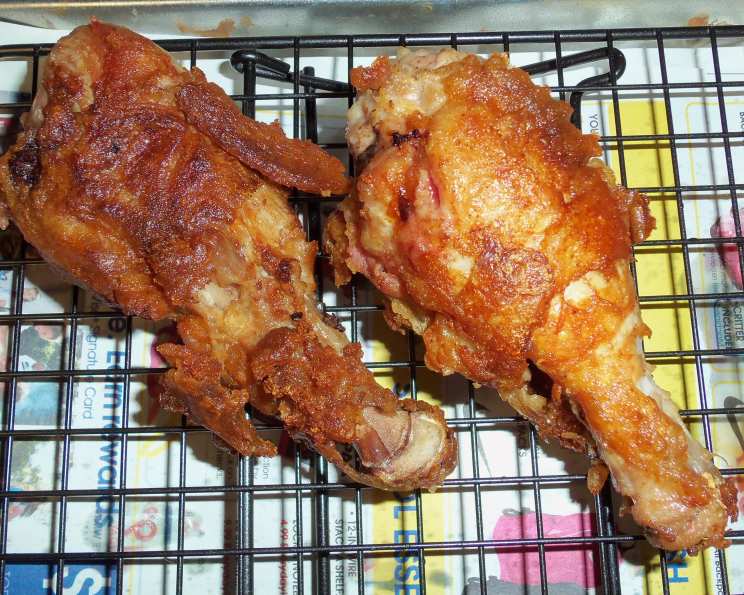
The Crispiest Beer Battered Chicken: A Culinary Classic
The memory is as vivid as the taste itself: a summer evening, the scent of freshly cut grass hanging in the air, and the unmistakable aroma of frying chicken wafting from my grandmother’s kitchen. She always made the best beer-battered chicken, the kind that shattered with a satisfying crunch, giving way to juicy, tender meat within. I’d sit at her worn kitchen table, mesmerized as she expertly dipped each piece of chicken in the bubbly batter, the secret, she claimed, being the perfect balance of ingredients and a whole lot of love. This recipe is my homage to her, a way to keep that golden memory alive.
Recipe Overview
- Prep Time: 35 minutes
- Cook Time: 15-20 minutes per batch
- Total Time: 50-55 minutes
- Servings: 4
- Yields: 12 drumsticks or 4 chicken breasts
- Dietary Type: Not Gluten-Free, Not Dairy-Free
Ingredients
- 1 cup flour
- ½ teaspoon salt
- 1 cup beer (lager or pale ale recommended)
- 1 ½ teaspoons parsley, dried or fresh, chopped
- 2 tablespoons green onions, chopped
- 12 chicken drumsticks (or 4 chicken breasts, cut into pieces)
- Salt and pepper, to taste
- Peanut oil, for frying (approximately 2 inches deep in your skillet)
Equipment Needed
- Large mixing bowl
- Whisk
- Large skillet or Dutch oven
- Tongs
- Paper towels
- Thermometer
Instructions
-
Prepare the Batter: In a large mixing bowl, combine the flour and salt. Using a whisk, gradually incorporate the beer until you achieve a smooth batter. It’s important to whisk gently to avoid overmixing, which can result in a tough batter. Let the batter stand for at least 30 minutes. This allows the gluten in the flour to relax, resulting in a lighter and crispier coating. This resting period is crucial – don’t skip it!
-
Flavor the Batter: After the batter has rested, gently stir in the parsley and green onions. Avoid vigorous mixing at this stage; just fold them in until evenly distributed.
-
Prepare the Chicken: Pat the chicken drumsticks (or pieces of chicken breast) dry with paper towels. Season generously with salt and pepper. Make sure to season both sides of the chicken.
-
Heat the Oil: In a large skillet or Dutch oven, pour in enough peanut oil to reach a depth of approximately 2 inches. Heat the oil over medium-high heat until it reaches a temperature of 350°F (175°C). Use a thermometer to monitor the oil temperature – this is essential for achieving perfectly cooked chicken. If the oil is not hot enough, the chicken will absorb too much oil and become greasy.
-
Batter the Chicken: Dip each piece of chicken into the batter, ensuring it’s completely coated. Allow any excess batter to drip off before carefully placing the chicken into the hot oil.
-
Fry the Chicken: Fry the chicken in batches, being careful not to overcrowd the skillet. Overcrowding will lower the oil temperature, resulting in soggy chicken. Fry for approximately 15-20 minutes, turning occasionally, until the chicken is golden brown and cooked through. The internal temperature of the chicken should reach 165°F (74°C). Use a thermometer to check the internal temperature.
-
Remove and Drain: Once the chicken is cooked through and golden brown, carefully remove it from the skillet using tongs. Place the fried chicken on a plate lined with paper towels to drain any excess oil.
-
Serve Immediately: Serve the beer-battered chicken immediately while it’s hot and crispy.
Expert Tips & Tricks
- Beer Selection: The type of beer you use will influence the flavor of the batter. A lager will provide a subtle, clean flavor, while a pale ale will offer a slightly more hoppy and complex taste. Experiment to find your favorite.
- Batter Consistency: If the batter seems too thick, you can add a tablespoon or two of beer to thin it out. Conversely, if it’s too thin, add a tablespoon of flour at a time until you reach the desired consistency. It should be thick enough to coat the chicken evenly, but not so thick that it creates a heavy, gloppy coating.
- Double Battering: For an extra-crispy coating, you can double batter the chicken. After the initial dip in the batter, dip the chicken in flour, then back into the batter before frying.
- Temperature Control: Maintaining the correct oil temperature is crucial for successful frying. If the oil is too hot, the chicken will burn on the outside before it’s cooked through on the inside. If it’s not hot enough, the chicken will absorb too much oil and become greasy.
- Preventing Soggy Chicken: Make sure not to overcrowd the pan. Also, ensure the oil temperature stays consistently hot. If it dips too low, remove the chicken and let the oil heat up again before proceeding.
Serving & Storage Suggestions
Serve your beer-battered chicken hot and crispy, accompanied by classic sides like creamy coleslaw, potato salad, or corn on the cob. For a tangy counterpoint, consider serving it with a honey-mustard dipping sauce or a spicy aioli.
Leftovers can be stored in an airtight container in the refrigerator for up to 3 days. However, the chicken will lose some of its crispness as it sits. To reheat, preheat your oven to 350°F (175°C) and bake the chicken for 10-15 minutes, or until heated through. You can also reheat it in an air fryer for a crispier result. Reheating in a microwave is not recommended as it will make the chicken soggy.
Freezing is not recommended as the beer batter tends to change its texture and gets soggy when thawed.
Nutritional Information
(Estimated values per serving, based on 3 drumsticks)
| Nutrient | Amount per Serving | % Daily Value |
|---|---|---|
| Calories | 493 kcal | – |
| Calories from Fat | 173 kcal | – |
| Total Fat | 19.3 g | 29% |
| Saturated Fat | 5.3 g | 26% |
| Cholesterol | 177.4 mg | 59% |
| Sodium | 476.2 mg | 19% |
| Total Carbohydrate | 26.2 g | 8% |
| Dietary Fiber | 0.9 g | 3% |
| Sugars | 0.2 g | 0% |
| Protein | 45.8 g | 91% |
Note: Nutritional information is an estimate and may vary based on specific ingredients and cooking methods.
Variations & Substitutions
- Gluten-Free: Substitute the all-purpose flour with a gluten-free flour blend. You may need to adjust the amount of liquid to achieve the desired batter consistency.
- Dairy-Free: This recipe is already mostly dairy-free, just ensure the beer you use is also dairy-free.
- Spice It Up: Add a pinch of cayenne pepper or a dash of hot sauce to the batter for a spicy kick.
- Herb Infusion: Experiment with different herbs in the batter, such as thyme, rosemary, or oregano.
- Sweet & Savory: Substitute some of the beer with apple cider for a slightly sweet and fruity flavor.
FAQs (Frequently Asked Questions)
Q: Why is my beer batter chicken soggy?
A: Soggy chicken usually indicates that the oil wasn’t hot enough, the pan was overcrowded, or the chicken wasn’t drained properly after frying. Make sure to use a thermometer to maintain the correct oil temperature and avoid overcrowding the pan.
Q: Can I make the batter ahead of time?
A: While it’s best to let the batter rest for 30 minutes before using, preparing it too far in advance can affect the texture. If you need to make it ahead, prepare no more than 2 hours in advance and store it in the refrigerator.
Q: What kind of beer is best for beer batter?
A: Lighter beers like lagers or pilsners are generally recommended, but you can also use pale ales for a slightly more hoppy flavor. Avoid using dark or heavy beers, as they can overpower the flavor of the chicken.
Q: How do I know when the chicken is done?
A: The chicken is done when the internal temperature reaches 165°F (74°C). Use a meat thermometer to check the temperature. The juices should also run clear when pierced with a fork.
Q: Can I use chicken thighs instead of drumsticks or breasts?
A: Absolutely! Chicken thighs are a great option for beer-battered chicken. They tend to be more flavorful and juicy than chicken breasts. Just adjust the cooking time accordingly.
Final Thoughts
Now it’s your turn to create some golden memories of your own with this classic recipe. The aroma of frying chicken, the satisfying crunch, and the juicy, tender meat within – it’s a culinary experience that’s hard to beat. Don’t be afraid to experiment with variations and make it your own. Share your creations with friends and family, and don’t forget to let me know how it turns out! Consider serving it with a side of crispy fries and a refreshing iced tea for the perfect summer meal. Happy cooking!