
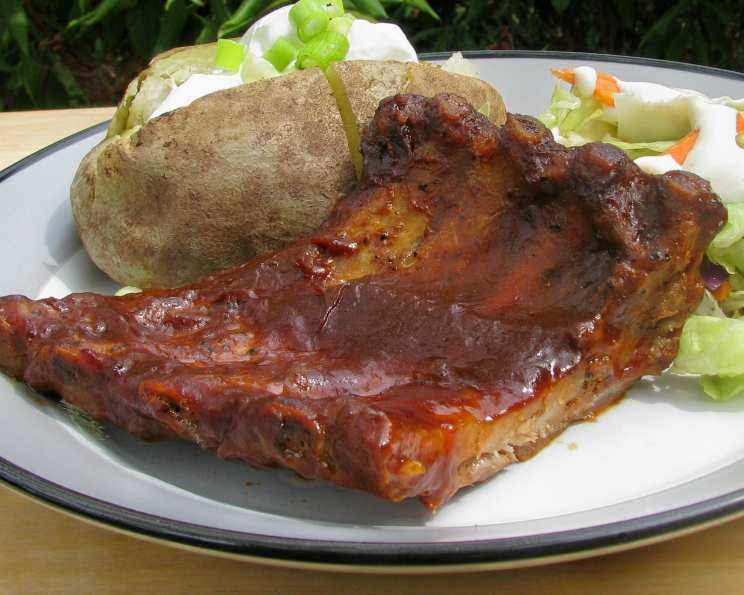
The Only Barbecue Ribs Recipe You’ll Ever Need
The memory is seared into my mind as vividly as the grill marks on a perfectly cooked rack of ribs. I was a young culinary student, attending a summer barbecue competition as a volunteer. The air hung thick with hickory smoke and the sweet, tangy aroma of barbecue sauce. I sampled ribs from contenders across the South, each boasting a unique blend of spices and techniques. But it was the unassuming entry from a home cook, cooked simply and honestly, that truly stole the show. It proved to me that great barbecue isn’t about elaborate equipment or secret ingredients, but about passion, patience, and understanding the fundamentals of flavor. And that’s the kind of barbecue I aim to share with you today.
Recipe Overview
- Prep Time: 5 minutes
- Cook Time: 2.5-3 hours (oven) + 5-10 minutes (grill)
- Total Time: 2 hours 35 minutes – 3 hours 10 minutes
- Servings: 4-6
- Yield: 2 racks of ribs
- Dietary Type: Varies (check barbecue sauce ingredients)
Ingredients
- 2 racks baby back ribs
- 12 ounces pit smoked barbecue sauce (store-bought or homemade; see notes below)
Equipment Needed
- Large oven pan
- Aluminum foil
- Plastic (Saran) wrap
- Grill (optional, for finishing)
Instructions
-
Prepare the Ribs for the Oven: Begin by wrapping each rack of baby back ribs tightly in plastic wrap, ensuring a secure seal. Then, encase the plastic-wrapped ribs in aluminum foil, again ensuring a tight and complete wrapping. This double layer of protection helps to trap moisture and create a tender, fall-off-the-bone result.
-
Slow Bake in the Oven: Place the wrapped ribs on a large oven pan. Bake at a low temperature of 225°F (107°C) for 2 1/2 to 3 hours. The long, slow cooking process is crucial for breaking down the tough connective tissues in the ribs, resulting in maximum tenderness. Check for doneness after 2.5 hours by unwrapping one rack (carefully, as the steam will be hot) and checking if the meat easily pulls away from the bone.
-
Prepare for the Grill (Optional): Once the ribs are cooked through in the oven, carefully unwrap them. Be extremely cautious while removing the plastic wrap and foil, as the steam can burn you. Discard the used plastic wrap and foil.
-
Grill to Brown (Optional): If you desire a smoky, caramelized exterior, preheat your grill to medium heat and lightly oil the grates. Place the ribs on the grill for just long enough to brown the surface, about 2-3 minutes per side. Be careful not to overcook them at this stage, as they are already cooked through.
-
Baste with Barbecue Sauce: Regardless of whether you grill the ribs or not, generously baste both sides of the ribs with the pit smoked barbecue sauce.
-
Finish on the Grill (Optional): If grilling, move the ribs to a cooler part of the grill, away from direct heat. Cover the grill and let the sauce heat through and caramelize slightly, about 2-3 minutes. This prevents the sauce from burning and allows the flavors to meld beautifully with the ribs.
-
Serve and Enjoy: Remove the ribs from the grill (or oven, if you skipped the grilling step) and let them rest for a few minutes before slicing and serving. This allows the juices to redistribute, resulting in a more tender and flavorful final product.
Expert Tips & Tricks
- Choosing Your Ribs: Look for racks of baby back ribs that are meaty and have a good amount of marbling (fat within the muscle). This fat will render during cooking, adding flavor and moisture.
- Homemade BBQ Sauce: While a good quality store-bought barbecue sauce works well, making your own allows you to customize the flavor to your liking. Experiment with different combinations of sweet, spicy, and smoky ingredients.
- Don’t Overcook: The key to perfect ribs is to cook them until they are tender but not mushy. Overcooked ribs will be dry and fall apart too easily.
- The Toothpick Test: A good way to check for doneness is to insert a toothpick into the meat between the bones. If it goes in easily, the ribs are done.
- Make-Ahead Option: The ribs can be cooked in the oven ahead of time and stored in the refrigerator for up to 3 days. When ready to serve, simply reheat them on the grill or in the oven and baste with barbecue sauce.
Serving & Storage Suggestions
Serve these delicious barbecue ribs with classic sides such as coleslaw, potato salad, corn on the cob, or baked beans. A crisp, refreshing beer or a sweet tea complement the smoky, savory flavors perfectly.
Leftover ribs can be stored in an airtight container in the refrigerator for up to 3-4 days. To reheat, wrap the ribs in foil and warm them in a 300°F (150°C) oven until heated through. You can also reheat them in the microwave, but be careful not to overcook them. For longer storage, freeze the ribs for up to 2-3 months. Thaw them in the refrigerator overnight before reheating.
Nutritional Information
(Estimated values per serving; will vary based on specific ingredients and portion size)
| Nutrient | Amount per Serving | % Daily Value |
|---|---|---|
| Calories | 600 kcal | 30% |
| Total Fat | 40g | 62% |
| Saturated Fat | 15g | 75% |
| Cholesterol | 150mg | 50% |
| Sodium | 1200mg | 52% |
| Total Carbohydrate | 30g | 11% |
| Dietary Fiber | 2g | 7% |
| Sugars | 20g | N/A |
| Protein | 40g | 80% |
Variations & Substitutions
- Spicy Ribs: Add a pinch of cayenne pepper or a dash of hot sauce to the barbecue sauce for a spicy kick.
- Honey Garlic Ribs: Substitute the pit smoked barbecue sauce with a mixture of honey, garlic, soy sauce, and ginger for a sweet and savory flavor.
- Dry Rub Ribs: Skip the barbecue sauce altogether and use a dry rub of spices such as paprika, brown sugar, garlic powder, onion powder, and cumin.
- Different Cuts of Meat: While this recipe calls for baby back ribs, you can also use spare ribs or country-style ribs. Adjust the cooking time accordingly.
- Smoker Ribs: If you have a smoker, you can smoke the ribs instead of baking them in the oven. Smoke them at 225°F (107°C) for 5-6 hours, or until they are tender.
FAQs (Frequently Asked Questions)
Q: Why do I need to wrap the ribs in plastic wrap and foil?
A: The plastic wrap and foil create a tight seal that traps moisture during cooking, resulting in tender and juicy ribs. The plastic wrap is food-safe at the low cooking temperature.
Q: Can I skip the grilling step?
A: Yes, you can skip the grilling step if you don’t have a grill or prefer not to use one. The ribs will still be delicious if cooked solely in the oven and basted with barbecue sauce.
Q: How do I know when the ribs are done?
A: The ribs are done when the meat is tender and easily pulls away from the bone. You can also use a toothpick to check for doneness.
Q: Can I use a different type of barbecue sauce?
A: Absolutely! Feel free to use your favorite barbecue sauce or experiment with different flavors.
Q: Can I make these ribs ahead of time?
A: Yes, the ribs can be cooked in the oven ahead of time and stored in the refrigerator for up to 3 days. When ready to serve, simply reheat them on the grill or in the oven and baste with barbecue sauce.
Final Thoughts
This recipe is more than just a set of instructions; it’s an invitation to create your own barbecue memories. Don’t be afraid to experiment with different flavors and techniques to find what works best for you. Whether you’re cooking for a crowd or just for yourself, I hope these ribs bring a little bit of joy to your table. So fire up the grill (or preheat your oven), gather your loved ones, and get ready to experience barbecue at its finest. And please, come back and share your feedback—I’d love to hear about your barbecue journey!