
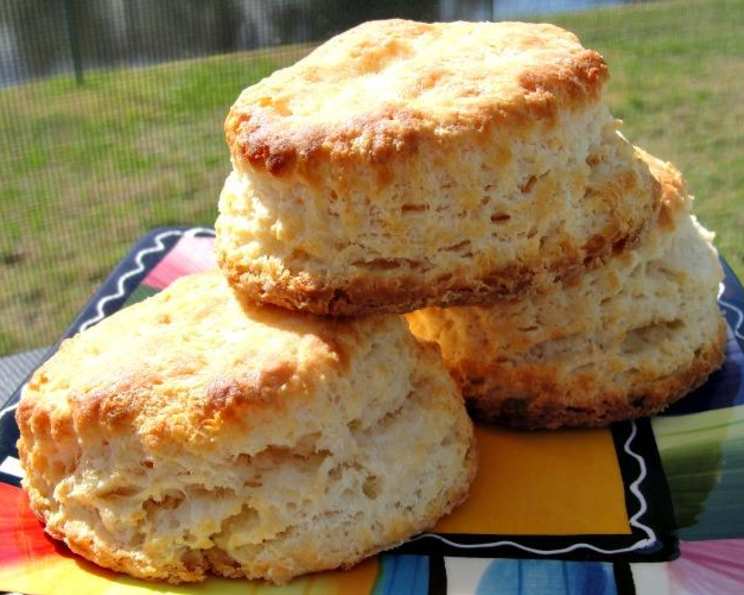
The Ultimate Buttermilk Biscuits: A Chef’s Secret
The scent of baking biscuits always takes me back to my grandmother’s kitchen. I remember standing on a wobbly stool, watching her effortlessly transform simple ingredients into golden, fluffy clouds. The warmth from the oven, the gentle rhythm of her rolling pin, and the anticipation of that first buttery bite – these are memories I cherish, and this biscuit recipe is my attempt to recreate that magic. It’s a journey of flour, butter, and buttermilk, culminating in a biscuit that’s crisp on the outside, tender on the inside, and utterly irresistible.
Recipe Overview
- Prep Time: 15 minutes
- Cook Time: 12 minutes
- Total Time: 27 minutes
- Yields: 10 biscuits
- Dietary Type: Comfort Food
Ingredients
- 3 cups flour
- 4 teaspoons baking powder
- 2 tablespoons sugar
- 1 teaspoon salt
- 1 teaspoon cream of tartar
- 1 cup butter, chilled
- 1 1/4 cups buttermilk
Equipment Needed
- Large mixing bowl
- Fork
- Lightly floured surface
- Rolling pin
- 2 1/2-inch biscuit cutter
- Ungreased baking sheet
Instructions
-
Preheat your oven to 450°F (232°C). Ensuring the oven is fully preheated is critical for the biscuits to rise properly.
-
In a large mixing bowl, whisk together the flour, baking powder, sugar, salt, and cream of tartar. The cream of tartar helps to create a more tender crumb, but it can be omitted if you don’t have it on hand, though the texture might be slightly different.
-
Slice the chilled butter into cubes. This is where the magic happens! The cold butter creates pockets of air that, when baked, result in those beautiful, flaky layers.
-
Cut the butter into the flour mixture using a pastry blender or your fingertips (work quickly to keep the butter cold!) until the mixture resembles pea-sized crumbs. You can also use a food processor for this step, pulsing until the butter is incorporated but still visible.
-
Add the buttermilk to the bowl.
-
Stir with a fork until the mixture is just moistened. Be careful not to overmix! Overmixing develops the gluten in the flour, resulting in tough biscuits. A few streaks of flour are perfectly fine at this stage.
-
Turn the dough out onto a lightly floured surface.
-
Gently knead and fold the dough just until it holds together. Again, be cautious not to overwork the dough, or the butter will melt and the biscuits will become tough. Aim for about 5-6 folds.
-
With a lightly floured rolling pin, roll the dough out to about 1/4-inch thickness.
-
Cut out biscuits with a 2 1/2-inch biscuit cutter. When cutting, press straight down and lift the cutter without twisting. Twisting seals the edges and prevents the biscuits from rising fully. If you don’t have a biscuit cutter, you can use a sharp knife to cut square biscuits.
-
Place the biscuits about 1 inch apart on an ungreased baking sheet. For softer-sided biscuits, place them close together so they touch. For crisper sides, space them further apart.
-
Bake for 10 to 12 minutes, or until the biscuits are raised and golden brown. Keep a close eye on them during the last few minutes of baking to prevent burning. The internal temperature should reach around 200-210°F (93-99°C).
-
Serve warm and enjoy!
Expert Tips & Tricks
- Keep everything cold! This is the golden rule for flaky biscuits. Chill the flour, butter, and even the buttermilk if you have time.
- Use high-quality butter. The better the butter, the better the flavor of your biscuits. European-style butter with a higher fat content is ideal.
- Don’t overmix! Overmixing develops gluten, which leads to tough biscuits. Mix until just combined.
- Lamination is key. The folding process creates layers of butter and dough, which puff up during baking, resulting in a flaky texture.
- Brush with melted butter before baking for an extra golden crust and richer flavor. A little bit of milk or cream works well too.
- For a more rustic look, skip the biscuit cutter and simply cut the dough into squares with a knife.
- To make ahead, cut out the biscuits and place them on a baking sheet. Cover tightly with plastic wrap and refrigerate for up to 24 hours. Bake as directed when ready. You can also freeze unbaked biscuits for longer storage.
Serving & Storage Suggestions
These buttermilk biscuits are best served warm, fresh from the oven. They are delicious on their own with a smear of butter and jam, or alongside savory dishes like soups, stews, or fried chicken.
- Storage: Leftover biscuits can be stored at room temperature in an airtight container for up to 2 days, or in the refrigerator for up to 5 days.
- Reheating: To reheat, wrap the biscuits in foil and warm them in a 350°F (175°C) oven for about 5-10 minutes. You can also microwave them for a few seconds, but they may become slightly softer.
- Freezing: Baked biscuits can be frozen for up to 2 months. Wrap them individually in plastic wrap and then place them in a freezer bag. Thaw at room temperature before reheating.
Nutritional Information
Here’s an estimate of the nutritional information per biscuit:
| Nutrient | Amount per Serving | % Daily Value |
|---|---|---|
| Calories | 323 kcal | – |
| Calories from Fat | 171 kcal | – |
| Total Fat | 19.1 g | 29% |
| Saturated Fat | 11.9 g | 59% |
| Cholesterol | 50 mg | 16% |
| Sodium | 572.9 mg | 23% |
| Total Carbohydrate | 33.2 g | 11% |
| Dietary Fiber | 1 g | 4% |
| Sugars | 4.1 g | – |
| Protein | 5.1 g | 10% |
Note: Nutritional information is an estimate and may vary based on specific ingredients and serving sizes.
Variations & Substitutions
- Gluten-Free: Use a gluten-free all-purpose flour blend and add 1/2 teaspoon of xanthan gum to help bind the dough.
- Vegan: Substitute the buttermilk with a mixture of 1 1/4 cups of plant-based milk and 1 tablespoon of lemon juice or apple cider vinegar. Use a vegan butter substitute.
- Cheese Biscuits: Add 1 cup of shredded cheddar cheese to the flour mixture.
- Herb Biscuits: Add 2 tablespoons of chopped fresh herbs, such as chives, rosemary, or thyme, to the flour mixture.
- Sweet Biscuits: Add a tablespoon of honey or maple syrup to the buttermilk for a slightly sweeter biscuit.
- Spicy Biscuits: Add a pinch of cayenne pepper or a dash of hot sauce to the buttermilk for a kick.
FAQs (Frequently Asked Questions)
Q: Why are my biscuits flat and dense?
A: This is usually caused by overmixing the dough or using warm butter. Remember to keep everything cold and mix until just combined. Also, ensure your baking powder is fresh.
Q: Can I use regular milk instead of buttermilk?
A: Buttermilk adds a tangy flavor and helps to tenderize the biscuits. If you don’t have buttermilk, you can make a substitute by adding 1 tablespoon of lemon juice or white vinegar to 1 1/4 cups of regular milk and letting it sit for 5 minutes.
Q: How can I make sure my biscuits are flaky?
A: The key to flaky biscuits is cold butter and minimal mixing. The cold butter creates pockets of steam during baking, resulting in those beautiful layers.
Q: Can I freeze the biscuit dough?
A: Yes, you can freeze unbaked biscuits. Cut them out and place them on a baking sheet lined with parchment paper. Freeze until solid, then transfer them to a freezer bag. Bake directly from frozen, adding a few minutes to the baking time.
Q: What if I don’t have a biscuit cutter?
A: No problem! Simply use a sharp knife to cut the dough into squares or triangles. The shape won’t affect the flavor!
Final Thoughts
I hope this recipe inspires you to create your own batch of perfect buttermilk biscuits. The warmth and comfort they bring are truly unmatched. Don’t be afraid to experiment with different variations and find your own signature twist. Whether you’re serving them with a hearty stew, a dollop of jam, or simply enjoying them on their own, these biscuits are sure to be a hit. Happy baking!