
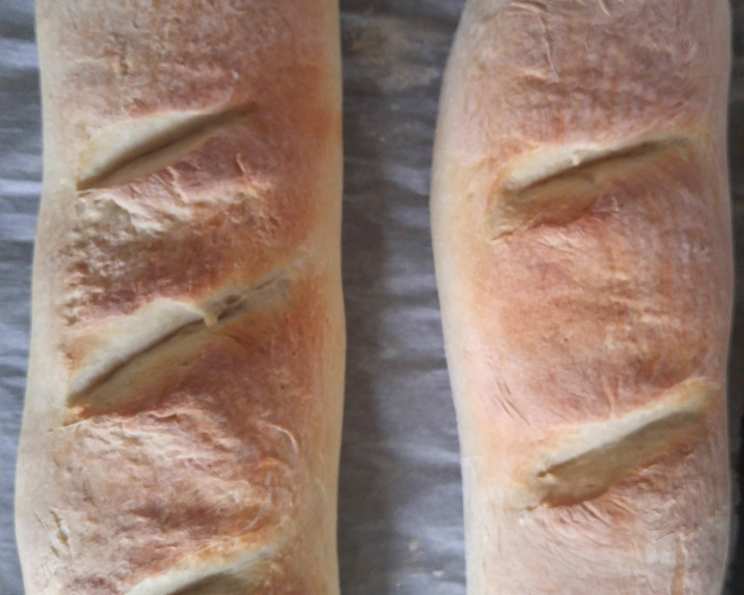
Best Ever French Bread: A Crusty, Homemade Delight
The memory is etched in my mind: the warm, yeasty aroma that would fill my grandmother’s kitchen every Sunday morning. It wasn’t just the smell of baking bread; it was the scent of love, tradition, and the promise of a simple, perfect meal. We’d tear into those crusty loaves of French bread, slathering them with sweet butter and homemade jam, the crackling crust giving way to a soft, airy interior. That simple pleasure sparked a lifelong obsession with perfecting the art of French bread baking. And after countless attempts, this recipe is the closest I’ve come to recreating that cherished memory.
Recipe Overview
- Prep Time: 15 minutes
- Cook Time: 15 minutes
- Total Time: 1 hour 30 minutes (includes rising time)
- Yields: 2 loaves
- Dietary Type: Vegetarian
Ingredients
- 2 cups warm water
- 2 tablespoons yeast (2 packets)
- 2 teaspoons salt
- 1 teaspoon sugar
- 4 1/2 – 5 cups bread flour
Equipment Needed
- Large bowl
- Measuring cups and spoons
- KitchenAid mixer (optional, but recommended)
- Baking sheet
- Damp dishcloth
- Sharp knife or bread lame
Instructions
-
Activate the Yeast: In a large bowl, dissolve 2 tablespoons of yeast (that’s two packets!) in 2 cups of warm water. Make sure the water isn’t too hot, or it will kill the yeast. Think lukewarm bathwater. Add 2 teaspoons of salt and 1 teaspoon of sugar. The sugar provides food for the yeast and helps it activate, resulting in a better rise.
-
Mix the Dough: Gradually add the bread flour, starting with 4 1/2 cups. Mix until the dough comes together and forms a soft dough. The key here is soft – you want it to be slightly tacky but not sticky. You might not need all 5 cups of flour, so add it gradually until you achieve the desired consistency.
-
Knead the Dough: Knead the dough for 6-8 minutes until it’s smooth and elastic. This is crucial for developing the gluten, which gives the bread its structure. If you have a KitchenAid mixer with a dough hook, use it! About 4 minutes on medium speed usually does the trick. Then, knead by hand for another 4 minutes to get a feel for the dough. If kneading by hand, use a floured surface and push the dough away from you with the heel of your hand, then fold it back over and repeat.
-
First Rise: Spray a large bowl with cooking spray. Place the dough inside, turning it once to coat. This prevents the dough from sticking as it rises. Cover the bowl with plastic wrap or a damp dishcloth and let it rise in a warm place for one hour, or until it has doubled in size. The warmer the environment, the faster it will rise.
-
Punch Down and Divide: Once the dough has doubled, punch it down to release the air. This helps to redistribute the yeast and creates a more even texture. Divide the dough in half.
-
Shape the Loaves: Form each half into a 12-inch loaf. You can also get creative with shapes! Try making one long loaf and two smaller round loaves, as I sometimes do. To shape the loaves, gently stretch and fold the dough, tucking the ends underneath to create a smooth surface.
-
Second Rise: Place the shaped loaves on a baking sheet lined with parchment paper. Cover them with a damp dishcloth and let them rise for another 30 minutes in a warm place. I like to set mine on the stove top while the oven is preheating.
-
Score the Loaves: Using a sharp knife or bread lame, cut diagonal marks about 1/4 inch deep down the length of each loaf. This allows the bread to expand properly in the oven and prevents it from cracking randomly.
-
Bake: Bake in a preheated oven at 450 degrees F (232 degrees C) for about 15 minutes, or until golden brown and the internal temperature reaches 200-210°F (93-99°C). For a really crusty loaf, pour about 1/4 cup of water into the bottom of the oven just before closing the door. This creates steam, which helps develop a crispier crust. Be careful when adding the water to the hot oven!
-
Cool: Let the bread cool on a wire rack before slicing and serving. This prevents the bread from becoming soggy.
Expert Tips & Tricks
- Don’t Overwork the Dough: Over-kneading can lead to a tough loaf. Knead until the dough is smooth and elastic, but not excessively.
- Temperature is Key: Use a thermometer to ensure your water is warm enough to activate the yeast (around 105-115°F). Too hot, and you’ll kill the yeast. Too cold, and it won’t activate properly.
- Steam is Your Friend: The steam trick is crucial for achieving that signature crusty exterior. If you don’t want to pour water directly into the oven, you can place a pan of hot water on the bottom rack.
- Scoring Matters: Scoring not only looks professional but also controls how the bread expands. If you don’t score, the bread will likely crack unevenly.
- Listen to Your Dough: Bread baking is as much art as science. Pay attention to the feel and appearance of the dough at each stage. Adjust the amount of flour or rising time as needed based on your environment and ingredients.
- Make Ahead Tip: You can prepare the dough through the first rise, punch it down, and refrigerate it overnight. Bring it to room temperature before shaping and proceeding with the second rise and baking.
Serving & Storage Suggestions
Serve your freshly baked French bread warm with butter, olive oil and balsamic vinegar, or alongside your favorite soup or stew. It’s also fantastic for sandwiches and toast.
To store, keep the bread in a paper bag at room temperature for up to 2 days. For longer storage, wrap it tightly in plastic wrap and freeze for up to 2 months. To reheat frozen bread, thaw it completely and then bake it in a preheated oven at 350 degrees F (175 degrees C) for 5-10 minutes, or until warmed through. You can also wrap it in foil before reheating to prevent it from drying out.
Nutritional Information
| Nutrient | Amount per Serving | % Daily Value |
|---|---|---|
| Calories | 533.65 kcal | N/A |
| Calories from Fat | 29 g | N/A |
| Total Fat | 3.3 g | 5% |
| Saturated Fat | 0.5 g | 2% |
| Cholesterol | 0 mg | 0% |
| Sodium | 1170.9 mg | 49% |
| Total Carbohydrate | 110.65 g | 37% |
| Dietary Fiber | 5.05 g | 20% |
| Sugars | 1.45 g | N/A |
| Protein | 16.8 g | 34% |
Note: Nutritional information is an estimate and may vary based on specific ingredients and preparation methods.
Variations & Substitutions
- Whole Wheat French Bread: Substitute up to half of the bread flour with whole wheat flour for a nuttier flavor and added fiber.
- Herb-Infused French Bread: Add 1-2 tablespoons of your favorite dried herbs, such as rosemary, thyme, or oregano, to the dough during the mixing process.
- Garlic French Bread: Brush the baked loaf with garlic-infused olive oil while it’s still warm.
- Sourdough French Bread: Use a sourdough starter in place of commercial yeast for a tangier flavor. This will require adjustments to the rising time.
FAQs (Frequently Asked Questions)
Q: Why is my bread dense and not airy?
A: This could be due to several factors, including using old yeast, not kneading enough, or not allowing the dough to rise sufficiently. Make sure your yeast is fresh, knead for the recommended time, and give the dough ample time to rise in a warm place.
Q: How do I get a really crusty crust?
A: The steam trick is essential for a crusty crust. Pouring water into the oven creates steam, which helps to develop a crispier exterior. Also, baking at a high temperature (450°F) contributes to a good crust.
Q: Can I use all-purpose flour instead of bread flour?
A: Bread flour has a higher protein content than all-purpose flour, which helps to develop more gluten and creates a chewier texture. While you can use all-purpose flour, the bread may not be as chewy or structured.
Q: How can I tell if my bread is done?
A: The best way to tell if your bread is done is to use a thermometer. The internal temperature should reach 200-210°F (93-99°C). You can also tap the bottom of the loaf; it should sound hollow.
Q: My loaves are spreading out instead of rising up. What am I doing wrong?
A: This usually indicates that the dough is too wet or that it hasn’t developed enough gluten. Make sure you’re using the correct amount of flour and kneading for the recommended time. Shaping the loaves properly can also help.
Final Thoughts
There’s something truly magical about creating your own bread from scratch. The process is simple, the ingredients are humble, and the reward is a loaf of warm, crusty goodness that fills your home with an irresistible aroma. This French bread recipe is a testament to the beauty of homemade baking. Don’t be intimidated – give it a try! I encourage you to experiment with different variations, share your creations with loved ones, and savor the simple joy of fresh, homemade bread. Feel free to let me know how it turns out!