
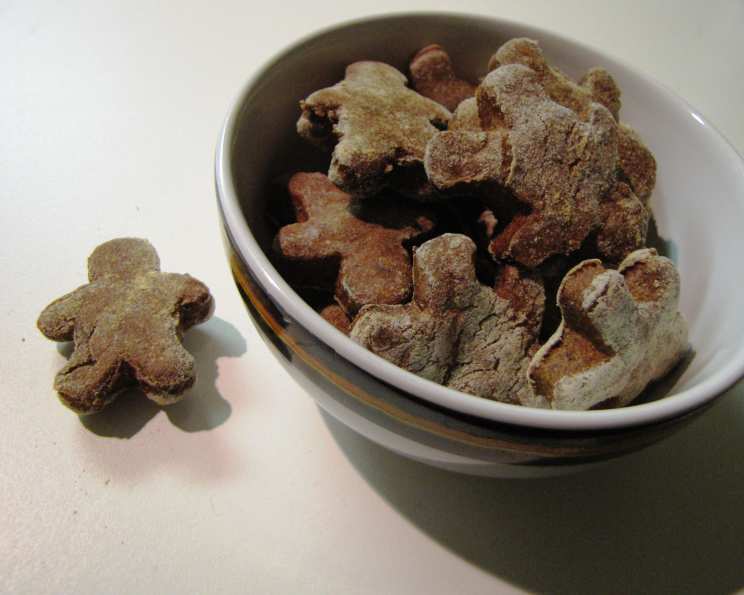
Best Ever Homemade Dog Biscuits
My golden retriever, Gus, wasn’t just a pet; he was family. And like any family member, he deserved the very best. Store-bought dog treats? They just didn’t cut it. They were often filled with questionable ingredients and lacked that special, homemade touch. I wanted to bake something wholesome and delicious, made with love, just for him. The first time I pulled a batch of these biscuits from the oven, the aroma alone had Gus doing zoomies around the kitchen. The tail wags that followed the first bite? Pure, unadulterated joy. It became our little ritual, a way to show him just how much he meant to us.
Recipe Overview
- Prep Time: 10 minutes
- Cook Time: 2 hours
- Total Time: 2 hours 10 minutes
- Yields: Approximately 15 biscuits
- Dietary Type: Not specified (Can be modified to be dairy-free)
Ingredients
- 1 ½ cups wheat flour
- ½ cup cornmeal
- ¼ cup dry milk
- ¼ cup wheat germ
- 4 ounces baby food, meat-flavored
- ½ cup water
- 1 egg
- 1 tablespoon peanut oil
Equipment Needed
- Medium-sized bowl
- Small-sized bowl
- Lightly floured surface
- Rolling pin
- Biscuit cutters or knife
- Baking sheet
Instructions
-
Begin by preheating your oven to 325°F (160°C). This low and slow baking process is key for creating that satisfyingly crunchy texture dogs love.
-
In a medium-sized bowl, thoroughly mix together all the dry ingredients: the wheat flour, cornmeal, dry milk, and wheat germ. Ensure everything is evenly distributed, as this will contribute to a consistent flavor and texture throughout the biscuits.
-
In a separate, small bowl, combine all the wet ingredients: the meat-flavored baby food, water, egg, and peanut oil. Whisk them together until they are well incorporated.
-
Now, the fun begins! Pour the wet ingredients into the bowl with the dry ingredients. Using a spoon or your hands, gently mix everything together. The resulting batter should feel similar to a biscuit dough – firm, but not too sticky.
-
Lightly flour a clean, flat surface. Turn the dough out onto the floured surface and knead it 4-6 times. This helps to bring the dough together and develop its texture.
-
Using a rolling pin, roll the dough out to approximately ½ inch (1.25 cm) thick. You want the biscuits to be substantial enough for a good crunch but not so thick that they take too long to bake.
-
Using biscuit cutters in your favorite shapes (bone-shaped cutters are always a hit!), or a knife, cut the dough into individual biscuit shapes. Re-roll any scraps to minimize waste.
-
Place the cut biscuits onto a baking sheet. There’s no need to grease the sheet, as the biscuits don’t tend to stick.
-
Bake the biscuits at 325°F (160°C) for 2 hours. This long baking time is essential for drying them out completely and achieving that desired hard, crunchy texture.
-
After baking, turn off the oven and allow the biscuits to cool completely inside the oven. This extra step helps to further harden them and remove any residual moisture. You can even leave them in the oven overnight for maximum crunch.
-
Once completely cooled, store the biscuits in an airtight container. This will help to maintain their texture and prevent them from becoming stale.
-
Finally, the most important step: Serve to your deserving canine companion and watch them enjoy!
Expert Tips & Tricks
- For extra flavor, consider adding a tablespoon of unsweetened applesauce or mashed sweet potato to the wet ingredients.
- If your dog has allergies, be mindful of the ingredients. You can substitute the wheat flour with oat flour or rice flour for a gluten-free option. Always consult with your veterinarian if you have concerns about your dog’s diet.
- To ensure the biscuits are completely dry, you can poke them with a fork before baking to allow steam to escape more easily.
- The size of the biscuits will affect the baking time. Smaller biscuits will bake faster, while larger ones will require more time. Keep an eye on them and adjust the baking time accordingly.
- If you find the dough is too sticky, add a little more flour, a tablespoon at a time, until it reaches the desired consistency.
- If you find the dough is too dry, add a teaspoon of water at a time until it is workable.
Serving & Storage Suggestions
These homemade dog biscuits are best served as a treat or reward for good behavior. Limit the number of biscuits given to your dog each day to avoid overfeeding. Store the cooled biscuits in an airtight container at room temperature for up to 2-3 weeks. For longer storage, you can freeze them for up to 3 months. Thaw them completely before serving. Avoid refrigerating, as this can cause them to become soft. Always ensure your dog has access to fresh water when enjoying these biscuits.
Nutritional Information
Note: Nutritional information is an estimate and may vary based on specific ingredient brands and portion sizes.
| Nutrient | Amount per Serving | % Daily Value (Dog) |
|---|---|---|
| Calories | 86 kcal | N/A |
| Total Fat | 2.4g | N/A |
| Saturated Fat | 0.7g | N/A |
| Cholesterol | 16mg | N/A |
| Sodium | 15mg | N/A |
| Total Carbohydrate | 14g | N/A |
| Dietary Fiber | 2g | N/A |
| Sugars | 1g | N/A |
| Protein | 3.4g | N/A |
Daily values are not established for dogs. This is for informational purposes only.
Variations & Substitutions
- Gluten-Free: Substitute the wheat flour with a gluten-free blend, oat flour, or brown rice flour.
- Dairy-Free: Omit the dry milk or substitute with a plant-based milk powder alternative, such as soy or almond milk powder (ensure it is unsweetened and safe for dogs).
- Flavor Boost: Add a teaspoon of dried herbs like parsley or rosemary for added flavor and potential health benefits (consult with your vet about safe herbs for dogs).
- Sweet Potato Version: Replace half of the baby food with an equal amount of mashed, cooked sweet potato for a naturally sweet and nutritious treat.
- Pumpkin Spice: Add a teaspoon of pumpkin pie spice for a festive, fall-inspired treat (ensure it does not contain nutmeg, which is toxic to dogs in large quantities).
FAQs (Frequently Asked Questions)
Q: Can I use different types of baby food?
A: Yes, you can use different meat-flavored baby food options as long as they are safe for dogs and do not contain onion or garlic, which are toxic.
Q: How can I make these biscuits softer?
A: Reduce the baking time to about 1 hour and skip the cooling in the oven. This will result in a softer biscuit.
Q: Are these biscuits suitable for puppies?
A: While the ingredients are generally safe, it’s best to consult with your veterinarian before giving these biscuits to puppies, as their dietary needs may differ.
Q: My dog has a chicken allergy. What can I substitute for the egg?
A: You can try using a “flax egg” (1 tablespoon of ground flaxseed mixed with 3 tablespoons of water, let sit for 5 minutes to thicken) as a substitute for the egg. However, the texture may be slightly different.
Q: Can I add cheese to these biscuits?
A: Yes, you can add a small amount of shredded cheddar cheese to the dough for added flavor, but be mindful of the salt content and limit the quantity.
Final Thoughts
These homemade dog biscuits are more than just a treat; they’re a symbol of the love and care we have for our furry friends. So, preheat your oven, gather your ingredients, and get ready to bake up a batch of these delicious and wholesome biscuits. Your dog will thank you with wagging tails and happy barks! Don’t hesitate to experiment with different flavors and ingredients to create the perfect biscuit for your canine companion. And most importantly, have fun in the kitchen! Share your baking adventures and photos of your happy pups enjoying their homemade treats – we’d love to see them!