
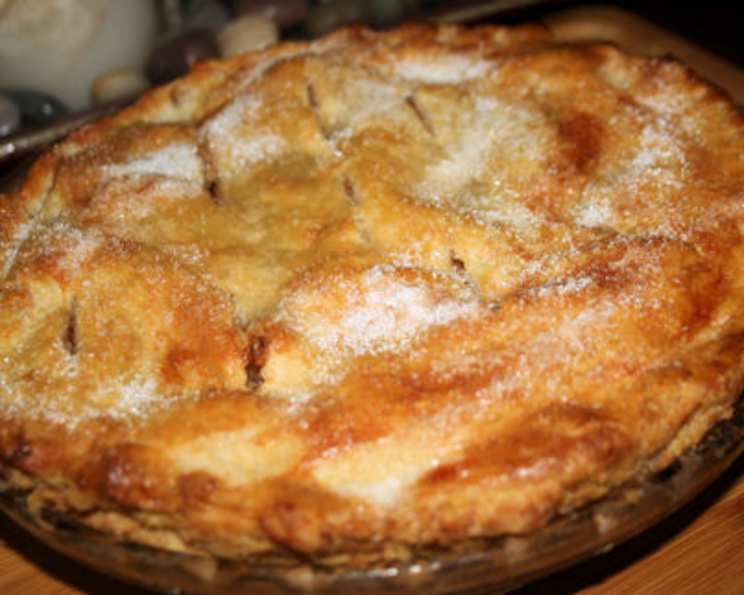
Best Ever Pie Crust: The Only Recipe You’ll Ever Need
I can still smell the warm, buttery aroma wafting from Grandma’s kitchen every Thanksgiving. The star of the show was always her pies, each one a masterpiece with a golden-brown, perfectly flaky crust. I remember being mesmerized as she effortlessly rolled out the dough, her hands moving with a practiced grace that only years of baking can instill. This recipe reminds me of those cherished memories, a taste of home baked with love.
Recipe Overview
- Prep Time: 15 minutes
- Cook Time: Varies depending on pie filling
- Total Time: 15 minutes + Cook Time
- Yield: 3 pie crusts
- Dietary Type: Vegetarian
Ingredients
- 5 cups flour
- 1 tablespoon salt
- 2 tablespoons sugar
- 2 1/4 cups shortening, cold
- 1 egg, slightly beaten
- 1 tablespoon vinegar
- Cold water, enough to reach 1 cup when combined with egg and vinegar
Equipment Needed
- Large mixing bowl
- Measuring cups and spoons
- Liquid measuring cup
- Pastry blender or fork
- Rolling pin
- Pie dish(es)
Instructions
-
In a large mixing bowl, combine the flour, salt, and sugar. Whisking the dry ingredients ensures even distribution of the salt and sugar, contributing to the crust’s flavor and texture.
-
Cut in the cold shortening using a pastry blender or a fork. Work the shortening into the flour mixture until it resembles coarse crumbs. It’s crucial to keep the shortening cold; this prevents it from melting and ensures a flaky crust. You should still see small pieces of shortening.
-
In a liquid measuring cup, mix the slightly beaten egg and vinegar. Then, add cold water until the mixture reaches the 1-cup mark. The vinegar helps to tenderize the dough, while the egg adds richness and structure. Using cold water is vital for keeping the shortening firm.
-
Add the liquid mixture to the flour mixture and mix until just combined. Be careful not to overmix, as this will develop the gluten in the flour and result in a tough crust. The dough should come together in a shaggy mass.
-
Divide the dough into three equal portions. Gently flatten each portion into a disc, wrap tightly in plastic wrap, and refrigerate for at least 30 minutes, or up to 2 days. This allows the gluten to relax, making the dough easier to roll out.
-
When ready to bake, preheat your oven according to your pie filling recipe.
-
On a lightly floured surface, roll out one disc of dough into a circle about 12 inches in diameter.
-
Carefully transfer the dough to your pie dish. Trim and crimp the edges as desired. For a blind-baked crust (pre-baking before adding the filling), prick the bottom of the crust with a fork to prevent it from puffing up. Line the crust with parchment paper and fill with pie weights or dried beans.
-
Bake according to your pie filling recipe or until golden brown. For blind-baking, bake at 375°F (190°C) for 15-20 minutes, then remove the pie weights and parchment paper and bake for another 5-10 minutes, or until golden brown.
Expert Tips & Tricks
- Keep everything cold! This is the most important tip for a flaky crust. Use cold shortening, cold water, and even chill your mixing bowl and rolling pin if you have time.
- Don’t overmix the dough. Overmixing develops the gluten and makes the crust tough. Mix just until the dough comes together.
- Let the dough rest. Refrigerating the dough allows the gluten to relax, making it easier to roll out.
- Use a pastry blender or fork. These tools help to cut the shortening into the flour without overworking the dough. If you don’t have a pastry blender, you can use two knives or your fingertips.
- Blind-bake for soggy fillings. If you’re making a pie with a wet filling, such as pumpkin or custard, blind-baking the crust will help prevent it from becoming soggy.
- For a golden-brown crust, brush the crust with an egg wash (1 egg beaten with 1 tablespoon of water) before baking. You can also sprinkle it with sugar for added sweetness and shine.
Serving & Storage Suggestions
Serve your pie warm or at room temperature, depending on the filling. This pie crust is excellent with both sweet and savory fillings.
Store leftover pie in the refrigerator for up to 3 days. To freeze baked pie, wrap it tightly in plastic wrap and then in foil. It can be frozen for up to 2 months. Thaw in the refrigerator overnight before serving. You can also freeze unbaked pie crusts. Wrap the dough tightly in plastic wrap and freeze for up to 3 months. Thaw in the refrigerator overnight before rolling out.
Nutritional Information
Note: Nutritional information is an estimate and may vary based on specific ingredients and serving size.
| Nutrient | Amount per Serving | % Daily Value |
|---|---|---|
| Calories | 725 kcal | 36% |
| Total Fat | 48.7g | 75% |
| Saturated Fat | 12.1g | 61% |
| Cholesterol | 23.5mg | 8% |
| Sodium | 784mg | 33% |
| Total Carbohydrate | 62.5g | 21% |
| Dietary Fiber | 1.9g | 8% |
| Sugars | 3g | N/A |
| Protein | 7.9g | 16% |
Variations & Substitutions
- Gluten-Free: Use a high-quality gluten-free flour blend designed for baking. You may need to add a binder such as xanthan gum to improve the texture.
- Vegan: Substitute the egg with 3 tablespoons of aquafaba (chickpea brine) or a flax egg (1 tablespoon ground flaxseed mixed with 3 tablespoons of water, let sit for 5 minutes). Use a vegan shortening.
- Whole Wheat: Substitute up to half of the all-purpose flour with whole wheat flour for a nuttier flavor. You may need to add a little more water to compensate for the extra absorption of the whole wheat flour.
- Different Flavors: Add spices like cinnamon, nutmeg, or ginger to the flour mixture for a flavored crust. You can also add citrus zest for a bright, aromatic crust.
FAQs (Frequently Asked Questions):
Q: Why is my pie crust tough?
A: Overmixing the dough is the most common cause of a tough pie crust. Overmixing develops the gluten in the flour, making the crust chewy instead of flaky. Also, make sure you let the dough rest in the refrigerator.
Q: How can I prevent my pie crust from shrinking during baking?
A: Letting the dough rest in the refrigerator before rolling it out is crucial. Also, avoid stretching the dough when placing it in the pie dish. Gently ease it into the dish and trim any excess.
Q: Can I make this pie crust ahead of time?
A: Absolutely! The dough can be made up to 2 days in advance and stored in the refrigerator. You can also freeze the dough for up to 3 months.
Q: What kind of shortening should I use?
A: Vegetable shortening is traditionally used for pie crusts because it creates a flaky texture. However, you can also use butter or a combination of butter and shortening. Using all butter will result in a more flavorful crust, but it may be slightly less flaky.
Q: My pie crust is browning too quickly. What can I do?
A: If your pie crust is browning too quickly, you can cover the edges with foil or use a pie shield. This will protect the edges from burning while the rest of the pie bakes.
Final Thoughts
Now that you’re armed with this “Best Ever Pie Crust” recipe, there’s no limit to the delectable pies you can create! Gather your ingredients, embrace the process, and don’t be afraid to experiment with different fillings and flavors. Baking a pie is an act of love, and I encourage you to share your creations with family and friends. I’d love to hear how it turns out for you—please share your experiences and any creative twists you add in the comments below! Happy baking!