
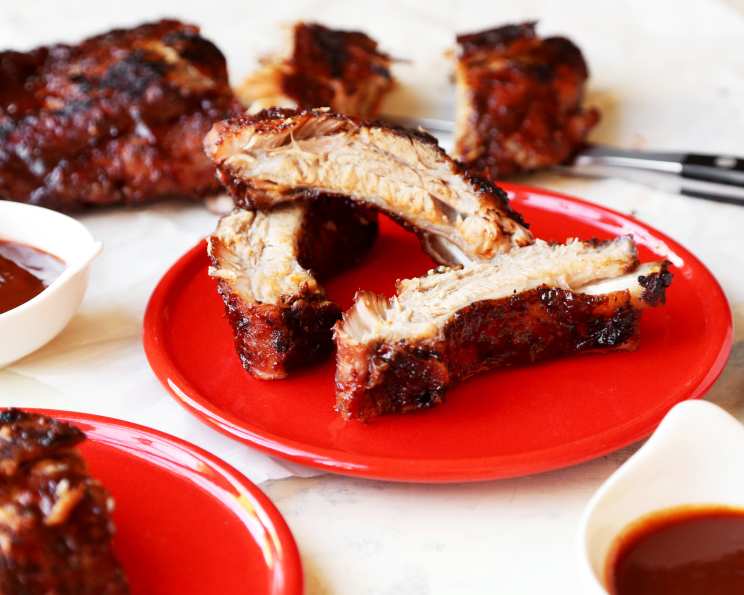
Beth’s Melt in Your Mouth Barbecue Ribs (Oven)
I remember the first time I tasted ribs that truly lived up to the “fall-off-the-bone” claim. It was at a family reunion, and my Aunt Beth, a culinary legend in our family, pulled out a platter piled high with these glistening, smoky ribs. The aroma alone was enough to make your mouth water, but the taste? Pure barbecue bliss. They were so tender, so flavorful, that I practically inhaled them. Ever since then, I’ve been on a quest to recreate that magic, and this recipe, passed down from Aunt Beth herself, is as close as it gets.
Recipe Overview
- Prep Time: 15 minutes
- Cook Time: 2 hours 30 minutes
- Total Time: 2 hours 45 minutes
- Servings: 6
- Dietary Type: Varies based on BBQ sauce – check ingredients for gluten and allergens
Ingredients
- 4 lbs pork ribs, membrane removed
- ¾ cup light brown sugar
- 1 teaspoon hickory smoke salt (If you cannot find, you can substitute 1 ½ to 2 teaspoons Hickory liquid smoke)
- 1 tablespoon paprika
- 1 tablespoon garlic powder
- ½ teaspoon ground red pepper (optional)
- 2 cups of your favorite barbecue sauce (mine is Sweet Baby Ray)
- Salt and pepper to taste
Equipment Needed
- Baking sheet
- Aluminum foil
- Medium bowl
- Broiler pan
Instructions
-
Begin by preheating your oven to 300 degrees F (150 degrees C). This low and slow cooking method is key to achieving that incredible tenderness.
-
Prepare your baking sheet by lining it with two layers of foil, making sure the shiny side is facing out. This will help reflect heat and prevent sticking. The double layer ensures there are no leaks!
-
Now, let’s tackle those ribs. If it hasn’t been done already, remove the tough membrane that covers the bony side. The easiest way to do this is to slide a spoon or the tip of kitchen shears under the membrane at the center of the rack, creating a little pocket. Then, grip the membrane with a paper towel and pull it away from the bones. It might take a bit of effort, but it’s worth it for the melt-in-your-mouth texture.
-
Season the ribs generously on both sides with salt and pepper. Don’t be shy! This is your foundation of flavor.
-
If you’re using Hickory liquid smoke instead of the hickory smoked salt, divide it evenly over both sides of the ribs at this stage. A little goes a long way, so be careful not to overdo it.
-
In a medium bowl, combine the light brown sugar, paprika, garlic powder, and ground red pepper (if using). This is your dry rub, a delicious blend of sweet, smoky, and savory.
-
Apply the rub liberally to all sides of the ribs, making sure every nook and cranny is coated. Really massage it in there to help it adhere.
-
Lay the ribs on the prepared baking sheet, meaty side down. Remember, when grilling, you want bone side down, but in the oven, we start with the meaty side down.
-
Cover the ribs with two layers of foil. Roll and crimp the edges of the foil tightly, making sure the edges are facing up to create a sealed packet. This traps the moisture and helps the ribs steam in their own juices.
-
Transfer the baking sheet to the preheated oven and bake for 2 to 2 ½ hours, or until the meat is starting to shrink away from the ends of the bones. This is a crucial indicator of doneness. You should be able to easily insert a fork into the meat.
-
Once the ribs are tender, remove them from the oven.
-
Turn on your broiler. While the broiler heats up, cut the ribs into serving-sized portions of 2 or 3 ribs each.
-
Arrange the ribs on a broiler pan, bony side up.
-
Brush the ribs generously with your favorite barbecue sauce.
-
Broil for 1 or 2 minutes, watching carefully, until the sauce is cooked on and bubbly. Broilers can be intense, so keep a close eye to prevent burning.
-
Turn the ribs over, meaty side up, and repeat the brushing and broiling process on the other side.
-
Alternatively, for a more authentic barbecue flavor, you can grill the ribs on your grill to cook on the sauce instead of broiling.
Expert Tips & Tricks
- For even more flavor, let the ribs sit with the dry rub on them for at least 30 minutes, or even overnight in the refrigerator.
- If you prefer a spicier kick, add a pinch of cayenne pepper to the dry rub.
- Don’t throw away the juices left in the foil after baking! These are full of flavor. You can strain them and add them to your barbecue sauce for an extra boost.
- If your ribs start to brown too quickly under the broiler, move them further away from the heat source.
- To check for doneness, insert a fork into the meat between the bones. If it goes in easily with little to no resistance, the ribs are ready.
Serving & Storage Suggestions
Serve these mouthwatering ribs hot off the broiler or grill. They’re fantastic with classic barbecue sides like coleslaw, corn on the cob, baked beans, and potato salad. For a complete meal, add a side of cornbread or biscuits.
Leftover ribs can be stored in an airtight container in the refrigerator for up to 3-4 days. For longer storage, you can freeze them for up to 2-3 months. To reheat, thaw the ribs in the refrigerator overnight and then bake them in a preheated oven at 350 degrees F (175 degrees C) until heated through. You can also reheat them in the microwave, but they may not be as tender.
Nutritional Information
Note: Nutritional information is an estimate and will vary based on specific ingredients and portion sizes.
| Nutrient | Amount per Serving | % Daily Value |
|---|---|---|
| Calories | 650 kcal | 33% |
| Total Fat | 35g | 54% |
| Saturated Fat | 15g | 75% |
| Cholesterol | 100mg | 33% |
| Sodium | 600mg | 25% |
| Total Carbohydrate | 40g | 13% |
| Dietary Fiber | 2g | 8% |
| Sugars | 30g | – |
| Protein | 40g | 80% |
Variations & Substitutions
- Spicy Ribs: Add 1-2 teaspoons of cayenne pepper or your favorite hot sauce to the dry rub for a fiery kick.
- Honey Garlic Ribs: Substitute half of the brown sugar with honey and add 2 cloves of minced garlic to the dry rub.
- Maple Glazed Ribs: Use maple syrup instead of brown sugar for a sweeter, more complex flavor.
- Dry Rub Only: Skip the barbecue sauce altogether and enjoy the ribs with just the dry rub.
FAQs (Frequently Asked Questions):
Q: Can I use baby back ribs instead of spare ribs?
A: Absolutely! Baby back ribs work just as well with this recipe. The cooking time might be slightly shorter, so keep an eye on them.
Q: What if I don’t have hickory smoked salt or liquid smoke?
A: You can use smoked paprika as a substitute, or simply omit the smoky flavor altogether. The ribs will still be delicious.
Q: How do I know when the ribs are done?
A: The best way to tell is when the meat starts to pull away from the bone and a fork inserted between the bones goes in easily with very little resistance.
Q: Can I make these ribs in a slow cooker?
A: Yes, you can adapt this recipe for a slow cooker. Place the ribs in the slow cooker, cover with the dry rub, and cook on low for 6-8 hours, or until tender. Then, broil or grill them with barbecue sauce as directed.
Q: Can I prepare the ribs ahead of time?
A: Yes! You can prepare the ribs up to the point of broiling or grilling. Simply bake them as directed, let them cool, and then store them in the refrigerator until you’re ready to finish them.
Final Thoughts
These ribs aren’t just a meal; they’re an experience. They’re a testament to the power of slow cooking and the magic that happens when simple ingredients are combined with love and patience. I urge you to try this recipe and share it with your family and friends. Let me know what you think, and don’t be afraid to put your own spin on it. After all, the best recipes are the ones that become your own! And if you’re feeling ambitious, pair these ribs with a crisp coleslaw and a cold glass of sweet tea for the ultimate barbecue feast.