
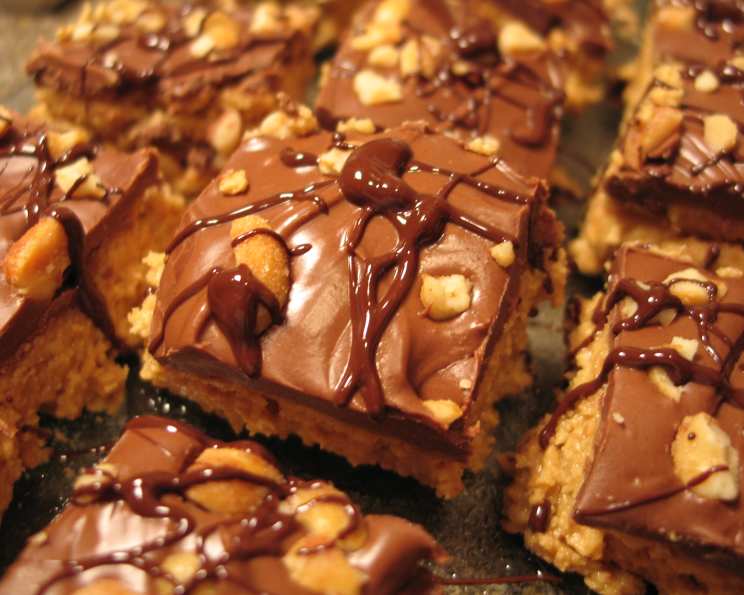
Better Than Reese’s Peanut Butter Cups
I remember one Christmas Eve, helping my grandmother assemble a tray of holiday treats for our neighbors. Among the sea of cookies and fudge, there was always a batch of these peanut butter bars, her “secret weapon” as she called them. The rich, peanut buttery aroma that filled the kitchen, the anticipation of that first bite, the perfect balance of sweet and salty… They were always the first to disappear, leaving a trail of chocolate crumbs and happy smiles. Ever since, these have held a special place in my heart, a sweet reminder of family, holidays, and simple joys.
Recipe Overview
- Prep Time: 15 minutes
- Cook Time: 0 minutes (chill time is needed)
- Total Time: 40 minutes
- Servings: 24-45
- Yield: 1 (9×13 inch) pan
- Dietary Type: Vegetarian
Ingredients
- 1 1/2 cups graham cracker crumbs
- 2 cups powdered sugar
- 1 cup softened unsalted butter
- 2 cups creamy peanut butter
- 1 (12 ounce) package milk chocolate chips
Equipment Needed
- 9×13 inch pan
- Mixing bowl
- Double boiler (or microwave-safe bowl)
- Spatula
- Measuring cups and spoons
Instructions
- In a large mixing bowl, thoroughly combine the graham cracker crumbs and powdered sugar. Ensure there are no lumps of powdered sugar remaining.
- Add the peanut butter and softened butter to the graham cracker mixture. Mix well until all ingredients are evenly incorporated and a slightly crumbly dough forms. Using your hands can sometimes help to fully incorporate the butter.
- Press the peanut butter mixture evenly into an ungreased 9×13 inch pan. Use your fingers or the back of a spoon to create a smooth, firm base. Ensuring an even layer will result in bars that are uniform in thickness.
- Set the pan aside while you prepare the chocolate topping.
- In a double boiler, gently melt the milk chocolate chips. Ensure the bottom of the top pot or bowl does not touch the simmering water to prevent scorching. Stir frequently until the chocolate is completely smooth and glossy. Alternatively, you can melt the chocolate in a microwave-safe bowl in 30-second intervals, stirring well between each interval, until melted and smooth.
- Once the chocolate is melted, pour it evenly over the peanut butter graham cracker mixture in the pan.
- Spread the melted chocolate carefully with a spatula to create a smooth, even layer across the entire surface of the peanut butter base.
- Chill the pan in the refrigerator until the chocolate is completely set. This usually takes approximately 25-35 minutes. Check the bars periodically to avoid over-chilling and making them too hard to cut.
- Once set, remove the pan from the refrigerator. Cut into squares or bars of your desired size.
- Keep the bars chilled or store them in a fairly cool room away from heat to maintain their shape and texture.
Expert Tips & Tricks
- Softening the Butter: Ensure the butter is truly softened, not melted. This allows it to cream properly with the other ingredients, creating a better texture for the base. Letting it sit at room temperature for at least an hour before starting is ideal.
- Melting Chocolate Perfection: When using a double boiler, make sure the water is simmering, not boiling vigorously. This prevents steam from getting into the chocolate and causing it to seize. If using the microwave, short bursts are key! Overheating will cause the chocolate to become grainy and unusable. Adding a teaspoon of vegetable oil can help maintain a smooth consistency.
- Neat Cutting: For clean, professional-looking cuts, use a warm knife. Run the knife under hot water, dry it thoroughly, and then make your cuts. Repeat as needed. You can also use a pizza cutter for a faster and equally clean cut.
- Peanut Butter Perfection: While creamy peanut butter is recommended, you can use natural peanut butter. If using natural peanut butter, make sure to stir it very well before measuring as the oil tends to separate.
Serving & Storage Suggestions
These peanut butter bars are best served chilled or at room temperature. They make a delightful addition to any dessert platter or as a standalone treat.
- Storage: Store leftover bars in an airtight container in the refrigerator for up to a week. They can also be stored at room temperature for a few days, but the chocolate may soften if it’s warm.
- Freezing: For longer storage, wrap the bars individually in plastic wrap and then place them in a freezer-safe container. They can be frozen for up to 2 months. Thaw in the refrigerator before serving.
- Reheating: These bars are generally not reheated, as they are best enjoyed cold or at room temperature.
Nutritional Information
| Nutrient | Amount per Serving | % Daily Value |
|---|---|---|
| Calories | 268.1 kcal | N/A |
| Calories from Fat | 177 g | 66% |
| Total Fat | 19.8 g | 30% |
| Saturated Fat | 7.5 g | 37% |
| Cholesterol | 20.9 mg | 6% |
| Sodium | 133.5 mg | 5% |
| Total Carbohydrate | 19.6 g | 6% |
| Dietary Fiber | 1.5 g | 6% |
| Sugars | 14.6 g | 58% |
| Protein | 6 g | 12% |
Note: Nutritional information is an estimate and may vary based on specific ingredients and portion sizes.
Variations & Substitutions
- Gluten-Free: Substitute the graham cracker crumbs with gluten-free graham cracker crumbs or a mixture of almond flour and rolled oats for a gluten-free option.
- Dark Chocolate: Use dark chocolate chips instead of milk chocolate chips for a richer, less sweet flavor.
- Peanut Butter Swirl: Melt a small amount of peanut butter separately and swirl it into the melted chocolate before it sets for a visually appealing and extra peanut buttery treat.
- Different Nut Butters: Experiment with other nut butters like almond butter or cashew butter for a unique flavor profile.
- Sea Salt Sprinkle: Sprinkle a pinch of sea salt over the melted chocolate before it sets to enhance the sweetness and create a salted caramel effect.
FAQs (Frequently Asked Questions)
Q: Can I use pre-crushed graham cracker crumbs?
A: Yes, you can use pre-crushed graham cracker crumbs to save time, but make sure they are finely ground for the best texture.
Q: What if my peanut butter mixture is too dry?
A: Add a tablespoon of melted butter or a small amount of milk to the mixture until it reaches a workable consistency. Be careful not to add too much liquid, or the base will be too soft.
Q: Can I use a different size pan?
A: Yes, but keep in mind that using a smaller pan will result in thicker bars, and a larger pan will result in thinner bars. Adjust the baking time accordingly.
Q: My chocolate cracked when I cut the bars. How can I prevent this?
A: Make sure the chocolate is not too cold before cutting. Let the bars sit at room temperature for a few minutes before cutting with a warm knife.
Q: How do I store these bars if I live in a hot climate?
A: In hot climates, it’s best to store the bars in the refrigerator to prevent the chocolate from melting.
Final Thoughts
Now it’s your turn to create some peanut butter magic! These bars are incredibly easy to make and are always a crowd-pleaser. Don’t be afraid to experiment with different variations and make them your own. I promise, once you taste these, you’ll understand why they’re “better than Reese’s.” Share your creations and feedback, and enjoy every delicious bite! Consider serving these with a cold glass of milk or alongside a scoop of vanilla ice cream for the ultimate dessert experience.