
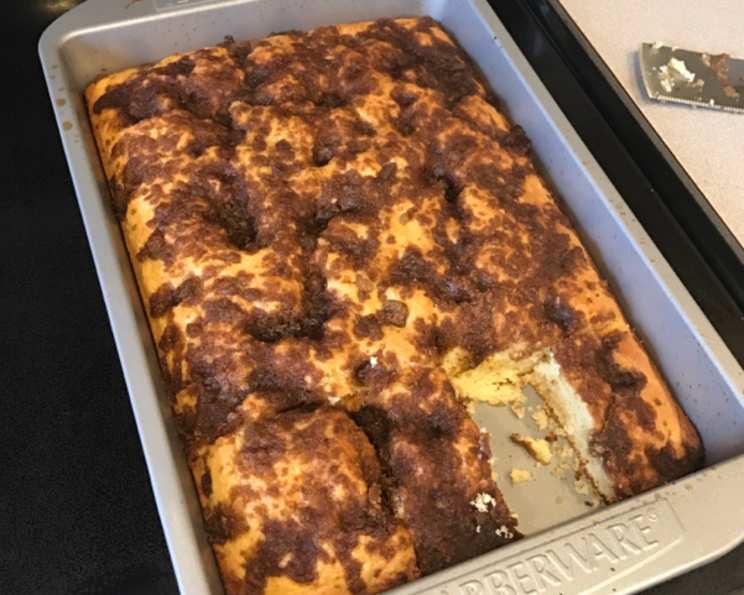
Betty Crocker’s Beloved 1973 Coffee Cake: A Taste of Nostalgia
The smell alone is enough to transport me back to my grandmother’s kitchen. It’s a scent memory, deeply ingrained – the warm, comforting aroma of cinnamon and butter mingling with the slightly tangy scent of baking powder. I can almost see her, humming softly as she pulled this very coffee cake, the Betty Crocker classic, from her avocado-green oven. It was always the centerpiece of our Sunday brunches, a sweet and simple pleasure that cemented our family’s bond.
Recipe Overview
- Prep Time: 15 minutes
- Cook Time: 35 minutes
- Total Time: 50 minutes
- Servings: 16 slices
- Yield: 1 9×13 inch cake
- Dietary Type: Not specified, contains dairy and eggs
Ingredients
- 1/2 cup vegetable oil
- 2 eggs
- 1 cup milk
- 3 cups flour
- 1 1/2 cups sugar
- 4 teaspoons baking powder
- 1 teaspoon salt
Topping:
- 3/4 cup brown sugar
- 1-2 teaspoons cinnamon (adjust to your preference)
- 3 tablespoons melted butter
- 1 cup chopped nuts (optional – walnuts or pecans work well)
Equipment Needed
- 9 x 13 inch baking pan
- Medium mixing bowl
- Large mixing bowl
- Measuring cups and spoons
- Whisk or fork
- Spatula
Instructions
- Begin by preheating your oven to 350°F (175°C). This ensures even baking and a perfectly golden crust.
- In a medium bowl, combine the vegetable oil, eggs, and milk. Whisk these wet ingredients together until they are well blended. This emulsion is key to a moist and tender cake.
- In a large bowl, combine all the dry ingredients: the flour, sugar, baking powder, and salt. Whisk them together thoroughly. This ensures that the baking powder is evenly distributed, resulting in a light and fluffy cake.
- Now, pour the wet ingredients into the bowl with the dry ingredients. Mix until just combined. Be careful not to overmix the batter. Overmixing can develop the gluten in the flour, leading to a tough cake. A few streaks of flour are fine.
- Grease and flour a 9 x 13 inch baking pan. This will prevent the cake from sticking and allow for easy removal after baking. Alternatively, you can use baking spray with flour already added.
- Pour the batter into the prepared pan and spread it evenly.
- In a separate small bowl, combine the topping ingredients: the brown sugar, cinnamon, and melted butter. If using nuts, add them now. Mix well until the topping is crumbly and evenly moistened.
- Sprinkle the topping evenly over the batter in the pan. Make sure to distribute it uniformly so that every slice gets a generous amount of the cinnamon-sugar goodness.
- Bake in the preheated oven for 35 minutes.
- To check for doneness, insert a toothpick into the center of the cake. If it comes out clean or with just a few moist crumbs, the cake is done. If it comes out with wet batter, bake for a few more minutes and check again. Remember, oven temperatures can vary, so it’s always best to rely on the toothpick test.
- Let cool in the pan for about 15 minutes before slicing and serving. This allows the cake to set slightly and makes it easier to cut.
Expert Tips & Tricks
- For extra moisture: Add 1/4 cup of sour cream or yogurt to the wet ingredients. This will create an even more tender and rich cake.
- Prevent a soggy bottom: Ensure your oven is fully preheated before baking. A consistent temperature is crucial for a well-baked cake.
- Elevate the flavor: A dash of nutmeg or cardamom in the topping can add a warm, complex note.
- Topping variation: Mix the topping ingredients with your fingers for a more uniform crumble.
- If your topping is browning too quickly: Tent the cake with foil during the last 10-15 minutes of baking.
Serving & Storage Suggestions
This coffee cake is best served warm, straight from the oven. It’s delicious on its own or with a dollop of whipped cream or a scoop of vanilla ice cream. It also pairs wonderfully with a cup of hot coffee or tea.
- Room Temperature: The cake can be stored at room temperature for up to 2 days in an airtight container.
- Refrigerator: For longer storage, keep it in the refrigerator for up to 5 days.
- Freezer: You can also freeze the cake for up to 2 months. Wrap it tightly in plastic wrap and then in foil or place it in a freezer-safe bag. Thaw overnight in the refrigerator before serving.
- Reheating: To reheat, warm individual slices in the microwave for a few seconds or in a low oven until heated through.
Nutritional Information
Please note that these values are approximate and can vary based on specific ingredients and portion sizes.
| Nutrient | Amount per Serving | % Daily Value |
|---|---|---|
| Calories | 296 kcal | N/A |
| Total Fat | 10.4 g | 15% |
| Saturated Fat | 2.8 g | 14% |
| Cholesterol | 31.1 mg | 10% |
| Sodium | 275 mg | 11% |
| Total Carbohydrate | 47.9 g | 15% |
| Dietary Fiber | 0.7 g | 2% |
| Sugars | 28.8 g | N/A |
| Protein | 3.8 g | 7% |
Variations & Substitutions
- Gluten-Free: Substitute the all-purpose flour with a gluten-free blend. You may need to add a binder like xanthan gum to improve the texture.
- Dairy-Free: Use almond milk or soy milk instead of regular milk, and substitute the melted butter in the topping with melted coconut oil or a dairy-free butter alternative.
- Nut-Free: Omit the nuts in the topping or substitute them with sunflower seeds or pumpkin seeds.
- Lemon Zest: Add the zest of one lemon to the batter for a bright, citrusy twist.
- Seasonal Fruit: Fold in fresh blueberries, raspberries, or sliced peaches into the batter for a summery variation. Apple slices or cranberries work well in the fall.
- Chocolate Chips: Add 1/2 cup of chocolate chips to the batter for a richer, more decadent cake.
FAQs (Frequently Asked Questions)
Q: Why did my coffee cake turn out dry?
A: Overbaking is the most common cause of a dry coffee cake. Be sure to check for doneness with a toothpick and avoid overmixing the batter.
Q: Can I make this coffee cake ahead of time?
A: Yes, you can prepare the batter ahead of time and store it in the refrigerator for up to 24 hours. Add the topping just before baking.
Q: Can I use a different size pan?
A: While a 9×13 inch pan is recommended, you can use a different size. If you use a smaller pan, the cake will be thicker and may require a longer baking time. Check for doneness frequently.
Q: My topping sank into the cake, what did I do wrong?
A: This can happen if the batter is too wet or the topping is too heavy. Be sure to measure the ingredients accurately and avoid overmixing the batter.
Q: Can I add a glaze to the coffee cake?
A: Absolutely! A simple powdered sugar glaze with a touch of vanilla extract or lemon juice would be a delicious addition. Drizzle it over the cooled cake.
Final Thoughts
This Betty Crocker coffee cake recipe, a true classic from 1973, is more than just a cake; it’s a slice of nostalgia, a reminder of simpler times and cherished family moments. I urge you to try this recipe and experience the comforting flavors for yourself. Bake it for your loved ones, share it with friends, and create new memories that will last a lifetime. And don’t hesitate to tweak it, experiment with variations, and make it your own. Let me know in the comments how it turns out! Consider pairing it with a freshly brewed pot of coffee or a glass of cold milk for the perfect treat. Happy baking!