
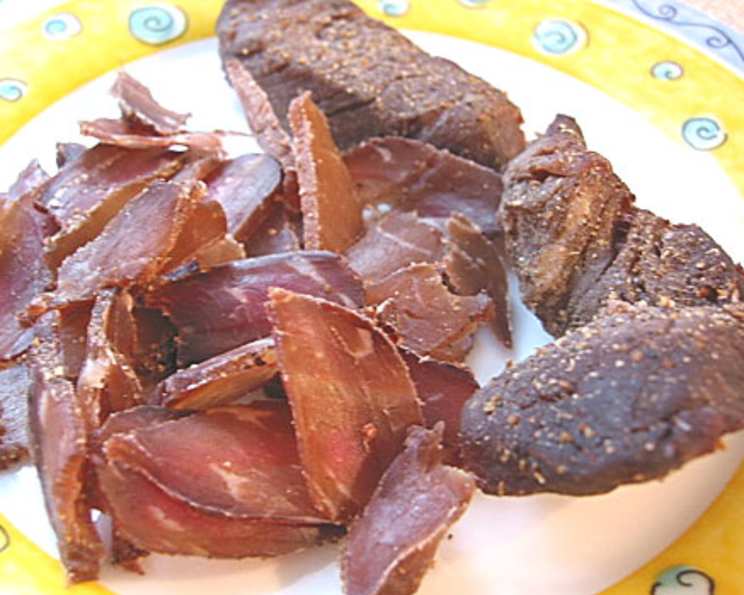
The Art of Biltong: A South African Culinary Treasure
The first time I tasted biltong, I was a culinary student working a summer stint in Cape Town. A street vendor, weathered and wise, offered me a sliver. The burst of savory, meaty flavor, intensified by coriander and a hint of vinegar, was unlike anything I’d experienced. It wasn’t just dried meat; it was a concentrated essence of South Africa, a taste of the rugged landscape and rich culinary history. From that moment, I was hooked, determined to master the art of making my own biltong and share this incredible treat with the world.
Recipe Overview
- Prep Time: 30 minutes
- Dry Time: 3-7 days (depending on drying method and desired texture)
- Total Time: 4-8 days
- Yields: 48-60 biltong strips
- Dietary Type: High Protein, Gluten-Free, Dairy-Free
Ingredients
- 5-10 kg beef (silverside or topside recommended)
- 625 ml vinegar (brown or malt vinegar)
- 75 g sugar (brown or white)
- 10 ml baking soda
- 10 ml black pepper
- 45 ml whole coriander seeds
- 275 g coarse salt (sea salt or kosher salt)
Equipment Needed
- Large cooler box or airtight container
- Roasting pan
- Sharp knife
- Meat hooks (or opened paperclips)
- Biltong box (optional, but highly recommended for faster and more controlled drying)
- Spice grinder or mortar and pestle
Instructions
- Begin by trimming any excess fat off the beef. While a little fat can add flavor, too much can impede the drying process and lead to spoilage.
- Slice the beef along the grain into strips no thicker than 1.5cm (approximately 1/2 inch). Slicing with the grain ensures that the biltong has the characteristic chewy texture.
- Cut these slices into strips that are 3-5cm (1-2 inches) wide. The width will determine the final size of your biltong pieces.
- In a bowl, combine the sugar, baking soda, and black pepper. The baking soda helps to tenderize the meat, while the sugar balances the saltiness and adds a subtle sweetness.
- Roast the coriander seeds in a dry pan over medium heat for about 2 minutes. This toasting intensifies the coriander’s aroma and flavor. Be careful not to burn the seeds.
- Once the coriander seeds are toasted, crush them finely using a spice grinder or a mortar and pestle. The finer the grind, the more evenly the flavor will distribute throughout the meat.
- Mix the crushed coriander into the sugar mixture.
- Pour the vinegar into a flat dish. Drag each meat strip through the vinegar, ensuring it’s well coated. The vinegar acts as a preservative and adds a tangy note to the biltong.
- For the next step, I like to use my cooler box. Sprinkle a generous handful of coarse salt over the bottom of the cooler box.
- Cover the salt with a layer of the vinegar-coated meat strips.
- Sprinkle the meat with a layer of salt, followed by a layer of the spice mixture.
- Continue layering the meat, salt, and spices, finishing with a final layer of salt and spices. This layering process ensures that each piece of meat is properly seasoned.
- Close the cooler box and leave it to stand for 24 hours. This allows the salt and spices to penetrate the meat and draw out moisture.
- After 24 hours, discard any leftover vinegar that may have accumulated in the dish.
- When you open the cooler box, you’ll notice a significant amount of water has been drawn from the meat, and the salt should be largely dissolved.
- Remove the meat from the cooler and place it on a tray.
- Remove any large pieces of salt that may still be clinging to the meat.
- At this stage, you can choose to pat the meat dry with paper towels, but I personally prefer to skip this step.
- Discard the water from the cooler box.
- Using a paperclip opened to resemble an “S”, hook each meat strip and hang it to dry.
- I prefer to use a biltong box, which allows the biltong to dry within 3 days. Conventional methods, such as hanging the meat in a well-ventilated room, can take much longer. The biltong box provides a controlled environment with consistent airflow, which is essential for even drying and preventing mold growth.
Expert Tips & Tricks
- Meat Selection is Key: Opt for cuts like silverside or topside, known for their leanness and consistent texture. Avoid cuts with excessive marbling, as the fat can hinder drying.
- Spice it Up: Experiment with different spice blends to create your signature biltong. Add a pinch of chili flakes for a spicy kick, or a touch of smoked paprika for a smoky flavor.
- Vinegar Variations: While brown or malt vinegar are traditional, you can also use cider vinegar or red wine vinegar for subtle flavor variations.
- Controlling the Dry: The key to perfect biltong is controlling the drying process. A biltong box with a fan and a low-wattage bulb is ideal, but you can also use a dehydrator or hang the meat in a cool, dry, and well-ventilated area.
- Doneness Test: The best way to check if your biltong is ready is to slice a piece open. The center should be slightly moist but not wet. Adjust the drying time according to your preference for texture.
Serving & Storage Suggestions
Serve your homemade biltong as a snack, appetizer, or part of a charcuterie board. It pairs beautifully with cheese, crackers, and a glass of South African red wine. Store biltong in an airtight container in a cool, dry place. It will keep for several weeks at room temperature, or even longer in the refrigerator. For long-term storage, you can freeze biltong, but be aware that freezing may slightly alter the texture.
Nutritional Information
| Nutrient | Amount per Serving | % Daily Value |
|---|---|---|
| Calories | 150 kcal | 8% |
| Total Fat | 5g | 7% |
| Saturated Fat | 2g | 10% |
| Cholesterol | 30mg | 10% |
| Sodium | 800mg | 35% |
| Total Carbohydrate | 2g | 1% |
| Dietary Fiber | 0g | 0% |
| Sugars | 1g | 2% |
| Protein | 25g | 50% |
Variations & Substitutions
- Venison Biltong: Substitute beef with venison for a richer, gamey flavor.
- Ostrich Biltong: Ostrich meat is another lean and delicious option for biltong.
- Spice Alternatives: Get creative with your spice blend. Try adding smoked paprika, chili flakes, or even a touch of garlic powder.
- Sweet Biltong: Increase the amount of sugar for a sweeter version.
- Wet Biltong: Reduce the drying time for a softer, more moist biltong.
FAQs (Frequently Asked Questions)
Q: How long does biltong last?
A: Properly dried and stored biltong can last for several weeks at room temperature or even longer in the refrigerator.
Q: Can I use other cuts of meat besides silverside or topside?
A: While silverside and topside are recommended due to their leanness and texture, you can experiment with other lean cuts, but be mindful of the fat content.
Q: How do I prevent mold from growing on my biltong?
A: Ensure adequate airflow during the drying process and avoid overcrowding the meat strips. Using a biltong box with a fan is highly recommended.
Q: What if my biltong is too salty?
A: Reduce the amount of salt used in the curing process or briefly soak the biltong in water before drying.
Q: Can I make biltong without a biltong box?
A: Yes, you can hang the meat in a cool, dry, and well-ventilated area, but the drying time will be longer, and you’ll need to monitor it closely for mold growth.
Final Thoughts
Creating biltong at home is a rewarding culinary experience that connects you to the rich traditions of South Africa. Don’t be afraid to experiment with different spice blends and drying techniques to find your perfect biltong recipe. Share your creations with friends and family, and enjoy the satisfaction of crafting this delicious and authentic treat. Whether you’re a seasoned chef or a curious home cook, I encourage you to embark on this flavorful journey and discover the art of biltong.