
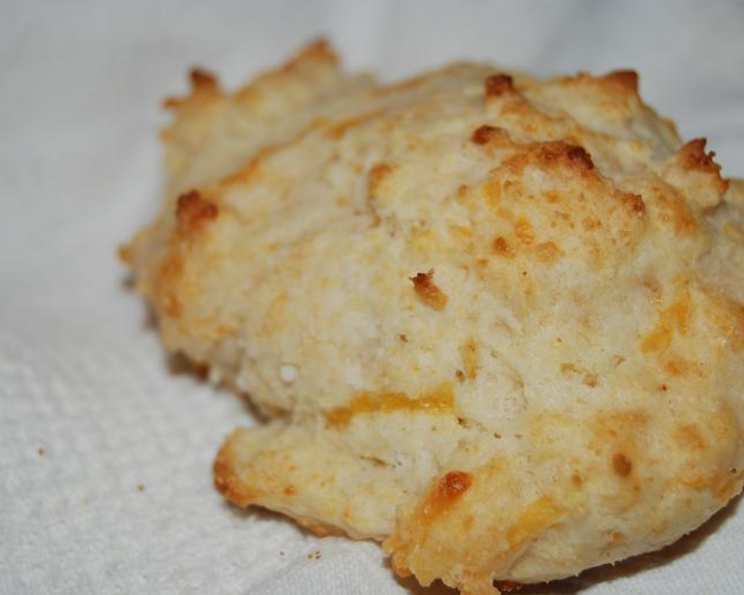
Homemade Biscuit Mix: The Foundation for Countless Comforts
I remember my grandmother always having a big jar of something she called “biscuit mix” tucked away in the refrigerator. As a child, it seemed like pure magic. One minute, it was a jar of unassuming powder, the next, it was fluffy biscuits slathered in butter and jam, or a comforting cobbler bubbling with juicy peaches. That mix was the secret to her spontaneous hospitality, always ready to whip up a treat for unexpected guests. The aroma of those freshly baked goods still brings me right back to her warm kitchen, surrounded by love and laughter. It’s a tradition worth keeping alive.
Recipe Overview
- Prep Time: 15 minutes
- Cook Time: 0 minutes (Mix is stored for later use)
- Total Time: 15 minutes
- Yields: 7 cups
- Dietary Type: Vegetarian
Ingredients
- 4 ¾ cups cake-and-pastry flour (or 4 ¼ cups all-purpose flour)
- 2 tablespoons baking powder
- 1 teaspoon baking soda
- 1 teaspoon cream of tartar
- 1 teaspoon salt
- ¾ cup instant milk
- 1 ⅛ cups vegetable shortening
Equipment Needed
- Large Mixing Bowl (optional)
- Sifter
- Food Processor with Metal Blade
- 8-cup Airtight Container
Instructions
-
Begin by sifting together the flour, baking powder, baking soda, cream of tartar, and salt into a large bowl, or directly into the food processor. This step is crucial for ensuring that the leavening agents are evenly distributed, resulting in a more consistent and light final product. If sifting into a bowl, transfer the mixture to the food processor after sifting.
-
Place the dry ingredients into a food processor fitted with the metal blade.
-
Add the instant milk and process for a few seconds to thoroughly mix the ingredients. This ensures the milk powder is evenly incorporated, contributing to the mix’s overall texture and flavor.
-
Cut the vegetable shortening into chunks. This will make it easier for the food processor to incorporate it evenly.
-
Add the shortening to the dry ingredients in the food processor.
-
Process until the mixture resembles coarse crumbs and the shortening is distributed evenly. Be mindful not to over-process, as this can lead to a tougher final product. You want to see small pieces of shortening throughout the flour mixture.
-
Spoon the prepared biscuit mix into an 8-cup container and seal tightly.
-
Store the biscuit mix in the refrigerator. This helps to keep the shortening cold and prevents it from going rancid, extending the shelf life of your mix.
Expert Tips & Tricks
- Flour Choice Matters: While all-purpose flour works in a pinch, cake-and-pastry flour will yield a more tender and delicate biscuit. The lower protein content prevents excessive gluten development.
- Cold is Key: Always use cold shortening. Cold fat creates pockets of steam in the oven, resulting in a flakier and lighter texture.
- Don’t Overmix: Overmixing develops gluten, leading to tough biscuits. Handle the dough gently when using the mix in recipes.
- Sweetness Adjustment: If you’re using this mix primarily for sweet applications like cobblers or coffee cakes, consider adding a tablespoon or two of sugar to the mix.
- Pulse, Don’t Puree: When using the food processor, pulse the mixture rather than running it continuously. This prevents the shortening from melting and ensures a crumbly texture.
Serving & Storage Suggestions
This biscuit mix is incredibly versatile and can be used as a base for a wide range of baked goods. It’s perfect for making:
- Biscuits: Use it to make classic, fluffy biscuits.
- Scones: Add berries, chocolate chips, or nuts to create delicious scones.
- Cobblers & Crisps: Top your favorite fruit with a layer of biscuit mix for a comforting dessert.
- Coffee Cakes: Use it as the base for a quick and easy coffee cake.
- Pancakes & Waffles: Add a bit of sugar and extra liquid to create a light and fluffy breakfast.
Storage:
- Refrigerator: The biscuit mix can be stored in the refrigerator for up to 2-3 months in an airtight container.
- Freezer: For longer storage, the mix can be frozen for up to 6 months. Ensure it’s in a freezer-safe container.
- Before using, check for any off odors or discoloration, which could indicate spoilage.
Nutritional Information
Note: Nutritional information is an estimate and can vary based on specific ingredients and serving sizes.
| Nutrient | Amount per Serving (Approx. 1/2 cup) | % Daily Value |
|---|---|---|
| Calories | 698.9 kcal | N/A |
| Calories from Fat | 336 g | N/A |
| Total Fat | 37.4 g | 57% |
| Saturated Fat | 11.9 g | 59% |
| Cholesterol | 13.3 mg | 4% |
| Sodium | 876.2 mg | 36% |
| Total Carbohydrate | 79 g | 26% |
| Dietary Fiber | 1.6 g | 6% |
| Sugars | 5.6 g | N/A |
| Protein | 11.2 g | 22% |
Variations & Substitutions
- Gluten-Free: Use a gluten-free all-purpose flour blend. Be sure to include a binder like xanthan gum for the best results.
- Dairy-Free: Substitute the instant milk with a non-dairy powdered milk alternative, such as soy or almond milk powder.
- Fat Alternatives: While vegetable shortening provides the best texture, you can substitute with cold butter or lard. Note that this may slightly alter the flavor and texture. If using butter, ensure it is very cold and cut into small cubes.
- Spice it Up: Add a teaspoon of dried herbs like rosemary or thyme for a savory biscuit mix. You can also add a pinch of red pepper flakes for a little heat.
- Sweet Variation: Add a couple tablespoons of sugar and a teaspoon of vanilla extract to the mix for a sweet biscuit base.
FAQs (Frequently Asked Questions)
Q: Can I make this without a food processor?
A: Yes, you can! Use a pastry blender or your fingertips to cut the shortening into the dry ingredients until the mixture resembles coarse crumbs. Be sure to work quickly to keep the shortening cold.
Q: Why is my biscuit mix turning out tough biscuits?
A: Overmixing is the most common culprit. When using the mix in recipes, mix only until just combined. Also, ensure your shortening is cold, as warm shortening will lead to a tougher texture.
Q: How do I know if my baking powder and baking soda are still good?
A: Test your baking powder by adding a teaspoon to a cup of hot water. It should bubble vigorously. Test your baking soda by mixing a teaspoon with a tablespoon of vinegar. It should also bubble. If they don’t, it’s time to replace them.
Q: Can I use this mix for more than just biscuits?
A: Absolutely! This mix is versatile and can be used for scones, cobblers, coffee cakes, and even pancakes or waffles with slight adjustments to the liquid and sugar content.
Q: How can I make sure my biscuits rise properly?
A: Ensure your oven is preheated to the correct temperature, and don’t overcrowd the baking sheet. A hot oven and adequate space around the biscuits are essential for proper rising.
Final Thoughts
Creating your own biscuit mix is a simple yet rewarding way to bring warmth and comfort to your kitchen. Not only does it offer convenience and versatility, but it also allows you to control the ingredients and customize the flavors to your liking. So, gather your ingredients, dust off that food processor (or pastry blender!), and embark on a baking adventure. Whether you’re whipping up a batch of fluffy biscuits for breakfast or a decadent cobbler for dessert, this homemade biscuit mix is sure to become a staple in your culinary repertoire. Don’t be afraid to experiment and make it your own, and most importantly, share the delicious results with those you love. Enjoy!