
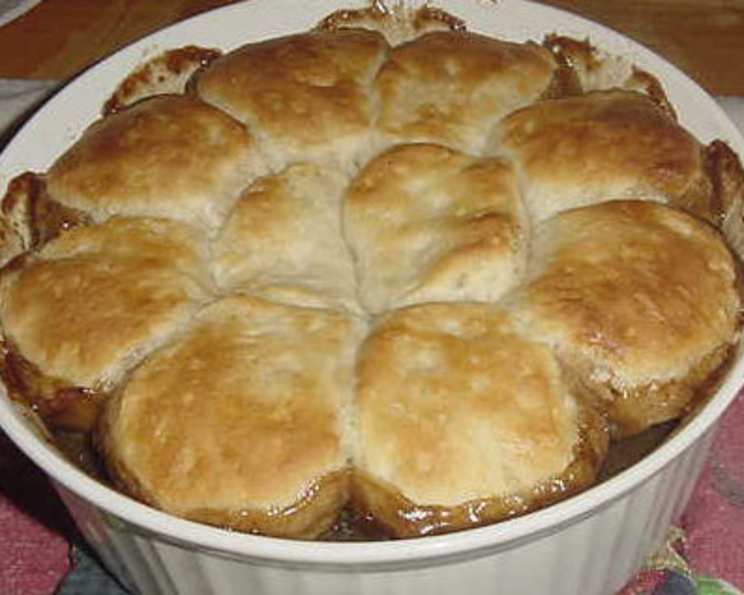
Biscuit-Topped Steak Pie: A Culinary Hug
The aroma alone takes me back. It’s a chilly autumn evening, the kind where the wind howls a mournful tune outside. My grandmother, a woman whose love language was undeniably food, would be bustling in her kitchen, a symphony of clanking pots and comforting smells filling the air. The star of her show, without fail, was steak pie, but not just any steak pie – a hearty, soul-warming version crowned with golden, buttery biscuits. Every bite was a taste of home, a reminder of her unwavering love and the simple joy of sharing a meal with family. Now, I carry on that tradition, adapting and tweaking as I go, but always keeping the essence of her warmth at the heart of it.
Recipe Overview
- Prep Time: 20 minutes
- Cook Time: 50 minutes
- Total Time: 1 hour 10 minutes
- Servings: 4-6
- Yield: 1 pie
- Dietary Type: Comfort Food
Ingredients
- 1 ½ lbs top round steaks, cooked and cut into 1 inch cubes (London broil, or use any kind of leftover beef you have on hand)
- 1 (9 ounce) bag frozen baby carrots
- 1 (9 ounce) bag frozen peas and pearl onions
- 1 large baking potato, cooked and cut into 1/2 inch pieces
- 1 (18 ounce) jar beef gravy (or use home-made or mixes)
- ½ teaspoon thyme
- ½ teaspoon black pepper
- 1 (10 ounce) can refrigerated buttermilk biscuits
Equipment Needed
- 2 quart casserole dish
- Oven
Instructions
- Begin by preheating your oven to 375°F (190°C). While the oven is heating, prepare your casserole dish. Generously spray or grease a 2 quart casserole dish. This ensures that the pie doesn’t stick and makes serving a breeze.
- Now it’s time to combine the filling ingredients. In the prepared casserole dish, combine the cooked beef cubes, frozen baby carrots, frozen peas and pearl onions, and cooked potato pieces. Make sure everything is evenly distributed for a balanced flavor in every bite.
- Next, add the flavor base. Pour the beef gravy over the vegetables and beef. Season generously with thyme and black pepper. Stir everything together thoroughly, ensuring that the gravy coats all the ingredients evenly. This step is crucial for infusing the entire pie with rich, savory flavors. If you are using homemade gravy, make sure it is not too thick. You want it to nicely coat the ingredients, not glue them together.
- Bake uncovered for 40 minutes. Place the casserole dish in the preheated oven and bake uncovered for 40 minutes. This allows the flavors to meld together beautifully and the vegetables to soften. Monitor the pie during baking to ensure the gravy doesn’t dry out too much; if it does, you can add a splash of beef broth or water.
- After 40 minutes, remove the casserole dish from the oven.
- Now it’s time to add the crowning glory – the biscuits. Increase the oven temperature to 400°F (200°C). Open the can of refrigerated buttermilk biscuits. Arrange the biscuits evenly over the top of the casserole, slightly overlapping them if necessary to cover the entire surface.
- Bake for 8-10 minutes more, or until the biscuits are golden brown and cooked through. Keep a close eye on the biscuits during this final stage. The baking time may vary slightly depending on your oven, so check for a beautiful golden brown color and a firm texture. A toothpick inserted into the center of a biscuit should come out clean.
- Remove from oven and let cool slightly before serving.
Expert Tips & Tricks
- Make-Ahead Magic: Assemble the pie filling a day in advance and store it in the refrigerator. This allows the flavors to deepen and intensifies the overall taste. Just add the biscuits before baking.
- Gravy Boost: For an even richer gravy, whisk in a tablespoon of Worcestershire sauce or a splash of red wine when mixing the filling ingredients.
- Biscuit Bliss: Brush the tops of the biscuits with melted butter or an egg wash before baking for an extra golden, glossy finish. For a savory twist, sprinkle with herbs like thyme or rosemary.
- Vegetable Variety: Feel free to experiment with different vegetables based on your preferences or what you have on hand. Mushrooms, parsnips, or celery would be delicious additions.
- Meat Matters: While this recipe calls for top round steak, you can easily adapt it using leftover roast beef, London broil, or even shredded chicken or turkey.
Serving & Storage Suggestions
Serve your Biscuit-Topped Steak Pie hot, straight from the oven, for the ultimate comfort food experience. Garnish with a sprinkle of fresh parsley or chives for a pop of color. This pie pairs beautifully with a simple side salad or steamed green beans.
For leftovers, allow the pie to cool completely before storing it in an airtight container in the refrigerator. It will keep for up to 3 days. To reheat, preheat your oven to 350°F (175°C) and bake for 15-20 minutes, or until heated through. You can also reheat individual portions in the microwave, but the biscuits may lose some of their crispness.
The pie can also be frozen for longer storage. Wrap it tightly in plastic wrap and then in foil, and it will keep for up to 2 months. Thaw completely in the refrigerator before reheating.
Nutritional Information
| Nutrient | Amount per Serving | % Daily Value |
|---|---|---|
| Calories | 690 kcal | 35% |
| Total Fat | 30g | 46% |
| Saturated Fat | 11g | 52% |
| Cholesterol | 108mg | 35% |
| Sodium | 1910mg | 79% |
| Total Carbohydrate | 55g | 18% |
| Dietary Fiber | 6g | 23% |
| Sugars | 9g | 37% |
| Protein | 49g | 98% |
Note: Nutritional information is an estimate and may vary based on specific ingredients used.
Variations & Substitutions
- Gluten-Free Goodness: Use gluten-free buttermilk biscuits or create your own gluten-free biscuit topping using a blend of gluten-free flours.
- Vegetarian Version: Substitute the beef with hearty vegetables like mushrooms, lentils, or cubed butternut squash for a vegetarian-friendly option. Use a vegetable-based gravy.
- Spicy Kick: Add a pinch of red pepper flakes or a dash of hot sauce to the filling for a touch of heat.
- Herb Haven: Experiment with different herbs like rosemary, sage, or oregano to customize the flavor profile.
- Cheese Please: Sprinkle shredded cheddar cheese over the biscuits during the last few minutes of baking for a cheesy, melty topping.
FAQs (Frequently Asked Questions)
Q: Can I use homemade biscuits instead of canned?
A: Absolutely! Homemade biscuits will add an extra layer of deliciousness to your steak pie. Just make sure they are pre-baked or par-baked before placing them on top of the filling.
Q: What if I don’t have top round steak?
A: No problem! This recipe is very forgiving. You can use any kind of leftover cooked beef you have on hand, such as roast beef, London broil, or even shredded steak.
Q: Can I add other vegetables to the pie?
A: Definitely! Feel free to add any vegetables you like. Mushrooms, celery, parsnips, or turnips would all be great additions.
Q: How do I prevent the biscuits from burning?
A: Keep a close eye on the biscuits during the last few minutes of baking. If they start to brown too quickly, you can loosely tent the pie with aluminum foil.
Q: Can I freeze the baked pie?
A: Yes, you can! Let the pie cool completely before wrapping it tightly in plastic wrap and then in foil. Freeze for up to 2 months. Thaw completely in the refrigerator before reheating.
Final Thoughts
This Biscuit-Topped Steak Pie is more than just a recipe; it’s a comforting hug in a dish, a celebration of simple ingredients transformed into something truly special. I encourage you to try this recipe and make it your own, adapting it to your tastes and preferences. Don’t be afraid to experiment with different vegetables, herbs, or meats. The most important ingredient is love, so pour your heart into it, and I promise you’ll create a dish that will warm both your body and soul. Share your creations and feedback – I’d love to hear about your personal touches and culinary adventures! Perhaps pair it with a robust red wine for an even more delightful experience. Happy cooking!